
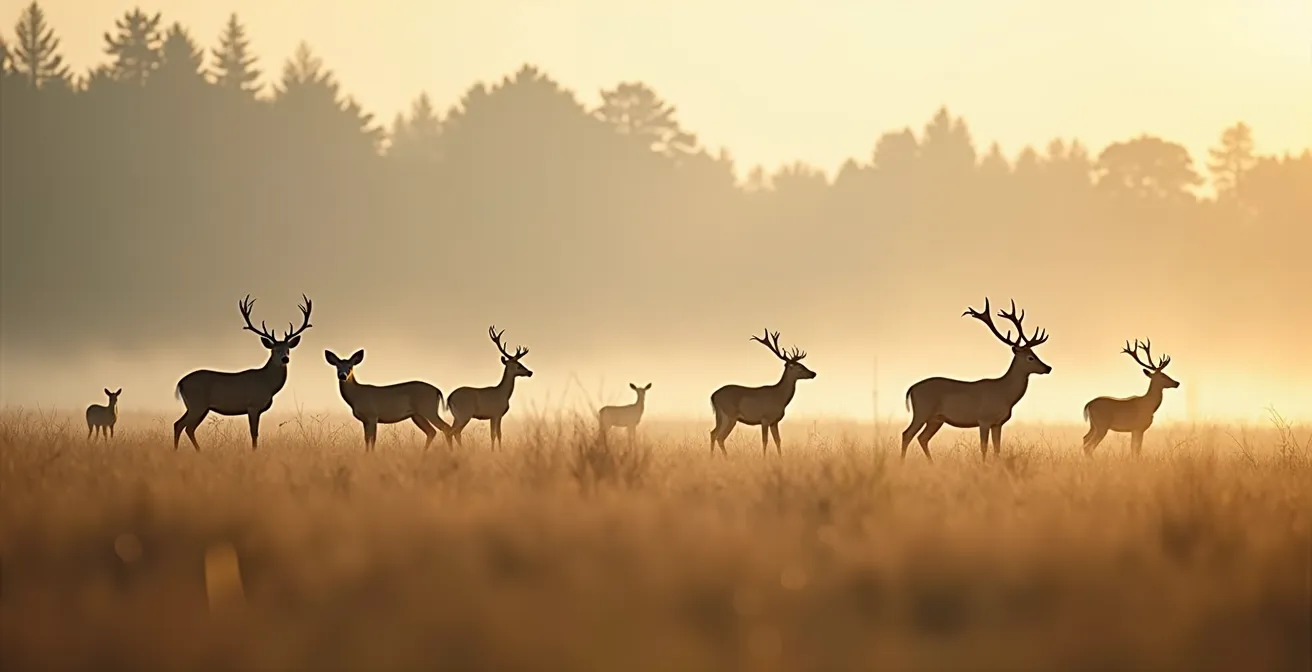
The endless 8×42 vs. 10×42 debate misses the point: superior field performance comes from mastering the ‘why’ behind your optics, not just the magnification number.
- Optical quality (like ED glass) provides better ‘information fidelity,’ reducing mental fatigue and leading to better decisions.
- Physical technique and understanding environmental factors are more critical for stability and clarity than the magnification number alone.
Recommendation: Choose your magnification based on your most common hunting environment, but invest your primary focus on mastering the principles of optical quality, stability, and environmental adaptation to truly gain an edge.
For any serious hunter, the question of 8×42 versus 10×42 binoculars is a rite of passage. The conventional wisdom is simple: 8x offers a wider field of view and a steadier image, while 10x provides more reach for identifying game at a distance. This debate, while valid, often overshadows a much more critical truth. Obsessing over this single specification is like arguing whether a scalpel is better than a razor blade without understanding the principles of surgery. The world’s best optics are useless without the expertise to interpret the information they provide and the discipline to use them effectively.
This guide moves beyond the surface-level discussion. We will not just rehash the pros and cons. Instead, we will explore the underlying principles that separate proficient hunters from true masters of the craft. We will delve into the science of light transmission, the biomechanics of a stable view, and the ecological intelligence required to turn a visual advantage into a successful harvest. The real key to optical dominance isn’t found in a number on the side of your binoculars, but in a deep understanding of how to maximize their potential in any scenario.
By focusing on the ‘why’ behind the technology and techniques, you will learn to make decisions based on a holistic understanding of your gear, your body, and your environment. You will see that concepts like color fidelity, fog proofing, and even selective harvest are all interconnected pieces of a single puzzle. The goal is to transform your binoculars from a simple viewing tool into a decisive strategic asset that minimizes your cognitive load and maximizes your effectiveness from the first light of dawn to the final moments of dusk.
This article is structured to build your expertise from the ground up. We will cover the foundational elements of optical quality, advanced field techniques for stability and maintenance, and finally, how to apply this knowledge to make smarter, more ethical decisions in the field. Let’s explore the components of true optical mastery.
Summary: Beyond 8×42 vs 10×42: An Expert’s Guide to Dominating the Field with Advanced Optics and Techniques
- Why ED Glass Is Worth the Extra Cost for Color Fidelity?
- How to Hold 10x Binoculars Steady Without a Tripod?
- Nitrogen vs Argon Purging: Which Prevents Internal Fogging Better?
- The Cleaning Mistake That Scratches Lens Coatings Permanently
- When to Use a Spotting Scope Instead of Binoculars for Game Scouting?
- Why Pheasants Choose Cattail Sloughs in Late Season Windy Days?
- How Selective Harvest of Older Males Improve Herd Genetics?
- How to Improve Target Acquisition Speed by 0.5 Seconds for Moving Game?
Why ED Glass Is Worth the Extra Cost for Color Fidelity?
When evaluating optics, hunters often focus on brightness. However, a far more critical factor for making accurate judgments in the field is color fidelity. Standard glass lenses act like a prism, separating light into its component colors. This causes a phenomenon called chromatic aberration, or color fringing—that distracting purple or green halo you see around high-contrast objects, like antlers against a bright sky. This isn’t just an aesthetic issue; it’s a loss of information.
This is where Extra-Low Dispersion (ED) glass becomes a game-changer. ED glass is a specialized optical glass engineered to minimize chromatic aberration. By precisely controlling how different wavelengths of light bend, ED glass reduces chromatic aberration by effectively concentrating light wavelengths onto a single focal point. The result is a sharper, cleaner image with true-to-life colors. For a hunter, this improved information fidelity translates into tangible advantages that go far beyond a “prettier” picture.
The practical benefits are most apparent at dawn and dusk, when light is poor and contrast is low. With ED glass, you can more easily distinguish a brown deer from a brown thicket, identify the subtle shades that indicate an animal’s health, and count antler tines with confidence. This clarity reduces the cognitive load on your brain; you spend less mental energy deciphering a blurry, color-fringed image and more time making a confident assessment. Over long glassing sessions, this reduction in eye strain and mental fatigue is a significant advantage, allowing you to stay sharp and focused when it matters most.
Ultimately, investing in ED glass isn’t a luxury; it’s an investment in better data. It provides a clearer, more accurate picture of your environment, enabling faster identification, more accurate trophy assessment, and a significant reduction in the eye strain that can dull a hunter’s edge during a long day in the field.
How to Hold 10x Binoculars Steady Without a Tripod?
The primary argument against 10x binoculars is the notorious hand shake that can render the extra magnification useless. While a tripod is the ultimate solution for stability, it’s often impractical for mobile hunting. The secret of seasoned hunters is not brute strength, but a biomechanical technique that turns your own body into a stable viewing platform. This “Tripod-of-Life” method relies on bone-on-bone support to create a rigid structure that dampens the micro-tremors of your muscles.
The most effective variation is the seated brace. Find a stable seat on the ground, a rock, or a log. Bring your knees up towards your chest. Now, instead of holding the binoculars with your arms floating in the air, you will create a solid triangular brace. Lock your elbows firmly against the insides or tops of your knees. This transfers the weight and movement from your easily-fatigued arm muscles to the solid structure of your skeleton. Tuck your upper arms against your ribs for an additional point of contact, further solidifying the system.

As you can see, this technique creates a stable, bone-supported system. For even more stability, you can use the “hat brim trick”: press the brim of your cap down onto the top of your binoculars while your fingers maintain their grip. This adds a fifth point of contact and downward pressure. Finally, control your breathing. Use the box breathing technique: inhale for four counts, hold for four, exhale for four, and pause for four. This slows your heart rate and minimizes the body shake that ruins a clear view, allowing you to effectively use 10x or even 12x magnification without a mechanical support.
By transforming your body into a stable platform, you negate the biggest drawback of higher-powered binoculars. This isn’t just about reducing shake; it’s about creating a sustainable glassing system that allows you to leverage the power of 10x magnification for extended periods, spotting game that would remain invisible to a less stable observer.
Nitrogen vs Argon Purging: Which Prevents Internal Fogging Better?
Every quality pair of hunting binoculars is advertised as “fog-proof,” a feature achieved by replacing the internal air with a dry, inert gas. For years, nitrogen has been the industry standard. Recently, however, premium optics have begun using argon. While both gases are effective, understanding the subtle differences between them allows you to choose the right optic for your specific hunting environment and budget.
The purpose of gas purging is to eliminate internal moisture that can condense on the lenses during rapid temperature changes, rendering your optics useless. Both nitrogen and argon are completely dry and chemically inert, meaning they won’t react with the internal components of the binoculars over time. The primary difference between them comes down to molecule size and thermal stability. Argon molecules are significantly larger than nitrogen molecules. This gives argon a superior resistance to diffusion; it is less likely to leak out through the optic’s seals over the long term, ensuring fog-proof performance for a longer lifespan.
This comparison becomes most relevant in extreme conditions. As a field case study in the Rocky Mountains showed, hunters moving from a heated vehicle at 70°F to sub-zero outdoor temperatures found that argon-purged binoculars maintained perfect fog-free performance. In contrast, some nitrogen-purged models occasionally showed temporary fogging at the very edges of the lens during the same drastic transition. For hunters operating in moderate climates without such extreme temperature swings, nitrogen provides nearly identical day-to-day performance at a more accessible price point.
The following table breaks down the key differences to help you make an informed decision based on your typical hunting conditions and budget.
| Feature | Nitrogen Purging | Argon Purging |
|---|---|---|
| Cost Impact | Standard pricing | 15-25% premium |
| Molecule Size | Smaller molecules | 40% larger molecules |
| Diffusion Resistance | Good for 10-15 years | Superior for 20+ years |
| Chemical Inertness | Good | Excellent |
| Best Use Case | 90% of hunting situations | Extreme temperature gradients |
| Temperature Stability | -20°F to 120°F | -40°F to 140°F |
Ultimately, the choice depends on your operational environment. If you frequently hunt in areas with extreme temperature gradients, the superior thermal stability and long-term reliability of argon purging may be a worthwhile investment. For the vast majority of hunters, however, a well-sealed, nitrogen-purged optic offers more than enough protection against internal fogging.
The Cleaning Mistake That Scratches Lens Coatings Permanently
A high-quality pair of binoculars is a significant investment, and its performance hinges on the delicate, multi-layered coatings on its lenses. These coatings, which are mere nanometers thick, are responsible for reducing glare, enhancing light transmission, and protecting the glass. The single most destructive mistake a hunter can make is cleaning a lens improperly, which can permanently scratch these coatings and degrade optical performance forever.
The cardinal sin of lens cleaning is wiping a dirty lens. Even a seemingly clean lens is covered in microscopic particles of dust, grit, and sand. Wiping this with a cloth—even a microfiber one—is like rubbing sandpaper across the delicate coatings. The key is to never wipe what you can blow away. The proper method is a two-phase process: “Float and Lift.” First, you must “float” all loose debris off the lens surface without making physical contact. Second, you “lift” the remaining oils and smudges with minimal pressure.

This process is not complicated, but it requires discipline. Your T-shirt is not a lens cloth. Breathing on the lens to create condensation introduces acids and contaminants. The goal is a gentle, methodical removal of contaminants, not a quick, aggressive wipe. Adhering to this protocol will ensure your expensive optics deliver peak performance for decades.
Your Action Plan: The Float and Lift Lens Cleaning Protocol
- Float Phase: Use a lens blower or a can of compressed air to remove all loose particles like dust and grit. Never touch the lens surface during this critical first step.
- Inspection: Hold the lens up to a light source at an angle. Visually confirm that all visible solid debris has been removed before proceeding to any contact cleaning.
- Lift Phase Application: Apply a small amount of a quality lens cleaning solution to a clean, dedicated microfiber cloth. Never, ever spray the solution directly onto the lens, as it can seep past the seals into the housing.
- Gentle Lift: Using the damp portion of the cloth, start from the center of the lens and use light, circular motions spiraling outwards. The goal is to lift oils and smudges, not scrub them.
- Final Verification: Use a dry part of the microfiber cloth or a separate clean one to gently remove any remaining streaks. Use an LED light at an angle to verify the lens is perfectly clean with no streaks or remaining particles.
By treating your lens coatings with the respect they deserve, you preserve the clarity, brightness, and contrast you paid for. This disciplined approach is a hallmark of a true optics professional and ensures your gear will never fail you due to preventable damage.
When to Use a Spotting Scope Instead of Binoculars for Game Scouting?
While 10x or even 12x binoculars offer significant reach, they have an effective limit for definitive game assessment. A common question for hunters, especially in open country, is when to make the jump to a spotting scope. The answer isn’t just about distance; it’s about making a strategic decision based on energy conservation and ethical certainty. The line between effective binocular use and the necessity of a spotting scope can be defined by a clear decision threshold.
Extensive field testing by experienced hunters shows that for simply detecting the presence of a game animal, 10×42 binoculars are often sufficient for targets well under 800 yards. However, for a definitive assessment—is that a legal buck? a true trophy-class animal? or a promising younger male that should be left to grow?—the decision threshold is much closer. Beyond 800 yards, a spotting scope becomes essential for gathering the high-fidelity information needed to make a “go or no-go” decision on a stalk.
This isn’t just about getting a better look; it’s a critical energy conservation strategy. A real-world case study of Western hunters illustrates this point perfectly. Guides reported that their clients saved an average of 2-3 hours of strenuous hiking and significant energy by using spotting scopes to verify trophy quality at distances of 1000 yards or more before committing to a stalk. One Colorado guide even documented that hunters employing the “binos for finding, spotter for analyzing” system had a 40% higher success rate on mature bucks. They avoided wasting time and energy on unsuccessful stalks of younger animals that only appeared promising through binoculars.
Think of your optics as a two-part system. Use your lightweight, wide-field-of-view binoculars for sweeping terrain and initial detection. Once a potential target is located at long range, deploy your tripod-mounted spotting scope to analyze and confirm. This methodical approach saves precious energy, prevents spooking game on fruitless stalks, and ensures you only commit when you’re certain the animal meets your management or trophy objectives.
Why Pheasants Choose Cattail Sloughs in Late Season Windy Days?
Mastering optics is not just about identifying game; it’s about understanding the subtle nuances of animal behavior from a distance. A classic example of this ecological intelligence is observing why pheasants vanish from open fields on windy, late-season days and retreat into the apparent cover of cattail sloughs. To the naked eye, it’s just a hiding spot. Through quality optics, a hunter can analyze and understand the sophisticated, multi-layered security system that makes these sloughs a perfect refuge.
The primary driver is thermal regulation. Wildlife habitat research demonstrates that the dense, packed structure of cattails creates a microclimate that can be 10-20°F warmer than the surrounding, wind-blasted prairie. For a bird trying to conserve critical energy in the cold, this thermal advantage is a powerful draw. But the benefits go far beyond simple warmth. A cattail slough offers a four-layer security system against threats.
First is acoustic masking; the constant rustling of the cattails in the wind masks the sound of an approaching hunter or predator. Second is aerial concealment; the dense overhead canopy shields the birds from hawks and other raptors. Third is food availability; the moist environment of the slough holds wind-blown seeds and active invertebrates long after the open fields have frozen over. Finally, the slough provides a unique escape architecture. The linear corridors allow pheasants to run for a considerable distance under cover, forcing a hunter or predator to commit deep into the thicket before the bird is forced to flush into the open.
By using your binoculars to observe these patterns from a distance, you move from simply searching for a target to strategically predicting its location. You learn to read the landscape and the weather, and understand that on a cold, windy day, the highest probability location for a wise old rooster is not in the open, but deep within the thermal and structural sanctuary of a cattail slough.
How Selective Harvest of Older Males Improve Herd Genetics?
The ultimate application of high-performance optics is not just in harvesting an animal, but in making a positive contribution to the health of the entire herd. This is the core principle of Quality Deer Management (QDM), where the goal is to create a balanced age structure and a healthier, more robust population. This requires the ability to accurately judge an animal’s age and quality in the field—a task for which high-fidelity optics are non-negotiable.
The common misconception is that “letting them grow” is simply about producing bigger antlers. The biological reality is more profound. When hunting pressure consistently removes the most promising 1.5 and 2.5-year-old bucks, it artificially skews the breeding population towards less dominant, often genetically inferior, young males. By selectively harvesting mature bucks (typically 4.5 years or older) and an appropriate number of does, hunters actively improve the herd’s genetic potential. Mature bucks have already had several seasons to pass on their superior survival and growth genetics, and their removal from the herd creates space and resources for the next generation of top-tier bucks to develop.
The success of this strategy is not theoretical. The Pennsylvania Game Commission’s management plan with antler restrictions provides a powerful case study. Before the program, the yearling buck harvest was nearly 90%. After implementation, it dropped to 48%, and by 2021, only 38% of the 145,320 antlered bucks harvested were yearlings. This demonstrates a monumental shift towards a more balanced age structure, giving more bucks the chance to reach maturity. This management is a delicate balance, as population ecology research confirms that maintaining a population at roughly 50% of its carrying capacity allows for the maximum sustainable yield, ensuring the herd is neither overpopulated nor depleted.
This level of management is impossible with subpar optics. It requires the color fidelity of ED glass to judge body size and condition, and the resolution to accurately assess antler mass and structure from a distance. It transforms hunting from a simple act of taking to a profound act of stewardship.
Key Takeaways
- True optical mastery is less about magnification numbers (8x vs. 10x) and more about understanding the principles of information fidelity, stability, and environmental context.
- Investing in high-quality glass (like ED glass) reduces eye strain and mental fatigue (cognitive load), leading to better and faster decisions in the field.
- Your body, when used with proper technique (bone-support, breathing), is the most critical piece of stabilization equipment you own, often negating the need for a tripod.
How to Improve Target Acquisition Speed by 0.5 Seconds for Moving Game?
All the scouting and glassing in the world culminates in one critical moment: acquiring the target and making a clean, ethical shot. For a moving animal, this sequence must be executed in fractions of a second. Improving your target acquisition speed is not about rushing; it’s about efficiency of motion and eliminating wasted effort. The key is the “Eyes First, Gun Second” protocol, a method that trains your body to work in seamless coordination with your eyes and your optic.
The most common mistake hunters make is leading with the rifle. They bring the scope up to their eye and then begin searching for the target through the narrow field of view. This “scope searching” is slow and inefficient. The correct protocol reverses this sequence. First, lock both of your eyes on the target—specifically on the vital zone where you intend to place the shot. With your eyes fixed, you then bring the rifle up in a smooth, practiced motion. Because your eyes are already locked on target, your body’s natural hand-eye coordination will bring the reticle almost exactly where it needs to be. You’re not searching; you’re simply refining the aim point.
This requires a consistent mount, where the rifle butt lands in the exact same shoulder pocket every single time. It’s a motion that must be practiced until it is subconscious. Combined with a “soft focus” technique, where you maintain peripheral awareness of the animal’s movement while bringing the rifle up, this system dramatically cuts down the time from decision to shot. As NRA instructors point out, even physiological stress can be managed with technique. In a high-stakes moment, a specific breathing technique can be the difference-maker.
A hunter has just run up a small hill to shoot the largest buck she has ever seen. She stops breathing during respiratory pause, but crosshairs are jumping due to heart pounding. She doesn’t have time to let breathing slow down. What does she do? She takes a full breath and holds it. This will steady the position for a quick shot. This technique only works for a very short period.
– NRA Shooting Instructors, NRA Family – Basics of Shooting
By pre-programming this shot sequence through repetition, you build the muscle memory needed to act decisively and without conscious thought. This half-second saved is not just about speed; it’s about giving yourself the time to confirm a clear shot path and execute an ethical harvest on a moving animal.