
The biggest myth in long-distance hiking is that maximum cushioning equals maximum joint protection; for serious treks, the opposite is often true.
- Extremely soft, thick midsoles can increase ankle instability and create shearing forces that lead to blisters, especially under the load of a heavy pack.
- True joint health depends on a sophisticated balance of shock absorption, torsional rigidity for stability, and proprioceptive feedback from the ground.
Recommendation: Focus on matching boot materials (like durable Polyurethane) and structural features (like a proper shank) to your specific trek’s demands, rather than simply choosing the ‘softest’ option off the shelf.
For any long-distance walker, the sharp, grinding pain in the knees or hips after a long day on the trail is an all-too-familiar enemy. The conventional wisdom, repeated in countless forums and gear shops, points to a simple solution: more cushioning. The logic seems unassailable—a thicker, softer barrier between your foot and the hard ground should surely absorb more impact. This has led to a market flooded with “maximalist” boots that promise a cloud-like experience. Trekkers often focus on this single metric, believing it’s the silver bullet for preventing joint fatigue and pain.
But what if this relentless pursuit of softness is a red herring? From a sports physiotherapy perspective, the interaction between your foot, your footwear, and the trail is a complex biomechanical system. Focusing solely on cushioning is like trying to build a high-performance engine by only looking at the size of the fuel tank. It ignores critical factors like stability, energy return, and the sensory feedback your brain needs to maintain balance on uneven terrain. This oversimplification can lead to choices that, counter-intuitively, increase the risk of other injuries, from ankle rolls to severe blisters.
The true key to preventing joint pain on 20km+ treks lies not in erasing the ground beneath your feet, but in understanding the technical trade-offs of footwear design. It requires a deeper look into material science and biomechanics. Instead of asking “how soft is it?”, the more important question is “how does it manage forces over time and terrain?”. This article will deconstruct the cushioning myth by exploring the science behind midsole materials, the hidden dangers of an unstable platform, and the structural elements that provide genuine, lasting protection for your joints.
This guide will navigate the crucial technical details that separate marketing hype from genuine ergonomic performance. By exploring the specific properties of different foams, the importance of a proper fit, and the structural design of a boot, you will gain the expertise needed to select footwear that truly supports your long-distance ambitions.
Summary: The Physiotherapist’s Deep Dive into Hiking Boot Cushioning
- Why EVA Foam Compresses Faster Than PU in Hiking Midsoles?
- How to Match Insole Arch Height to Your Foot Profile Correctly?
- Max Cushion vs Ground Feel: Which Is Safer for Heavy Backpacking?
- The Hidden Link Between Soft Cushioning and Increased Blister Risks
- How Allowing Boots to Rest for 24 Hours Restores Cushioning Rebound?
- Why Lightweight Boots May Increase Ankle Fatigue on Multi-Day Treks?
- How to Fit Thermal Insoles Without Cutting off Circulation?
- How to Maintain Ankle Stability on Uneven Ground Without Restricting Movement?
Why EVA Foam Compresses Faster Than PU in Hiking Midsoles?
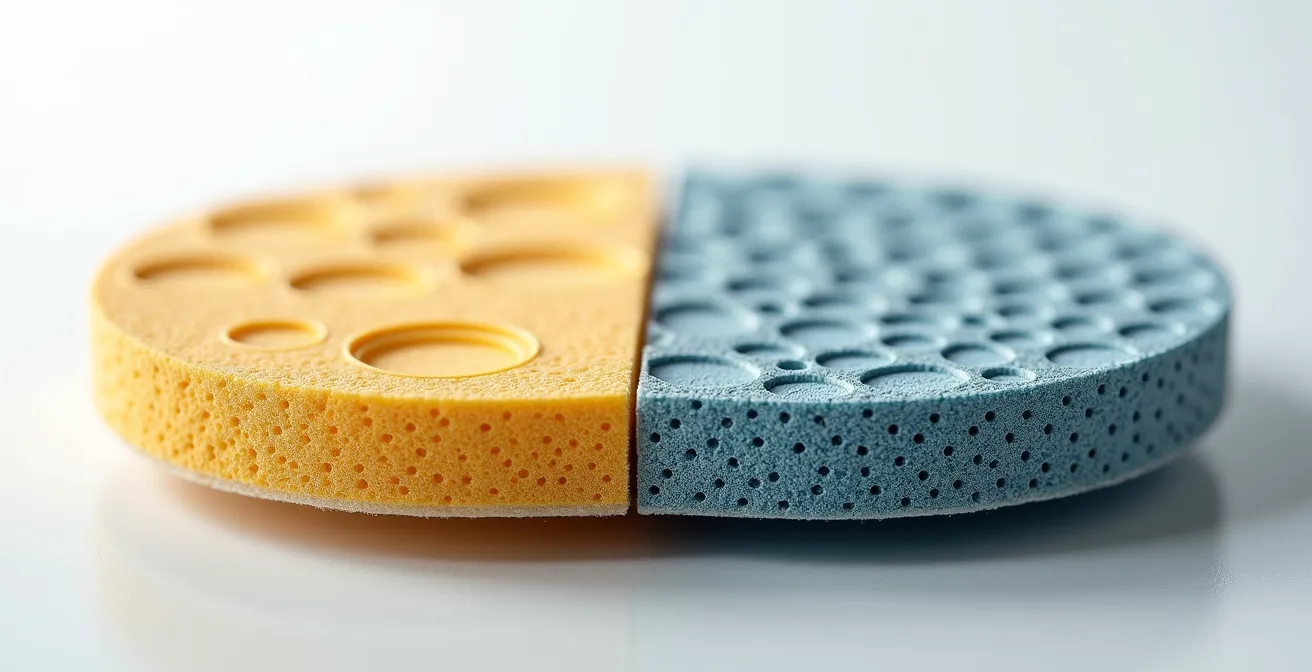
The heart of any hiking boot’s cushioning system is the midsole, and the two dominant materials used are Ethylene-vinyl acetate (EVA) and Polyurethane (PU). While both provide shock absorption, their long-term performance is vastly different, directly impacting joint protection over hundreds of kilometers. EVA is prized for its light weight and initial softness, making it a popular choice for trail runners and light hikers. However, its structure is its primary weakness. EVA is a closed-cell foam, meaning it’s composed of tiny, gas-filled bubbles. With each step, these bubbles are compressed. Over time, they don’t fully rebound, leading to a permanent compression known as “packing out.”
This material degradation is not trivial. Footwear studies show that EVA midsoles can lose 50% of their cushioning within just 300-500 kilometers. In contrast, PU, a denser and more resilient polymer, loses only 10-15% over the same distance. This means a boot that felt protective at the start of a season can offer significantly less shock absorption by the end, transmitting more force directly to your ankles, knees, and hips. The visual below contrasts the microscopic structure that underpins this difference in durability.
Furthermore, EVA’s performance is temperature-sensitive. In colder conditions, typically below 5°C (40°F), it becomes significantly harder and less effective at absorbing shock. For all-season trekkers or those hiking in alpine environments, this can turn a “cushioned” boot into a rigid, unforgiving platform. PU maintains its flexibility and shock-absorbing properties across a much wider temperature range, offering more consistent and reliable joint protection. Choosing PU is an investment in long-term performance and predictable support, a critical factor for anyone serious about multi-day trekking.
How to Match Insole Arch Height to Your Foot Profile Correctly?
While the midsole provides general shock absorption, the insole is what customizes the boot’s support to your unique foot anatomy. The most critical aspect of this is matching the insole’s arch height to your foot’s arch profile. An improperly supported arch can lead to overpronation (foot rolling inward) or supination (foot rolling outward), which disrupts the kinetic chain and places unnatural stress on the knees, hips, and lower back. Finding the correct match is a cornerstone of biomechanical efficiency and joint health on the trail.
The first step is to determine your arch type: neutral, low (flat feet), or high. A simple method is the “wet test”: wet the bottom of your foot and step onto a piece of cardboard or dark paper. A full, wide footprint indicates a low arch. A footprint showing only the heel and the ball of the foot with a thin line connecting them suggests a high arch. A print that falls in between indicates a neutral arch. Once you know your profile, you can select an insole that provides the appropriate level of support. Low arches need a firm, guiding structure to prevent collapse, while high arches require support to distribute pressure evenly and prevent strain.
The impact of this personalization is significant. When the arch is properly supported, it acts as a natural shock absorber and helps maintain proper leg alignment throughout your stride. This reduces rotational forces on the knee and abnormal stress on the hip joint. In fact, clinical studies demonstrate that proper arch support reduces knee and hip pain in 65% of hikers, a testament to its importance. Ignoring this crucial interface between your foot and the boot negates many of the benefits of a well-cushioned midsole. It’s an essential, non-negotiable step for any long-distance walker aiming to minimize joint impact.
Max Cushion vs Ground Feel: Which Is Safer for Heavy Backpacking?
The trend towards “maximalist” cushioning, with stack heights exceeding 30-40mm, presents a significant paradox for backpackers carrying heavy loads. While the initial feeling of softness is appealing, it comes at a dangerous cost to stability. A thick, soft midsole acts as an unstable platform, increasing the risk of ankle rolls, especially on technical, uneven terrain. The problem is twofold: it reduces proprioception and creates a longer lever arm. Proprioception is your body’s ability to sense its position in space, and a thick foam layer dulls the sensory feedback from your feet, delaying the micro-adjustments your ankle needs to make to maintain balance.
Secondly, a high stack height creates a longer lever. Imagine walking on stilts; a small misstep at the base results in a large, uncontrollable movement at the ankle. A boot with a 40mm stack height multiplies the torque on your ankle during a stumble compared to a boot with a more traditional 20mm stack height. When carrying a pack of 20kg or more, your center of gravity is already higher and less stable. Combining that with an unstable footwear platform is a recipe for injury. For this reason, footwear with better “ground feel”—a firmer midsole and lower stack height—is often a safer choice for heavy backpacking.
This does not mean sacrificing shock absorption. As noted by a leading gear testing organization, the key is the quality of the foam, not just the quantity. As Chris Maxcer, an experienced tester at Outdoor Gear Lab, states in his report:
The real choice isn’t about comfort. It’s about a technical trade-off between shock absorption and stability. For heavy loads, a denser, more resilient foam like PU provides excellent shock absorption without sacrificing stability or proprioception.
– Chris Maxcer, Outdoor Gear Lab Tester
The following table, based on data from extensive field testing by OutdoorGearLab, clearly illustrates the biomechanical trade-offs when carrying a heavy load.
| Factor | Max Cushion | Ground Feel |
|---|---|---|
| Stack Height Impact | High (30-40mm) – creates longer lever arm, multiplying ankle torque during missteps | Low (15-25mm) – minimal lever arm, reduced injury risk |
| Proprioception | Significantly reduced – dulled sensory feedback delays balance adjustments | Enhanced – immediate ground feedback enables micro-adjustments |
| Stability with 20kg+ pack | Poor – soft cushioning creates instability platform | Excellent – firm base provides stable foundation |
| Joint Protection | High initial shock absorption but unstable | Moderate absorption with better control |
| Ankle Roll Risk | Increased by 30-40% on technical terrain | Baseline risk with proper technique |
The Hidden Link Between Soft Cushioning and Increased Blister Risks
One of the most counter-intuitive consequences of maximalist cushioning is an increased risk of blisters, even in perfectly fitted boots. The cause lies in the biomechanics of walking on a very soft surface. Extremely pliable foam allows for tiny, repetitive movements of the foot inside the boot with every single step. While imperceptible at first, this internal sliding generates significant skin-shearing forces. Instead of the boot moving as one with the foot, the skin is pulled and stretched in multiple directions, leading to the formation of deep, painful blisters that are notoriously difficult to treat on the trail.
This phenomenon was highlighted in a specific analysis of boots known for their extreme cushioning, which is summarized in the case study below. The micro-movements create friction, but the problem is compounded by another factor: heat and moisture. Softer foams, particularly memory foams, tend to be less breathable. They trap heat and create a hot, humid micro-climate inside the boot. This environment softens the skin, making it far more vulnerable to damage from the shearing forces. It’s a vicious cycle where the very feature designed for comfort ends up creating the perfect conditions for skin failure.
Case Study: Shear Force Mechanism in Soft Cushioned Boots
Testing of the Hoka Anacapa, a boot with maximal cushioning, revealed that the extremely soft foam allows micro-movements of the foot inside the boot with every step. These repetitive internal sliding movements generate skin-shearing forces that can cause deep blisters even in properly fitted boots. Additionally, the analysis noted that softer memory foams create a hot, humid micro-climate by trapping heat and reducing breathability, which in turn softens the skin and makes it more susceptible to damage from friction and shear.
To counteract this, hikers using soft-cushioned boots must be strategic. The goal is to minimize internal foot movement and reduce the coefficient of friction between the sock and the skin. This can involve using a two-sock system (a thin, moisture-wicking liner sock under a thicker outer sock) to displace the friction to the layer between the socks, rather than between the sock and skin. Applying an anti-chafe balm to hotspots before hiking can also provide a protective barrier. Ultimately, a firmer insole can sometimes be added to a soft boot to reduce internal foot movement and stabilize the platform.

How Allowing Boots to Rest for 24 Hours Restores Cushioning Rebound?
A hiking boot’s midsole is not a static component; it is a dynamic system that fatigues and recovers. After a long day on the trail, the foam’s ability to absorb shock is significantly diminished. This is because the polymer structure doesn’t have enough time to decompress and return to its original shape between steps. The cumulative effect of thousands of impacts leads to a temporary but significant loss of performance. In fact, material science research confirms that midsoles can lose 40-60% of their rebound capacity after a 20km trek. Continuing to hike on this compressed foam the next day means your joints are absorbing a much higher percentage of the impact forces.
This is where one of the simplest yet most effective trail habits comes into play: rotating your footwear. For multi-day or thru-hikes, carrying a second pair of shoes is often impractical. The solution is to allow your boots a sufficient rest period. A 24-hour rest allows the foam’s polymer chains to slowly decompress and realign, restoring a significant portion of their original shock-absorbing properties. While a full 48 hours is sometimes cited for complete recovery of EVA foam, even a 24-hour break can make a noticeable difference in performance and joint comfort.
This principle is why many seasoned thru-hikers alternate between two pairs of the same shoe model, mailing one ahead to a resupply point. For shorter multi-day trips, the practical takeaway is to plan your hiking days to allow for this recovery. If you arrive at camp in the afternoon, your boots have until the next morning—roughly 16-18 hours—to recover. While not the full 24-48 hours, it’s substantially better than no rest at all. This simple act of giving your gear time to “heal” is a direct investment in protecting your knees and hips on the subsequent day’s journey. It treats the boot not as an inert piece of equipment, but as a dynamic tool that requires maintenance and recovery, just like your own muscles.
Why Lightweight Boots May Increase Ankle Fatigue on Multi-Day Treks?
The obsession with shedding grams has pushed many hikers towards ultra-lightweight boots and trail runners. While reducing the weight on your feet certainly saves energy, this approach can be counterproductive for multi-day treks, especially when carrying a pack. The features often sacrificed to save weight are precisely those that provide crucial support and reduce cumulative fatigue: a stiff shank, robust heel counter, and torsional rigidity. Without this underlying structure, the small stabilizing muscles and tendons in your feet and ankles are forced to work overtime with every step to keep you balanced on uneven ground.
Over the course of a single day, this may not be noticeable. But over several consecutive days, this constant, low-level muscular effort leads to significant stabilizer muscle fatigue. A fatigued muscle is less responsive and provides poor support, dramatically increasing the risk of missteps, stumbles, and ankle sprains as the day wears on. A slightly heavier boot with a proper supportive chassis acts as an external skeleton, doing much of this stabilizing work for you. It bears the load, allowing your muscles to focus on propulsion rather than stabilization, thus conserving their strength for the entire duration of the trek.
The data on injury prevention is clear. Structural support is not just about comfort; it’s a primary safety feature. For instance, a study found that footwear offering dedicated ankle support reduces injury rates by 47% among hikers. While this often refers to cuff height, the more critical element is the boot’s overall structural integrity and resistance to twisting. For multi-day treks with a pack, the small energy-saving benefit of a minimalist, lightweight boot is often outweighed by the increased muscular fatigue and heightened risk of a trip-ending injury. The wiser choice is often a moderately weighted boot that provides a solid, reliable platform for your feet.
How to Fit Thermal Insoles Without Cutting off Circulation?
In cold weather, adding thermal insoles seems like a simple way to prevent cold from seeping up through the soles of your boots. However, most thermal insoles are significantly thicker than standard ones, and adding this extra volume inside a boot can create dangerous pressure points. The most critical area of concern is the instep, the top of your foot. A thick insole pushes your foot upwards, compressing the soft tissues of the instep against the unyielding tongue and laces of the boot. This is precisely where the dorsalis pedis artery and major nerves that supply the toes are located. Compressing them can quickly lead to numbness, tingling, and in severe cases, restricted blood flow, which ironically increases the risk of frostbite.
The solution requires a multi-faceted approach. First, consider modern insulation materials. Traditional felt or foam insoles are often 8-10mm thick, whereas newer insoles using Aerogel offer superior thermal resistance with a minimal thickness of just 3-5mm. This simple material choice can prevent many volume-related issues from the start. Second, you must adjust your lacing technique. “Window lacing” or “box lacing” is a method where you skip an eyelet or two directly over the pressure point on your instep. This creates a small “window” that relieves pressure on the underlying artery and nerves while keeping the rest of the boot secure.
Finally, the fitting process itself is paramount. You should always test-fit thermal insoles at the end of the day when your feet have naturally swelled to their largest size, and you must wear your thickest winter socks during the fitting. The following checklist provides a systematic protocol to ensure your thermal insoles provide warmth without compromising circulation and safety.
Your Action Plan: Dynamic Fitting for Thermal Insoles
- Assess Fit at Peak Volume: Always try on boots with new thermal insoles at the end of the day and while wearing your thickest pair of winter hiking socks to simulate worst-case foot swell.
- Perform a Walk Test: After lacing up, walk around for at least 10 minutes. Pay close attention to any signs of numbness, tingling, or “hot spots,” especially over the instep and in the toes.
- Master Window Lacing: Identify the eyelets directly over your instep’s highest point. Unlace the boot and re-lace it by running the laces vertically up the sides, skipping the crisscross pattern over that specific area to relieve pressure.
- Verify Toe Box Volume: Stand up and ensure you still have about a centimeter (a thumb’s width) of space between your longest toe and the end of the boot. Your toes should be able to wiggle freely without being compressed.
- Consider Boot Sizing: If you plan to use thick thermal insoles regularly for winter hiking, proactively purchase winter boots that are a half-size larger than your normal size to accommodate the extra volume from the start.
Key Takeaways
- Polyurethane (PU) foam offers vastly superior long-term durability and consistent cushioning performance compared to EVA, which compresses permanently.
- Excessive, soft cushioning (maximalism) can compromise stability and proprioceptive feedback, increasing the risk of ankle rolls and blisters, especially with a heavy pack.
- True stability comes from a boot’s structural integrity—its shank and torsional rigidity—which prevents unnatural twisting, rather than just from high ankle cuffs.
How to Maintain Ankle Stability on Uneven Ground Without Restricting Movement?
The ultimate goal of a great hiking boot is to achieve a difficult balance: providing rock-solid ankle stability on treacherous ground while still allowing the natural range of motion required for an efficient stride. Many hikers mistakenly believe that a high, stiff ankle cuff is the sole provider of stability. While a cuff offers some protection and proprioceptive feedback, the true hero of stability is the boot’s underlying chassis, specifically its torsional rigidity. This is the boot’s resistance to twisting forces along its length. A boot with high torsional rigidity will not easily twist when you place your weight on an angled rock or root, preventing your ankle from being forced into an unnatural, injury-prone position.
This rigidity is primarily provided by the shank, a stiff plate (made of plastic, TPU, or sometimes steel) embedded within the midsole. The length and stiffness of the shank determine the boot’s performance. Full-length shanks provide maximum rigidity and support, ideal for mountaineering or carrying very heavy loads on technical terrain. For most long-distance hiking, a 3/4 or half-length shank provides an excellent compromise. It delivers robust torsional resistance through the midfoot and heel while allowing engineered flex zones in the forefoot. This design prevents side-to-side twisting but allows your foot to bend naturally at the ball during the “toe-off” phase of your stride.
This combination of midfoot rigidity and forefoot flexibility is the key to functional stability. It protects the ankle from the dangerous, unexpected rotational forces that cause sprains, but it doesn’t fight against the natural, forward-plane movement of walking. Biomechanical testing confirms that boots with this engineered design can significantly reduce the likelihood of an ankle roll. The best boots are not simply stiff boxes for your feet; they are sophisticated biomechanical tools designed to channel forces safely, offering protection without creating a restrictive, unnatural gait. When selecting a boot, bending and twisting it in your hands is a simple, effective test of its underlying structure and its ability to provide this critical balance.
To truly protect your joints for the long haul, you must evolve from a consumer seeking “comfort” to an informed technician seeking “performance.” This means analyzing a boot’s material composition, its structural integrity, and how it interacts with your personal biomechanics. Choosing a durable PU midsole, matching an insole to your arch, and selecting a boot with appropriate torsional rigidity are the technical decisions that will pay dividends in pain-free kilometers, long after the showroom appeal of a soft, squishy foam has faded.