Contrary to popular belief, the choice between wax and cream isn’t what determines if your boots leak; it’s how you apply it that dictates performance and breathability.
- True waterproofing depends on using controlled heat for deep wax penetration without damaging the leather’s proteins.
- Over-saturating boots with any product creates an impermeable barrier that traps sweat, sacrificing the critical vapor permeability needed for hiking.
Recommendation: Master the science of application—from heating to curing—to create a hydrophobic barrier that repels water effectively while allowing your feet to breathe.
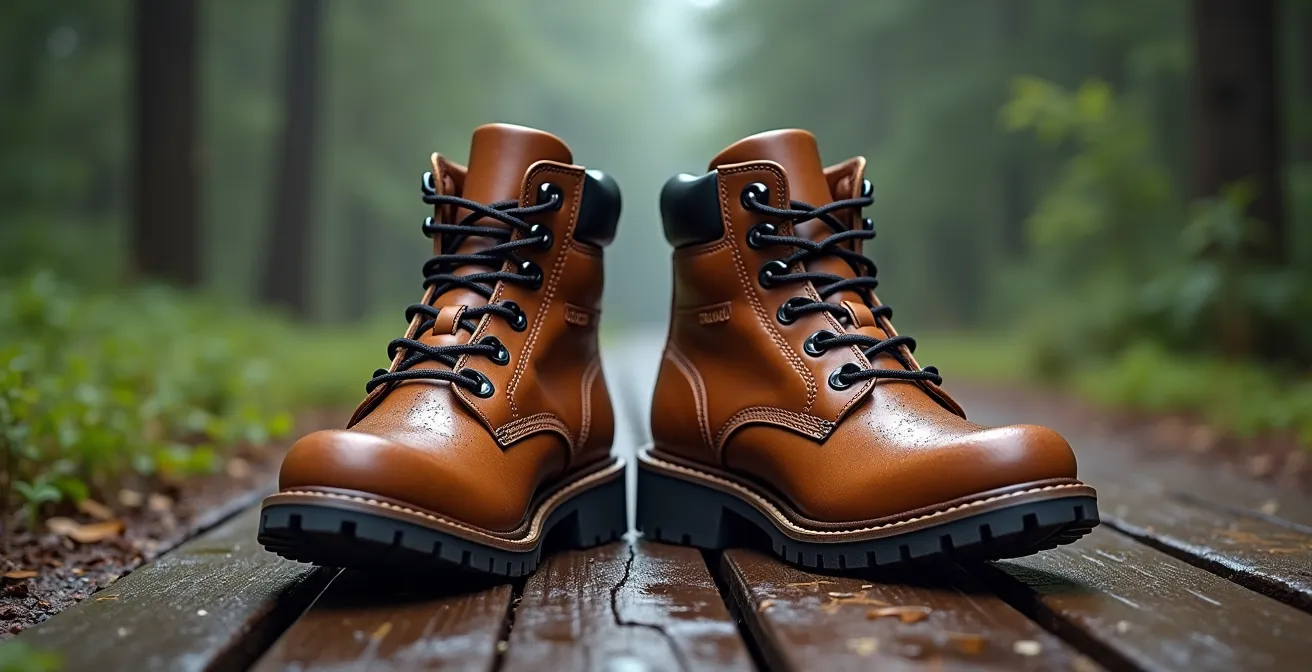
For any hiker, the debate between waterproofing creams and waxes for leather boots is a familiar one. The goal is simple: keep water out. Yet the common outcome is often a frustrating compromise between damp socks from a downpour and sweaty feet from a lack of breathability. We meticulously clean our boots, apply our chosen product, and hope for the best, often blaming the wax or cream when performance falls short. This cycle leads many to believe one product is inherently superior to the other.
But what if this entire debate is focused on the wrong variable? The conventional wisdom pits the conditioning properties of cream against the heavy-duty barrier of wax. While these differences exist, they are secondary to a much more critical factor: the application process itself. The real culprit behind failed waterproofing or unbearably sweaty feet isn’t usually the product in the tin, but the technique—or lack thereof—used to apply it. The temperature of the wax, the saturation level of the leather, and the curing time are not minor details; they are the core principles governing the performance of your gear.
This guide moves beyond the simplistic “cream or wax” question. Instead, we will explore the science of creating a durable, hydrophobic barrier that works *with* your leather, not against it. We will dissect the common mistakes that sabotage breathability and lead to premature leather degradation. By understanding the physics of application and the chemistry of leather care, you will learn to achieve superior water resistance, regardless of your product choice, ensuring your feet stay dry from the outside in and the inside out.
To navigate this technical landscape, this article breaks down the critical stages of effective boot waterproofing and maintenance. The following sections will provide a clear roadmap, from initial application to long-term storage, helping you master each step of the process.
Summary: Cream vs. Wax for Boots: Why Your Application Technique Matters More Than the Product
- How to Heat Wax for Deep Penetration Without Burning the Leather?
- Why Over-Waxing Your Boots Causes Sweaty Feet on the Trail?
- Spray vs Rub-On: Which Renewing Agent Works Best on Mixed Materials?
- The Drying Mistake That Causes Wax to Flake Off Instantly
- How Often Should You Reapply Wax During a Wet Hiking Season?
- The Maintenance Error That Makes Leather Brittle and Prone to Tearing
- Oil vs Cream Conditioner: Which Is Better for Nubuck Leather?
- How Ventilated Boot Bags Prevent Mold Growth Between Seasons?
How to Heat Wax for Deep Penetration Without Burning the Leather?
The idea of heating wax before applying it to leather boots is sound in principle: warming the wax lowers its viscosity, allowing it to penetrate deeper into the leather’s pores rather than just sitting on the surface. However, the execution is where many well-intentioned hikers go wrong. The goal is gentle, even heat—not cooking your boots. Excessive heat can cause irreversible damage through a process called protein denaturation, where the leather’s fibrous structure is permanently altered, leading to stiffness and cracking. A heat gun, for example, can quickly exceed safe temperatures and scorch the leather, compromising its integrity forever.
The key is control. The ideal temperature range allows the wax to melt and flow without posing a risk to the leather or the boot’s adhesives. A hairdryer on a low setting is often the safest and most effective tool for this job. It provides enough heat to facilitate absorption while giving you precise control over the application area. This method ensures the wax is drawn deep into the leather, creating a much more durable and effective hydrophobic barrier. The following table compares common heating methods, highlighting the balance between speed and safety.
| Method | Temperature Range | Safety Level | Pros | Cons |
|---|---|---|---|---|
| Hairdryer (Low) | 120-140°F | Very Safe | Controlled heat, even distribution | Slower process |
| Direct Sunlight | 100-120°F | Safe | Gentle, natural heating | Weather dependent, very slow |
| Heat Gun | 150°F+ | Risky | Fast melting | Can burn leather, denature proteins |
| Oven | Variable | Dangerous | Even heating | Risk of overheating, glue damage |
| Radiator | 100-130°F | Moderate | Passive heating | Uneven drying risk |
Ultimately, patience is paramount. Natural beeswax application works best when the wax is worked deep into the leather fibers by rubbing it onto a completely dry surface and then gently heating it. A slow, controlled process results in a superior bond and longer-lasting protection. Taking an extra 10 minutes with a hairdryer can mean the difference between a resilient, waterproof boot and one that’s been permanently damaged.
Why Over-Waxing Your Boots Causes Sweaty Feet on the Trail?
There’s a common misconception that “more is better” when waterproofing boots. In pursuit of an impenetrable shield against rain, hikers often apply thick, heavy layers of wax. While this creates a formidable barrier against external water, it also creates an equally effective barrier against internal moisture trying to escape. This is the critical trade-off that is so often overlooked. Leather is a naturally porous material, and high-quality hiking boots are designed to leverage this property to maintain vapor permeability—the scientific term for breathability.
During a strenuous hike, your feet work hard and produce a significant amount of perspiration. In fact, research shows that feet can produce up to 0.5 liters (1 pint) of moisture per day during intense activity. When a boot’s breathability is compromised by an excessively thick layer of wax, this vapor becomes trapped. The result is a swampy, uncomfortable internal environment that leads to maceration (softening of the skin), blisters, and cold feet as the trapped moisture cools. Essentially, you’ve waterproofed your boots from the inside as well as the out.
The correct approach is to apply thin, even layers of wax, allowing each one to be absorbed before considering another. The goal is to impregnate the leather fibers with wax, not to cake a solid layer on top. A properly treated boot will still feel like leather, not plastic. By focusing on deep penetration (as discussed in the previous section) rather than surface accumulation, you maintain the leather’s natural structure and allow it to manage moisture vapor as intended. A truly waterproof boot doesn’t just keep rain out; it lets sweat escape.
Spray vs Rub-On: Which Renewing Agent Works Best on Mixed Materials?
Modern hiking boots are rarely made of a single material. They are complex constructions of full-grain leather, nubuck panels, synthetic fabrics, and rubber rands. This hybrid design maximizes durability, flexibility, and breathability, but it presents a significant challenge for waterproofing. Applying a single product—especially a heavy wax or oil-based cream—across these different surfaces is a common maintenance error. Waxes and oils are formulated for the porous structure of smooth leather; when applied to synthetic textiles or napped leathers like nubuck, they can clog the weave, mat the texture, and ultimately fail to bond correctly.
The most effective strategy for mixed-material boots is a zoned approach. Treat each material with a product designed for it.
- Smooth Leather Sections: These are the ideal candidates for rub-on waxes or creams, which penetrate deeply to condition and provide a robust hydrophobic barrier.
- Synthetic Fabric Panels (e.g., Cordura): These non-porous materials do not absorb waxes. A silicone- or polymer-based waterproofing spray is far more effective, as it creates a surface-level DWR (Durable Water Repellent) coating without leaving a greasy, ineffective residue.
- Napped Leathers (Nubuck/Suede): These require specialized sprays that waterproof without flattening the delicate nap. This will be covered in greater detail later.
This targeted method ensures optimal performance across the entire boot. While some oils like mink or neatsfoot oil can add protection, they are best used as a base layer on smooth leather only and will often darken the color of the leather. For mixed materials, sprays offer unparalleled versatility for treating non-leather components.
As the image demonstrates, different materials require different care. The glossy, water-beading surface of the waxed leather contrasts sharply with the matte finish of the spray-treated fabric. Adopting this zoned maintenance strategy is essential for preserving the performance and longevity of modern hiking boots.
The Drying Mistake That Causes Wax to Flake Off Instantly
After carefully applying a waterproofing treatment, the final and most frequently botched step is the drying, or more accurately, the curing process. Many hikers, eager to get back on the trail, attempt to speed up drying by placing their boots near a direct heat source like a campfire, radiator, or wood stove. This is a critical error. Just as excessive heat can burn leather during application, it can ruin the waterproofing bond during curing. Rapid, high-heat drying forces the solvents in the wax to evaporate too quickly and can cause the wax itself to shrink and crack, resulting in a brittle, flaky surface that offers zero protection.
Proper curing is a chemical process, not just a physical one. It requires time at a stable temperature to allow the wax to fully bond with the leather fibers. Forcing this process with heat disrupts the bond. The best practice is to let the boots cure naturally at room temperature. Experts recommend natural drying conditions, ideally between 65-75°F (18-24°C), away from direct sunlight or heat vents. This slow, patient process allows for the creation of a flexible, durable, and truly integrated waterproof layer.
Some treatments, particularly those from brands like Nikwax, are explicitly formulated to air cure and do not require any heat at all. Baking or heating these products can actually damage their polymer-based chemistry. The key takeaway is to always follow the manufacturer’s instructions, but when in doubt, default to a slow, natural, room-temperature cure. A 24-48 hour wait is a small price to pay for waterproofing that actually lasts.
Action Plan: The Ideal Wax Curing Process
- Post-Application Placement: After applying the final thin coat of wax, move the boots to a dry, well-ventilated area with a stable temperature.
- Avoid Direct Heat: Absolutely do not place boots near a fire, radiator, or in direct, intense sunlight. Heat is the enemy of a proper cure.
- Allow Sufficient Time: Let the boots sit undisturbed for a full 24 to 48 hours. This allows the wax to solidify and bond completely with the leather fibers.
- Buff for Bonding: Once fully cured, use a soft cloth or horsehair brush to buff the entire surface briskly. This creates a small amount of friction heat that polishes the surface and strengthens the final wax bond.
- Final Water Test: Before your next hike, sprinkle a few drops of water on the boots. The water should bead up into perfect, tight spheres. If it soaks in or spreads out, a touch-up may be needed.
How Often Should You Reapply Wax During a Wet Hiking Season?
There is no one-size-fits-all calendar for reapplying waterproofing. An arbitrary schedule like “every three months” or “twice a season” fails to account for the most important variables: usage intensity, weather conditions, and terrain. A boot used for a dozen multi-day treks in the rainy Pacific Northwest will need far more frequent attention than one used for occasional day hikes in a dry climate. Relying on a rigid timeline is a surefire way to get caught with failing protection when you need it most.
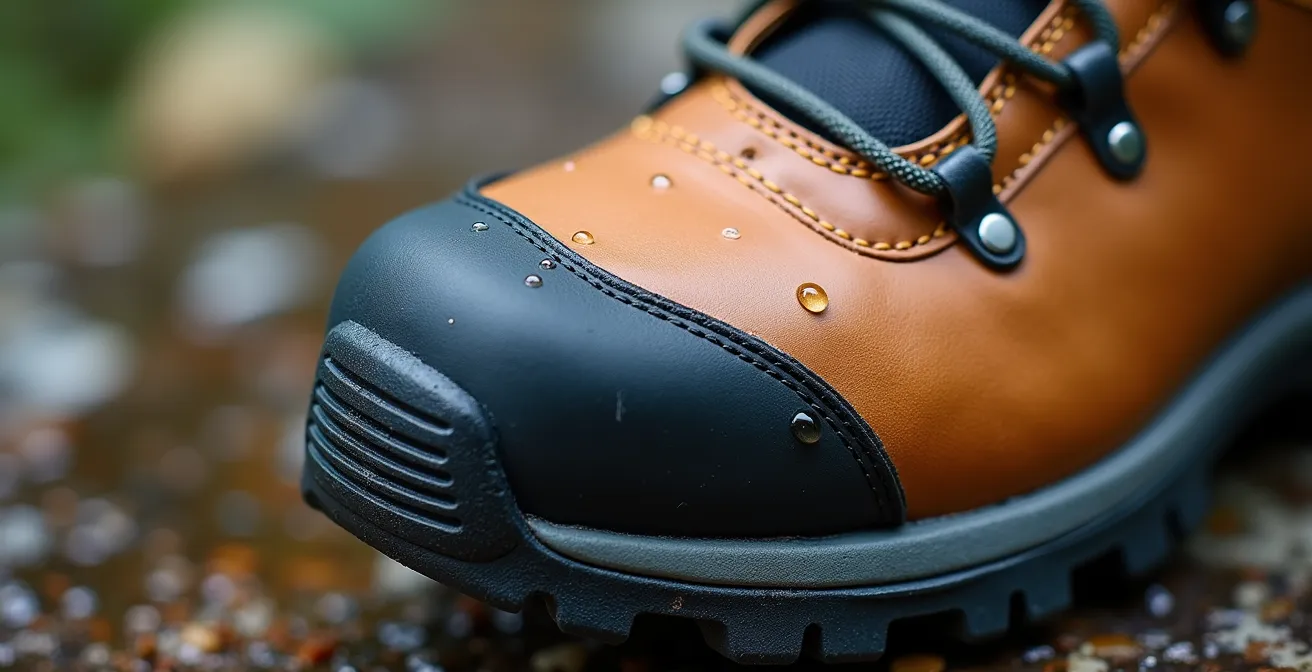
The most reliable indicator for reapplication is not the calendar, but direct observation. A properly waxed boot will exhibit a distinct physical property: water will bead up into tight, spherical droplets on its surface and roll right off. This is the visual proof of a healthy hydrophobic barrier. As the wax wears down from abrasion and flexing, this beading effect will diminish. Water will start to “wet out,” meaning it will spread across the surface and begin to soak into the leather’s outer layers. This is your signal to act.
As a rule of thumb, it’s wise to inspect and test your boots before any significant trip into wet weather. As field tests confirm, the best approach is to reapply as needed, specifically when water stops beading on the surface. This “performance-based” maintenance schedule is far more effective than a time-based one. It ensures your boots are always protected at peak performance levels without over-applying product, which can lead to buildup and reduced breathability. Watch your boots, and they will tell you when they need care.
The Maintenance Error That Makes Leather Brittle and Prone to Tearing
While waterproofing is a key part of leather boot care, it’s only one piece of the puzzle. The most common and destructive maintenance error is not related to waterproofing, but to improper cleaning and conditioning. Leather is a natural skin, and like our own skin, it has a specific pH balance. Aggressive cleaning or using the wrong type of conditioner can strip the leather of its natural oils and disrupt this delicate balance, leading to a condition known as chemical degradation. This makes the leather dry, brittle, and significantly more susceptible to cracking and tearing, especially at flex points around the ankle and toes.
Many hikers, in an effort to remove caked-on mud, reach for harsh household soaps or detergents. These are typically alkaline and can wreak havoc on leather’s naturally acidic state. Even products specifically marketed for leather, like saddle soap, can be detrimental if used too frequently or without being thoroughly rinsed off. The residue left behind can continue to degrade the leather over time. The goal of cleaning is to remove dirt, not to strip the leather bare.
This point is powerfully articulated by experts in the field. As one veteran cobbler explains, the choice of products is critical to leather’s long-term health. The wrong cleaner or conditioner can have devastating effects.
Using harsh, alkaline cleaners like saddle soap improperly or the wrong conditioner can disrupt leather’s natural acidic pH, making it susceptible to chemical degradation and brittleness.
– Dave Page, REI Expert Advice – Seattle-area cobbler with 45+ years experience
The solution is to use a pH-neutral cleaner specifically designed for footwear and to follow it up with a proper conditioning treatment—not just a waterproofing wax. A conditioner replenishes the essential oils that keep the leather supple and strong. Waterproofing protects it from external moisture, but conditioning preserves its internal structure.
Oil vs Cream Conditioner: Which Is Better for Nubuck Leather?
The advice given for smooth, full-grain leather is dangerously incorrect when applied to napped leathers like nubuck or suede. These materials have a distinct, velvety texture created by sanding or buffing the grain side of the hide. This ‘nap’ is composed of thousands of tiny, raised fibers. The primary goal of nubuck maintenance is to clean and protect it while preserving this nap integrity. Applying heavy oils, creams, or waxes is the fastest way to destroy it.
These products are designed to penetrate and saturate smooth leather. When applied to nubuck, they do not absorb in the same way. Instead, they plaster the fine fibers down, matting them into a smooth, greasy, and often permanently darkened surface. The original texture is irreversibly lost, and the boot’s appearance is ruined. More importantly, this matted surface can attract more dirt and is often less breathable than the original nubuck.
For nubuck, a completely different set of tools and products is required. Cleaning should be done with a specialized suede/nubuck ‘eraser’ block to lift stains, followed by a gentle brushing with a nubuck brush to restore the nap. For waterproofing, only spray-on treatments specifically formulated for nubuck and suede should be used. These products apply a lightweight, flexible, and breathable coating that doesn’t damage the texture.
The consequences of using the wrong treatment are not subtle. As this comparative analysis demonstrates, the wrong choice leads to irreversible damage.
| Treatment Type | Effect on Nap | Color Change | Water Protection | Reversibility |
|---|---|---|---|---|
| Oil-based | Permanently flattens | Darkens severely | Good | Irreversible |
| Cream/Wax | Mats down texture | Darkens | Excellent | Irreversible |
| Spray (Nubuck-specific) | Preserves texture | Minimal | Moderate | Can be refreshed |
The verdict is clear: oils, creams, and waxes have no place in a nubuck care kit. Stick to the specialized erasers, brushes, and sprays designed to protect the material without destroying its unique character.
Key Takeaways
- The effectiveness of waterproofing hinges on application technique, not just the product choice (cream vs. wax).
- Over-application of any waterproofing product destroys breathability, leading to trapped sweat and blisters.
- Always use a zoned approach for mixed-material boots, applying waxes/creams to smooth leather and sprays to synthetics and nubuck.
How Ventilated Boot Bags Prevent Mold Growth Between Seasons?
The final act of boot care—and one that determines their fate during the off-season—is proper storage. After a long season of use, simply tossing boots into a plastic bin or the back of a dark closet is a recipe for disaster. Leather is an organic material, and if stored while even slightly damp in a sealed, unventilated environment, it becomes a perfect breeding ground for mold and mildew. This not only ruins the leather and creates a foul odor but can also begin to eat away at the glues and stitching that hold the boot together.
Ventilation is the single most important factor in preventing mold growth. A ventilated boot bag, typically made of mesh or breathable fabric, allows air to circulate freely. This constant airflow wicks away any residual moisture trapped deep within the leather or insulation, ensuring the boots remain completely dry. Sealing boots in a plastic container does the opposite; it traps moisture and creates a humid microclimate ideal for fungal growth. Studies on long-term storage show a stark difference: boots kept in ventilated conditions show no mold, while those in sealed containers can develop visible mold within weeks. Storing boots in a stable, normal-temperature environment is just as crucial; avoid attics or garages where temperature swings can cause condensation.
Furthermore, using cedar boot trees is highly recommended. Boot trees serve two functions: they help the boot maintain its proper shape, preventing creasing and collapse, and cedar wood itself is naturally aromatic and moisture-absorbent, actively pulling dampness out of the leather while inhibiting the growth of odor-causing bacteria.
Checklist: Pre-Storage Boot Preparation
- Thorough Cleaning: Remove laces and insoles. Use a soft brush to remove all caked-on dirt and debris. If necessary, use a dedicated boot cleaner and a small amount of water, then allow to air dry completely.
- Final Conditioning: Apply a light coat of a suitable leather conditioner (not a heavy wax) to replenish oils and keep the leather supple during storage. Let it absorb fully.
- Insert Support and Desiccants: Place cedar boot trees inside each boot to maintain shape and absorb moisture. In their absence, loosely crumpled newspaper or silica gel packets can be used as a temporary substitute.
- Choose Ventilated Storage: Place the boots in a breathable mesh or fabric boot bag. Absolutely avoid sealed plastic bags or airtight containers.
- Select a Stable Environment: Store the bag in a closet or room with stable, moderate temperatures and low humidity. Do not store boots in unventilated basements, attics, or garages.
Proper storage is not an afterthought; it is the final, crucial step in ensuring your investment is protected and ready for your next adventure.
By moving beyond the simple cream-versus-wax debate and embracing the science of application, curing, and maintenance, you can transform your boot care regimen. The result is not only superior protection against the elements but also enhanced comfort and a significantly longer lifespan for your most critical piece of hiking gear. Apply these techniques consistently, and your boots will be ready to perform whenever the trail calls.