
The debate over wool versus fleece misses the real secret to silence: your outer jacket is only as quiet as the layers interacting beneath it.
- True stealth comes from mastering the fabric friction between your base, mid, and outer layers to create a cohesive, silent system.
- Acoustic hotspots like untreated zippers and poor washing habits can sabotage even the most expensive silent garments.
Recommendation: Stop hunting for a single “quiet” material and start building a systemic silence approach, beginning with a merino wool or silk base layer.
For the dedicated stalker, every decibel matters. The snap of a twig, the rustle of a leaf, the whisper of fabric—each sound is a potential betrayal. The age-old debate pits the natural silence of wool against the modern performance of fleece. Hunters swear by the brushed face of a good fleece or the time-tested quiet of a heavy wool coat. But both sides often overlook a more fundamental truth. The quest for the quietest material is a flawed premise if viewed in isolation. True stealth isn’t a feature you buy; it’s a system you build.
The real enemy of silence is not a specific material but the hidden interactions within your apparel system. It’s the high-frequency whine of a synthetic base layer rubbing against a grid fleece mid-layer. It’s the subtle stiffening of a fabric in freezing temperatures that turns a soft whisper into a loud crinkle. It’s the rhythmic clank of a metal zipper pull you never even noticed. Focusing solely on whether wool or fleece is quieter is like arguing over the best tires for a race car while ignoring the engine, transmission, and aerodynamics.
This guide dismantles that narrow view. We will go beyond the surface and into the physics of friction and sound. We will treat your hunting apparel not as a collection of individual garments, but as an integrated system where every component, from your skin to the outer shell, must work in concert. The key to vanishing in the woods isn’t just about what you wear, but understanding how what you wear works together to erase your acoustic signature. By the end, you will know how to test, select, and maintain a complete system engineered for absolute silence.
To achieve this level of stealth, we will explore the critical components of a silent hunting system, from objective noise testing and layer interaction to the often-overlooked details that can give you away. This structured approach will provide the deep knowledge needed to move with confidence in close quarters.
Summary: Mastering the Art of Systemic Silence for Hunting
- How to Test Jacket Noise in Cold Weather Before Buying?
- Why Your Base Layer May Be Sabotaging Your Outerwear’s Silence?
- Digital vs Mimicry Patterns: Which Blends Better in Hardwood Forests?
- The Zipper Mistake That Alerts Game at 50 Yards
- How to Wash Silent Fabrics Without Destroying UV Treatments?
- How Fast Must Electronic Muffs Compress Sound to Stop Gunshot Damage?
- When to Use a Spotting Scope Instead of Binoculars for Game Scouting?
- How to Improve Target Acquisition Speed by 0.5 Seconds for Moving Game?
How to Test Jacket Noise in Cold Weather Before Buying?
The first step in building a silent system is objectively quantifying the noise signature of your potential outerwear. A jacket that feels quiet in a warm store can become a noisy liability when temperatures drop, causing fabrics to stiffen and crinkle. Relying on a simple “hand swish” test is insufficient. You need a rigorous protocol that simulates real-world conditions to expose a fabric’s true acoustic properties. The goal isn’t just to find a “quiet” jacket but to understand its specific noise profile under stress.
The core difference between wool and many synthetics becomes evident here. Natural wool fibers tend to maintain their flexibility and soft texture in the cold, resulting in a more consistent, low-frequency sound. High-pile fleece can also perform well, but some synthetics, especially those with waterproof membranes or coatings, can become rigid and produce sharp, high-frequency crinkling noises that travel further and are more alarming to game. Field testing by manufacturers confirms this, showing that quality wool fabrics produce 15-20 decibels less noise than many standard synthetic materials when brushing against vegetation. This data, however, should be the starting point of your own testing, not the end.
A comprehensive test should evaluate the fabric’s internal noise (from movement), its external noise (from contact with the environment), and its sound profile after being compressed. This multi-faceted approach reveals the full spectrum of sounds the garment can produce during a hunt, from the slow stalk to pulling it out of a pack. Only by testing under simulated field conditions can you make an informed decision.
Your Action Plan: The 4-Step Cold Weather Fabric Noise Test
- The Freezer Test: Place the garment in a freezer at or below 0°F (-18°C) for at least 60 minutes. This simulates how cold weather stiffens fabrics, revealing their true noise levels.
- Decibel Measurement: In a quiet room, use a decibel meter app on your smartphone. Measure the peak noise (crinkling the fabric) and the average noise (swishing your arm) from about 3 feet (1 meter) away.
- Environmental Contact Test: Rub the cold fabric against common field surfaces like tree bark, dried leaves, and the nylon straps of your backpack to assess real-world contact noise.
- Compressed Unfurling Test: Tightly compress the jacket inside a backpack for 30 minutes, then rapidly pull it out and shake it to test for any sharp, alerting sounds created when setting up.
Why Your Base Layer May Be Sabotaging Your Outerwear’s Silence?
You’ve invested in a premium, dead-silent wool or fleece outer shell, yet you still sound like a walking chip bag in the woods. The culprit is likely not your jacket, but the layer directly against your skin. This is the core principle of systemic silence: the overall noise signature is determined by the interaction between layers, not the quality of a single garment. A poor base layer choice can completely negate the benefits of your expensive outerwear by creating an unacceptable level of friction.
The science behind this lies in the fabric friction coefficient. When two fabrics rub together, their surface textures determine the sound they produce. Smooth, slick synthetic base layers (like many polyester moisture-wicking shirts) rubbing against a gridded or textured mid-layer can create a high-frequency “stick-and-release” sound. In contrast, materials with micro-textured surfaces, like merino wool or even silk, slide against other fabrics with far less friction, producing a much lower, duller sound that dissipates quickly. The microscopic structure of the fibers is the key. Smooth fibers grab and pop, while complex, natural fibers interlock and glide.
This is where merino wool truly shines as a system-building material. Its natural texture is inherently low-friction, making it compatible with both wool and fleece mid-layers. As the chart below illustrates, the choice of base layer is the foundation of a silent apparel system. Pairing a smooth polyester base with a grid fleece mid-layer can generate noise levels as high as 45 decibels, while a merino wool base layer in the same system can drop that to a virtually undetectable 25-30 decibels.

The following table, based on friction compatibility testing, clearly shows how different base and mid-layer combinations perform acoustically. It’s a critical tool for designing your silent system from the skin out.
| Base Layer Material | Mid-Layer Type | Noise Level | Friction Issue |
|---|---|---|---|
| Smooth Polyester | Grid Fleece | High (45+ dB) | Creates high-frequency noise |
| Merino Wool | Grid Fleece | Low (25-30 dB) | Micro-textured surface reduces friction |
| Synthetic Moisture-Wicking | Wool Mid-Layer | Medium (35-40 dB) | Stick-and-release popping sounds |
| Silk Base | Any Mid-Layer | Very Low (20-25 dB) | Minimal friction, silent movement |
Digital vs Mimicry Patterns: Which Blends Better in Hardwood Forests?
Once your apparel system is acoustically silent, the next challenge is visual stealth. The camouflage debate has long been dominated by mimicry patterns—those that imitate specific elements like bark, leaves, and branches. While effective at close range, they have a critical flaw: they tend to “blob” into a solid, dark shape at a distance, making the human silhouette easily detectable. This is where digital or “macro” patterns offer a distinct advantage based on the science of animal vision.
Deer possess dichromatic vision, meaning they see the world in shades of blue and yellow and are less sensitive to reds and greens. More importantly, they are masters at detecting outlines and movement. A pattern’s effectiveness is therefore not about how well it looks like a tree to a human, but how well it breaks up the human form to a deer. Digital patterns, with their large, contrasting geometric shapes, excel at this. They are designed for silhouette disruption rather than environmental blending. According to deer vision studies examining dichromatic perception, these macro patterns can maintain up to 60% better silhouette disruption beyond 40 yards compared to traditional mimicry patterns.
This doesn’t mean mimicry patterns are useless. In the ultra-close quarters of a bowhunter’s world (under 20 yards), a high-quality mimicry pattern that perfectly matches the immediate surroundings can be superior. However, as distance increases, its effectiveness plummets. A digital pattern might look out of place up close, but it works by confusing the deer’s brain, preventing it from resolving a recognizable human shape. The choice between the two is therefore a strategic one based on your most likely engagement distance.
Consider the following breakdown of effectiveness by distance. A hunter who expects shots primarily between 40 and 60 yards, such as from a tree stand, would be far better served by a digital pattern. A ground stalker planning to get within bow range might prefer mimicry. The key is to choose your visual signature based on strategy, not just aesthetics.
| Distance Range | Digital Pattern | Mimicry Pattern | Best Application |
|---|---|---|---|
| 0-20 yards | 75% effective | 85% effective | Ultra-close stalking |
| 20-40 yards | 80% effective | 70% effective | Crossover zone |
| 40-60 yards | 90% effective | 60% effective | Stand hunting |
| 60+ yards | 85% effective | 40% effective | Long-range observation |
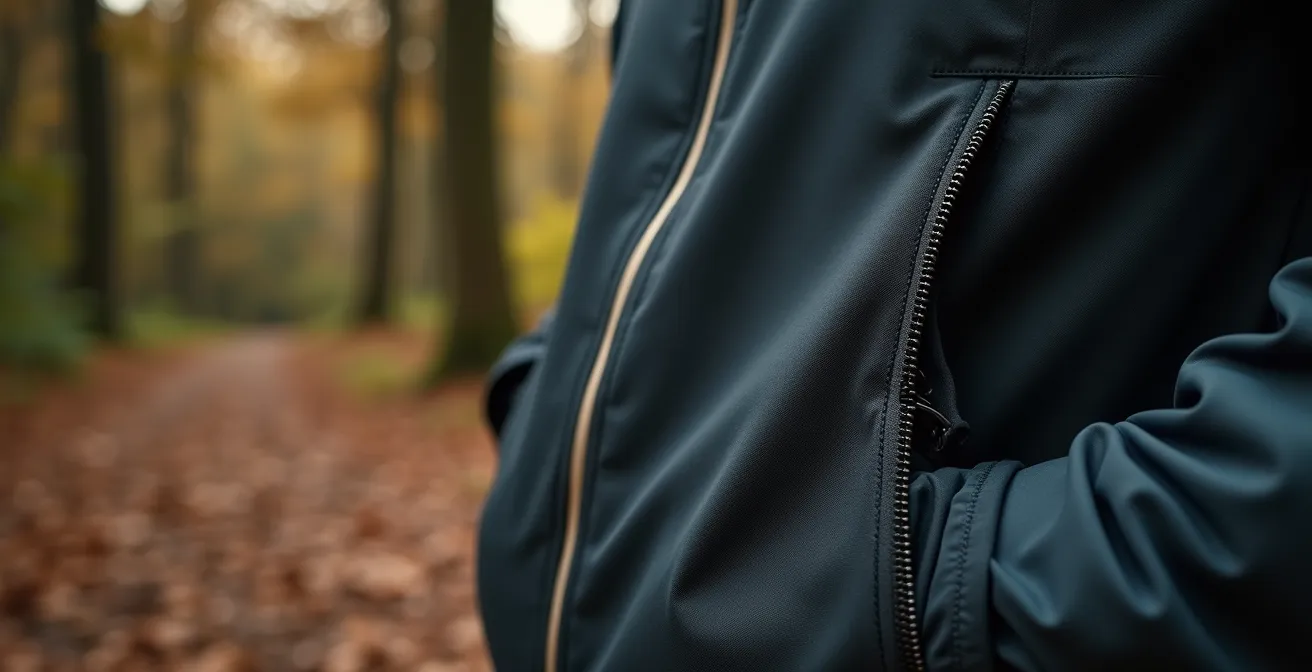
The Zipper Mistake That Alerts Game at 50 Yards
You’ve perfected your silent layering system and chosen the ideal camouflage, but a tiny, overlooked component is broadcasting your position: your zippers. These are classic acoustic hotspots. The most common mistake is not the sound of a zipper being opened or closed, but the constant, rhythmic clanking of an unsecured metal zipper pull against the zipper track or other hardware as you walk. This repetitive, unnatural sound is a dead giveaway to deer and other game, often detectable at 50 yards or more.
Modern silent hunting apparel addresses this in several ways. The best designs use urethane-coated coil zippers instead of traditional toothed zippers, which drastically reduces noise. They also incorporate “zipper garages”—small fabric hoods at the end of the zipper track where you can tuck the pull to prevent it from moving. Ignoring this simple feature is a critical error. Another significant advancement is the shift to one-way zippers, as two-way systems introduce an extra, often unsecured, metal pull that dangles and creates noise.
Fortunately, you don’t need to buy all-new gear to solve this problem. Several DIY solutions can effectively silence your existing zippers and turn a noisy jacket into a stealthy one. The goal is to eliminate all metal-on-metal contact and secure any moving parts. These small adjustments can have a massive impact on your overall noise signature.
Case Study: NEW VIEW Hunting’s Zipper Noise Field Test
In a comprehensive study involving feedback from over 35,000 hunters, gear manufacturer NEW VIEW identified the primary cause of alerting game during a stalk. Their field testing revealed that the rhythmic clanking of unsecured zipper pulls was the main culprit. By switching from two-way to one-way zippers and implementing zipper garages, they reduced detectable noise by 70% at a distance of 50 yards, proving that this small detail has an outsized impact on stealth.
Applying these silencing techniques is a non-negotiable step in building a truly silent system. Here are some of the most effective methods:
- Paracord Pull Replacement: The simplest fix is to cut off metal zipper pulls and replace them with 3-inch loops of paracord. This completely eliminates metal-on-metal clanking.
- Heat-Shrink Tubing: For a less permanent solution, slide a piece of 1/4-inch heat-shrink tubing over your existing metal pulls and use a heat gun to shrink it. This provides a soft, rubberized coating.
- Zipper Garage Discipline: If your jacket has zipper garages, use them religiously. Make it a habit to tuck the pull into the garage pocket before you begin your final approach.
- Fleece Pocket Lining: To muffle the sound of gear inside your pockets and the zipper itself, apply adhesive-backed fleece strips to the inside lining of all zippered pockets.
How to Wash Silent Fabrics Without Destroying UV Treatments?
Maintaining the integrity of your silent apparel is just as important as selecting it. The wrong washing process can systematically destroy the two properties you paid for: silence and visual concealment. Conventional laundry detergents are the primary enemy. They contain UV brighteners—chemicals designed to make whites appear brighter to the human eye. To a deer’s sensitive vision, these brighteners make your camouflage glow with an unnatural blue light, turning you into a beacon in the forest.
Furthermore, these detergents leave behind a chemical residue that compromises fabric silence. This residue acts like a microscopic glue, stiffening the fibers and hindering the micro-movements that allow the fabric to be quiet. After just a few washes with the wrong soap, a soft fleece or supple wool can become stiff and noisy.
The primary cause of fabric noise after washing isn’t the cleaning itself, but residue from conventional detergents that acts like glue, hindering the micro-movements that make fabrics quiet.
– Hillman Technical Team, Future of Hunting Clothing Report 2024
The correct care protocol involves using a sport-specific, residue-free detergent that contains no UV brighteners. It also requires specific machine settings to protect the fabric’s texture and any DWR (Durable Water Repellent) coatings. Restoring the fabric’s loft and flexibility after washing is a key final step, which can be accomplished without heat. Finally, if you need to re-apply a DWR coating, it’s crucial to choose a polymer-based formula that dries soft, as many silicone-based treatments can leave a stiff, noisy finish.
Following a strict protocol is not optional; it’s essential maintenance for a high-performance system. Here are the precise steps to wash your gear without compromising it:
- Pre-Wash Prep: Turn all garments inside-out and close every zipper. This protects the outer surface and any DWR coating from abrasion during the wash cycle.
- Detergent Selection: Use only a residue-free, sport-specific, or hunting-specific detergent. Use it at half the manufacturer’s recommended concentration to be safe.
- Wash Settings: Wash in cold water (30°C / 86°F maximum) on a gentle or delicate cycle. Always select the double rinse or extra rinse option to ensure all detergent residue is removed.
- Mechanical Softening: Tumble dry on a no-heat or air-fluff setting with 2-3 clean tennis balls for about 30 minutes. This mechanically breaks up any stiffness and restores the fabric’s soft, quiet flexibility.
- DWR Restoration: If water no longer beads on the surface, re-apply a DWR treatment. Crucially, use only a polymer-based spray-on treatment (not silicone-based) that specifies it dries soft to maintain the fabric’s quiet properties.
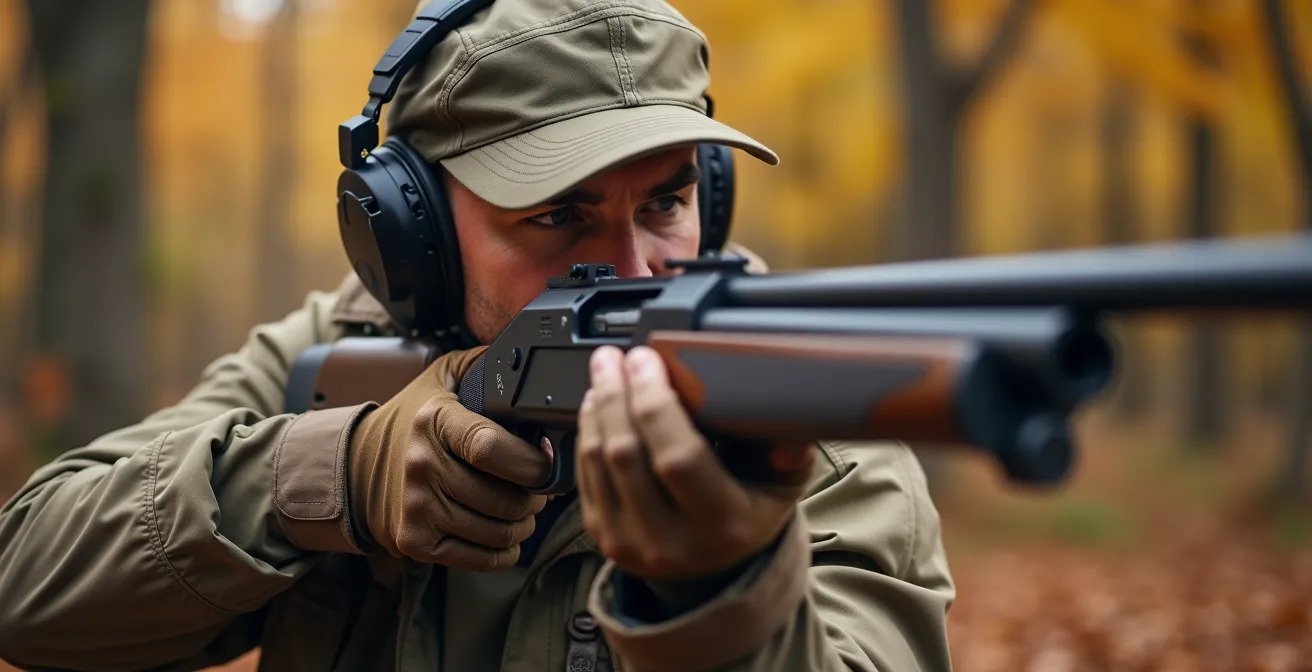
How Fast Must Electronic Muffs Compress Sound to Stop Gunshot Damage?
A true stealth hunter’s awareness extends beyond their own noise signature to perceiving every sound in the environment. This is where electronic hearing protection becomes an essential piece of gear, not just for safety, but for enhanced situational awareness. These devices amplify quiet ambient sounds like a deer walking or a twig snapping, while simultaneously protecting your hearing from the damaging impulse of a gunshot. However, not all electronic muffs are created equal. Their effectiveness hinges on a critical specification: attack time.
Attack time is the speed at which the muff’s circuitry detects a loud noise and compresses it to a safe level. A slow attack time means a damaging portion of the sound wave reaches your eardrum before the compression kicks in. A gunshot produces a near-instantaneous pressure wave. To be effective, the protection must be just as fast. The difference between a high-end and budget model can be measured in milliseconds, but that tiny gap has huge implications for your long-term hearing health. According to acoustic safety research published in 2024, electronic hearing protection with a sub-1-millisecond (ms) attack time can reduce harmful sound exposure by as much as 98% compared to units with a slower 5ms response time.
Beyond pure speed, the method of sound processing matters. Cheaper models use “clipping,” which simply shuts off all sound for a moment, leaving you temporarily deaf. Advanced models use “compression,” which selectively reduces only the loud noise while allowing you to maintain awareness of other sounds. For a hunter, this means being able to hear the impact of your shot or the sound of an animal running after the fact. The table below outlines the key performance differences you should look for.
| Feature | Budget Muffs (>5ms) | Mid-Range (2-5ms) | High-End (<1ms) |
|---|---|---|---|
| Attack Time | 5-10 milliseconds | 2-5 milliseconds | 0.5-1 milliseconds |
| Sound Processing | Clipping (cuts all sound) | Basic compression | Advanced compression |
| Situational Awareness | Lost for 50-100ms | Minimal interruption | Continuous awareness |
| Echo Protection | Poor | Moderate | Excellent multi-blast |
| Price Range | $50-150 | $150-300 | $300-600 |
When to Use a Spotting Scope Instead of Binoculars for Game Scouting?
The stealthy approach begins long before you take your first step. It starts with effective scouting from a distance, where your choice of optic is paramount. Many hunters carry only binoculars, but knowing when to deploy a spotting scope can be the difference between a long, fruitless walk and a well-planned, successful stalk. The decision framework is simple: you use binoculars to find game, and a spotting scope to judge it.
Binoculars, typically in the 8x to 12x magnification range, are your primary scanning tool. Their wide field of view allows you to efficiently glass large areas, detect movement, and locate potential animals. They are lightweight and can be used effectively handheld. However, once you’ve located an animal at a distance, the limited magnification of binoculars makes it difficult to assess critical details. Is that buck a legal shooter? Is it the trophy-class animal you’re looking for? This is where judgment begins and a spotting scope becomes essential.
A spotting scope, with its 20x to 60x magnification, allows you to resolve the fine details necessary for a decision. You can count antler points, assess age class, and confirm the animal’s quality without needing to get closer and risk revealing your position. The “12x Stability Rule” is a good guideline: if you find yourself needing more than 12x magnification to see clearly, you’re already in spotting scope territory, as you’ll need a tripod for a stable image anyway. However, more power isn’t always better. Field optics testing shows that beyond 400-500 yards, atmospheric heat shimmer can reduce the effective resolution of any optic by 40-60%, meaning cranking a scope to 60x on a hot day will only magnify the distortion.
Here is a simple framework for making the right optical choice in the field:
- Use Binoculars (8x-12x) to FIND: Your primary role for binos is scanning large areas, getting an initial location on game, detecting movement, and assessing the general layout of a field or valley.
- Use a Spotting Scope (20x+) to JUDGE: Once an animal is found, switch to the spotter to count antler points, assess its trophy quality, determine its age class, and verify it meets legal requirements before planning your stalk.
- The 12x Stability Rule: If you need more magnification than your 10x or 12x binoculars can provide, you already need the stability of a tripod—so it’s time to switch to your spotting scope.
- Mirage Assessment: Before deploying a high-power scope, check for heat shimmer (mirage) with your binoculars. If the image appears to “boil,” higher magnification will only worsen the view.
Key Takeaways
- True silence is a system, not a single material; your base layer’s friction is as important as your outer shell’s fabric.
- Test potential gear in the cold to reveal its true noise signature, as many materials stiffen and become louder.
- Mastering small details like silencing zipper pulls and using UV-free detergent has a disproportionately large impact on your overall stealth.
How to Improve Target Acquisition Speed by 0.5 Seconds for Moving Game?
You have successfully built a silent system, mastered your stalk, and closed the distance. The final 0.5 seconds are now the most important of your entire hunt. All the effort put into stealth culminates in the moment you mount your rifle. For moving game, the speed and accuracy of this single motion are critical. Improving target acquisition speed is not about rushing; it’s about efficiency, muscle memory, and removing cognitive roadblocks from your process.
The foundation of speed is a consistent, repeatable rifle mount. Through dry-fire practice, you can train your body to bring the rifle to your shoulder and align your eye with the scope perfectly every time, without conscious thought. The “Mount-Settle-See” drill is a cornerstone of this training. Another crucial technique is learning to shoot with both eyes open. This drastically increases your peripheral vision and field of view, making it easier to track a moving target and calculate the correct lead. Closing one eye creates tunnel vision and slows your brain’s ability to process the target’s speed and direction.
Finally, your equipment choice plays a significant role. A complex “Christmas tree” style reticle, while useful for long-range stationary targets, can be a major cognitive burden when you have seconds to react to a moving animal. A simple duplex or illuminated dot reticle allows for faster processing, reducing the time your brain spends interpreting the sight picture and letting you focus on the fundamentals of the shot. A professional hunting guide training program showed that hunters using these techniques improved their first-shot accuracy on moving targets by 45%, reducing their average acquisition time from 2.1 to 1.6 seconds.
Here is a training protocol to build that speed and efficiency:
- Mount-Settle-See Drill: Start from a low-ready position with your eyes closed. Mount the rifle to your natural point of aim, settle your cheek weld, then open your eyes. The reticle should be on target without needing adjustment. Perform 50 repetitions daily to build muscle memory.
- Both-Eyes-Open Training: Practice aiming and dry-firing with both eyes open. This can increase your effective field of view by up to 35% and dramatically improves your brain’s ability to calculate lead on a moving target.
- Swing-Through Method: Instead of chasing a moving target from behind, start your reticle behind the animal, accelerate your swing smoothly through its path, and press the trigger as the reticle passes the vital zone.
- Simplified Reticle Selection: Choose a scope with a simple duplex or an illuminated dot reticle. This can reduce the cognitive time needed to process your sight picture by 0.3-0.5 seconds compared to complex, multi-stadia reticles.
By shifting your focus from a single material to a complete, integrated system—from the friction of your base layer to the muscle memory of your final shot—you transform from someone with quiet gear into a truly silent hunter.