True safety on technical terrain is a skill, not a purchase; it’s achieved by mastering movement, not by accumulating gear.
- Friction, balance, and weight distribution are the core physical principles you must understand and practice.
- Your mind is your most critical safety tool. Recognizing cognitive biases like overconfidence is as important as proper foot placement.
Recommendation: Instead of focusing on what to buy, focus on how to move. Practice the drills in this guide in a low-risk environment to build muscle memory and proprioceptive awareness.
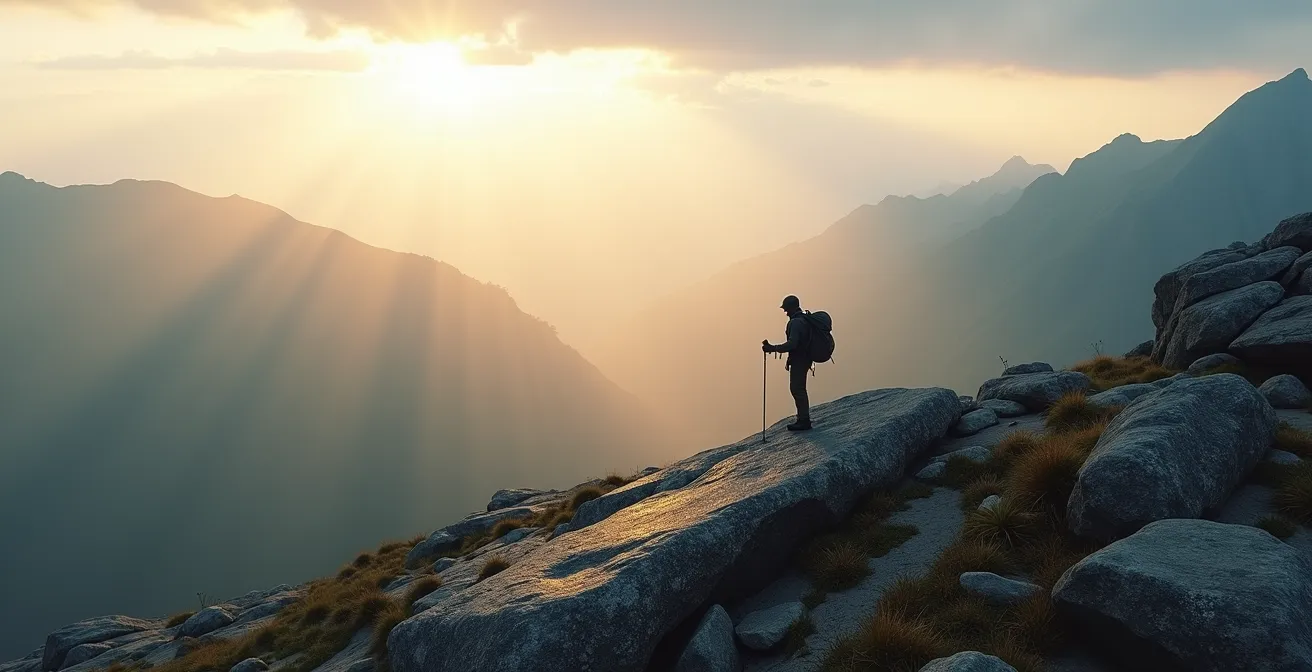
There’s a moment every adventurous hiker faces. The maintained trail dissolves, and ahead lies a steep, broken landscape of rock, roots, and loose scree. Your goal is on the other side, but the path forward requires more than just endurance. The common advice echoes in your mind: “maintain three points of contact,” “get better boots,” “use trekking poles.” While this advice has its place, it treats the problem as a gear or a simple rule deficiency. It frames safety as something you can buy or memorize.
But as a guide who has spent countless hours watching people move through challenging environments, I can tell you that the most crucial safety equipment is not on your feet, but between your ears and in your muscle memory. Safety in technical terrain is less about the equipment you carry and more about mastering the fundamental physics of movement and understanding the psychological traps that lead to accidents. It’s about developing a deep, intuitive connection between your body and the ground beneath you—a skill set known as proprioception.
This guide will not give you another gear checklist. Instead, it will deconstruct the essential skills required to move with confidence and security when the trail runs out. We will explore specific techniques for different surfaces, analyze the critical choices in footwear, understand the mental errors that lead to falls, and build a framework for prioritizing your actions if things go wrong. We will transform you from a passenger in your boots to a pilot of your own body.
The following sections break down the specific skills and knowledge you need to develop. By understanding these concepts, you can build the confidence and competence to safely explore more challenging and rewarding terrain.
Summary: A Guide to Safe Movement on Technical Terrain
- Why Following the Cairn Line Isn’t Always the Safest Path in Fog?
- How to Use the ‘Smearing’ Technique on Smooth Rock Slabs?
- Approach Shoes vs Hiking Boots: Which Is Safer for Ridge Scrambling?
- The Overconfidence Error That Leads to Slips on Wet Roots
- How to Distribute Weight When Descending Loose Scree Slopes?
- Deep Lugs vs Shallow Tread: Which Is Safer on Slick Sandstone?
- How to Train Your Proprioception for Safer Hiking on Loose Rocks?
- The Rule of Threes: How to Prioritize Survival Actions in the First 24 Hours?
Why Following the Cairn Line Isn’t Always the Safest Path in Fog?
In low visibility, the sight of a cairn—a man-made pile of stones—can feel like a lifeline. It’s a sign that someone has been here before. However, treating a line of cairns as an infallible route is a classic heuristic trap, a mental shortcut that can lead to disaster. Cairns are unofficial and unregulated. A cairn might mark a climber’s access route to a dangerous cliff, a path to a non-existent viewpoint, or simply be the result of a bored hiker. In fog, blindly following these markers without confirming your position is a gamble.
The professional approach is to treat cairns as potential points of interest, not as your primary navigation tool. Your compass, map, and an awareness of the terrain’s shape are your true guides. True navigation is a constant process of hypothesis and verification. You take a bearing, estimate your travel time, and predict what the terrain should feel like under your feet. When visibility drops, your other senses become more critical.
Instead of relying on unknown markers, a disciplined navigation protocol is essential. The following steps should become your standard procedure in poor visibility:
- Use multiple navigation techniques simultaneously – combine compass bearings with terrain association rather than following cairns blindly.
- Establish regular check-in points using your compass and map every 10-15 minutes to verify your position.
- Listen for environmental cues like water flow, wind patterns, and even distant traffic sounds to maintain directional awareness.
- Create your own temporary markers (like arranging sticks) that you can remove on return, rather than trusting unknown cairns.
- When visibility drops below 50 feet, consider stopping and waiting rather than following uncertain cairn lines that may lead off-route.
Ultimately, the safest path is the one you can verify yourself, not the one someone else may have built for an unknown purpose. Your map and compass are tools of certainty; a cairn is just a suggestion, and a potentially dangerous one at that.
How to Use the ‘Smearing’ Technique on Smooth Rock Slabs?
When faced with a steep, smooth slab of rock, our instinct is to search for edges and holds. But often, the most secure way to ascend is to use a technique called “smearing.” Smearing is the art of maximizing friction by pressing as much of your shoe’s rubber sole onto the rock as possible. It’s a technique that feels counter-intuitive at first but is fundamental to efficient movement on technical rock. The key is to trust the friction dynamics between your shoe and the stone.
To execute a smear, you drop your heel, bend your ankle, and press the ball of your foot firmly against the rock. This action increases the surface area of contact, generating significantly more grip than just using your toes. You must keep your body weight directly over your foot and your hips close to the rock, creating a stable kinetic chain. It’s a game of pressure and trust.
As this image demonstrates, the goal is to deform the rubber of the shoe against the rock’s texture, creating thousands of microscopic points of contact. This technique is why a shoe’s rubber compound is so critical. Different rubbers perform differently under various conditions, impacting both friction and durability. For hikers moving into this type of terrain, choosing footwear with “sticky” rubber designed for this purpose is a significant safety consideration.
Your Action Plan: Progressive Smearing Drill Sequence for Beginners
- Practice on a low-angle concrete ramp or skate park, focusing on pressing your entire forefoot flat against the surface.
- Progress to outdoor boulders with 20-30 degree slabs, maintaining three points of contact while shifting weight.
- Work on dynamic weight transfers between feet, keeping hips close to the rock and heels low.
- Practice transitioning from edge holds to smears mid-sequence without losing balance.
- Challenge yourself on steeper slabs (40+ degrees) for short sections, building confidence gradually.
Smearing is more than just a footwork technique; it is a shift in mindset. It teaches you to see smooth rock not as an obstacle, but as a surface full of possibility, unlocked by pressure, balance, and trust in your footwear.
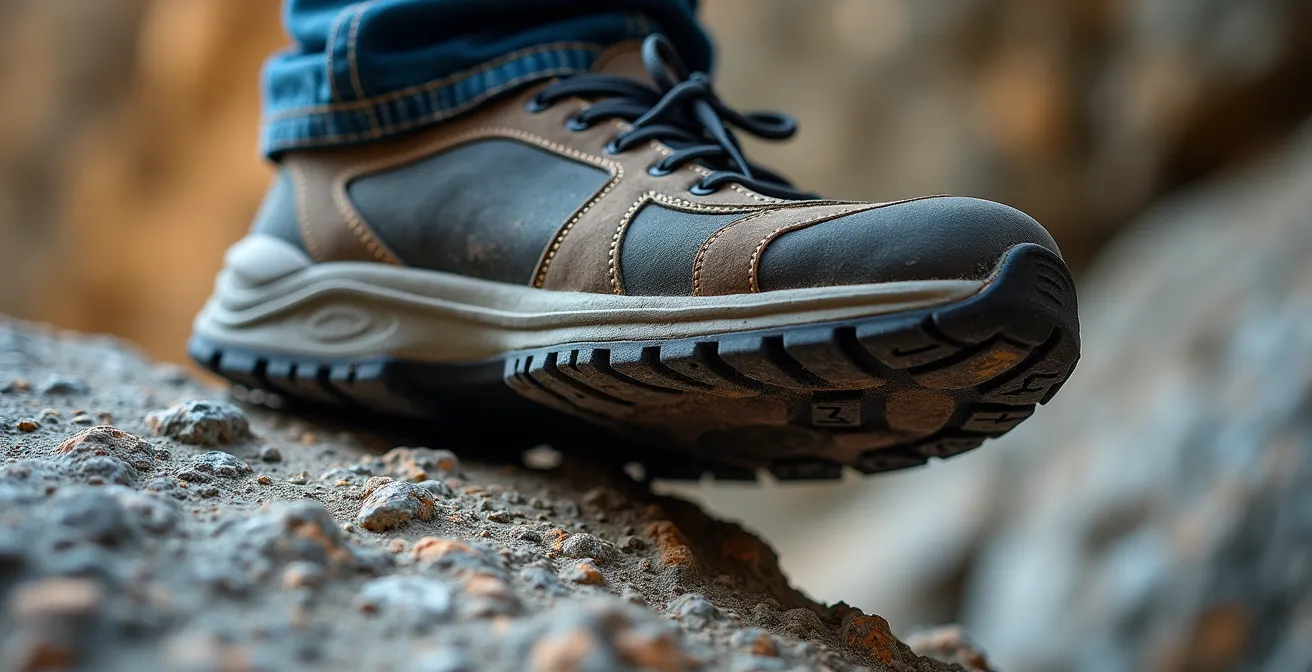
Approach Shoes vs Hiking Boots: Which Is Safer for Ridge Scrambling?
The “hiking boots for ankle support” mantra is one of the most common platitudes in the outdoors. While true for carrying heavy loads on established trails, this advice becomes dangerously simplistic on technical ridges and scrambles. Here, precision, sensitivity, and grip become paramount, and the bulky, stiff nature of a traditional hiking boot can become a liability. This is where the approach shoe comes in—a hybrid designed for exactly this transition zone.
Approach shoes combine the lightweight, agile feel of a trail runner with the sticky rubber and precise toe box of a climbing shoe. This design allows for far greater sensitivity; you can feel the rock beneath your feet, making it easier to test holds and place your feet precisely on small edges. Furthermore, recent testing data reveals that approach shoes are 40-50% lighter than typical hiking boots. This reduction in weight at your feet significantly decreases fatigue and increases agility over a long day of scrambling.
The choice is not about which is “better” but which is appropriate for the objective. A heavy pack on a muddy trail demands a boot. A light pack on a technical, rocky ridge with sections of 3rd or 4th class scrambling strongly favors an approach shoe. Ankle support is largely a myth for preventing the types of twists and sprains that happen on uneven ground; ankle strength, developed through training, is far more effective. The right footwear decision is a critical safety calculation based on a ratio of trail-to-scramble and pack weight.
This decision framework helps clarify when to prioritize ankle support versus when to prioritize rock grip and precision. For any route involving exposed ridges, the ability to place your foot with surgical precision is the most important safety factor.
| Trail/Scrambling Ratio | Pack Weight | Recommended Footwear | Key Safety Factor |
|---|---|---|---|
| 80% trail / 20% scramble | >30 lbs | Hiking Boots | Ankle support priority |
| 50% trail / 50% scramble | 15-30 lbs | Sturdy Approach Shoes | Balanced performance |
| 20% trail / 80% scramble | <15 lbs | Technical Approach Shoes | Rock grip priority |
| Exposed ridges | Any weight | Approach Shoes | Precision placement critical |
Choosing an approach shoe is not about wanting to be a climber; it’s about selecting the right tool for the job to maximize safety and efficiency when the terrain demands more than just walking.
The Overconfidence Error That Leads to Slips on Wet Roots
One of the most common and dangerous falls a hiker can take happens not on a dramatic cliff, but on a seemingly innocuous wet root or rock late in the day. The cause is rarely a lack of physical ability; it’s a cognitive failure known as the overconfidence error, amplified by decision fatigue. After successfully navigating hundreds of similar obstacles throughout the day, our brain creates a mental shortcut: “This is easy, I’ve done it a hundred times.” This is when we are most vulnerable.
This cognitive bias causes us to lower our guard. We stop actively assessing the specific risk of *this* particular root. Is it covered in a slicker type of algae? Is it at a more awkward angle? Is my boot caked with mud, reducing its grip? Our fatigued mind, eager to reach the campsite or car, dismisses these micro-calculations. We place our foot with the same casual confidence we had at 9 AM, but the physical and environmental conditions have changed.
Imagine it’s 4 PM. You’ve been hiking for six hours, you’re slightly dehydrated, and your glycogen stores are low. You see another stretch of muddy, root-filled trail. Instead of seeing it as a technical problem to be solved with careful footwork, your brain categorizes it as “annoying obstacle before rest.” You step carelessly, your focus is on the end of the trail, not on your foot placement, and that’s when the slip happens. It’s not a failure of your boots; it’s a failure of your risk management system, which has been compromised by fatigue.
The antidote to this is a conscious and deliberate mental reset. When you recognize you’re tired and facing a section of slippery terrain, force yourself to stop. Take a deep breath. Say out loud, “This is a high-risk area. Focus.” Treat each step as an independent event. Engage your core, lower your center of gravity, and test your footing before fully committing your weight. By recognizing the mental trap, you can override the dangerous autopilot and re-engage the careful, deliberate hiker you were at the start of the day.
This is not just about being careful. It is about understanding that your mental state is a piece of safety gear, and just like any gear, it can wear out and fail if not properly maintained and checked.
How to Distribute Weight When Descending Loose Scree Slopes?
Descending a slope of loose rock, or scree, can be one of an off-trail hiker’s most intimidating tasks. The ground is literally moving beneath you. The key to a safe and efficient descent is not to fight this movement, but to work with it by mastering weight distribution. The correct technique varies dramatically depending on the size of the rocks, but the underlying principle is to maintain balance while controlling your momentum.
On slopes of fine, pebble-sized scree, the most effective technique is often called “scree skiing” or the “plunge step.” Here, you adopt a relaxed, athletic stance with your knees and ankles bent, lean back slightly, and take long, deliberate strides, landing firmly on your heels. This action “plunges” your heel into the loose rock, using the scree itself to brake your descent. It feels like skiing in slow motion. You let the small rocks flow around your boots, maintaining a rhythmic, controlled slide. It requires confidence, as your first instinct is to lean forward and tense up, which is the worst thing you can do.
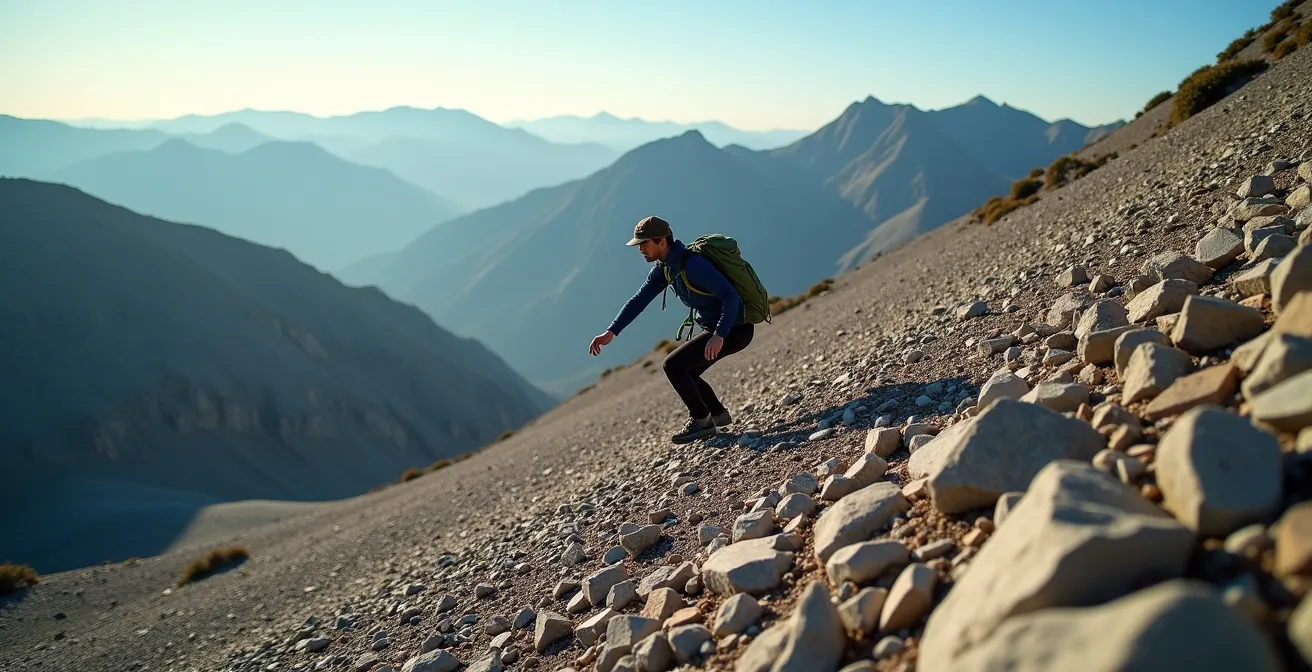
This technique, however, is extremely dangerous on larger, unstable scree or talus (rocks bigger than your fist). Here, each rock can shift or roll unpredictably, creating a risk of a serious fall. On this type of terrain, the technique shifts completely. You must face sideways or even face into the slope, maintaining three points of contact as if you were downclimbing. Steps are short, deliberate, and tested before you commit your full weight. Trekking poles are used here not for rhythm, but as probes to test the stability of rocks ahead. Speed is your enemy; control is everything.
Knowing which technique to apply comes from experience and a quick assessment of the rock size and stability. Mastering both allows you to adapt and move safely through one of the most dynamic environments in the mountains.
Deep Lugs vs Shallow Tread: Which Is Safer on Slick Sandstone?
On muddy or loose trails, deep, aggressive lugs on a shoe’s outsole are king. They bite into the soft ground, providing excellent traction. However, this logic completely reverses when you step onto smooth, slick sandstone or granite slabs. On this kind of surface, those deep lugs become a liability, and a shallower tread pattern offers a demonstrably safer grip. The reason is simple physics: surface contact area.
Friction is a direct function of the surface area in contact between two objects. Deep lugs create voids, significantly reducing the amount of rubber that is actually touching the rock. A shallower, more continuous tread pattern, or even a completely smooth “climbing zone” on the outsole, allows the shoe to maximize its contact with the rock. In fact, friction testing demonstrates that shallow tread patterns provide 35-40% more surface contact area on smooth sandstone compared to deep lugs. This increased contact translates directly into more friction and a more secure feeling, especially when smearing.
This is why high-performance approach shoes and climbing shoes often feature a smooth or finely textured patch of rubber under the big toe and ball of the foot. Manufacturers understand that on technical rock, maximizing the rubber-on-rock connection is the ultimate priority. This design choice is a deliberate trade-off, sacrificing performance in deep mud for superior security on technical slabs and scrambles. It highlights the importance of choosing footwear specifically for the most challenging terrain you expect to encounter on your day, not for the walk from the car.
So, while a boot with deep lugs might feel safer on the muddy approach trail, the shoe with the shallower tread will provide a greater margin of safety on the exposed, slick-rock crux of your route. The next time you look at footwear, don’t just assess the depth of the lugs; consider the type of terrain where safety matters most and choose the tread pattern that maximizes friction there.
The safest tread is not the deepest, but the one best matched to the most critical and dangerous surface you will cross.
How to Train Your Proprioception for Safer Hiking on Loose Rocks?
What separates a nimble mountain goat from a stumbling hiker? More than anything, it’s a highly developed sense of proprioception. Often called the “sixth sense,” proprioception is your body’s innate ability to know where its parts are in space without having to look. It’s the silent, constant feedback loop between the nerves in your muscles and joints and your brain that allows you to make thousands of instantaneous micro-adjustments to maintain balance. On stable ground, this system runs on autopilot. On a field of loose, shifting rocks, it can become overwhelmed—unless it’s been trained.
Improving your proprioception doesn’t require a gym or fancy equipment. In fact, the best training ground is the outdoors itself. The goal is to consciously challenge your balance in controlled, low-consequence situations. This forces your nervous system to build stronger, faster pathways, improving your reaction time and stability when it counts. You are essentially upgrading your body’s internal GPS and stabilization system.
By regularly practicing simple drills, you can significantly enhance your safety margin on unstable terrain. These exercises are not about strength, but about neural conditioning. They teach your ankles, knees, and core to anticipate and react to instability before it becomes a fall. Here are some field-expedient drills you can incorporate into any hike:
- Eyes-Closed Rock Test: Stand on a wobbly rock with eyes shut for 5-10 seconds, focusing on micro-adjustments in your ankles.
- Silent Talus Hopping: Cross a 20-foot rock field without making any sound, forcing deliberate and balanced foot placement.
- Single-Leg Balance Challenge: Stand on one foot on uneven ground for 30 seconds, then switch, building ankle stability.
- Weight-Shifting Drill: Rock slowly from heel to toe on unstable surfaces, maintaining control throughout the movement.
- Core-to-Ground Connection: Practice engaging your core before each step on loose terrain, creating a stable kinetic chain.
Investing time in this training will pay far greater dividends for your safety and confidence than any new piece of gear. It is the fundamental skill that underpins all others in technical terrain.
Key Takeaways
- Mastering movement skills like smearing and proprioceptive balance provides more safety than any single piece of gear.
- The right technique and footwear are dictated by the specific terrain; there is no one-size-fits-all solution.
- Your mental state—awareness of fatigue and cognitive biases—is a critical component of your safety system.
The Rule of Threes: How to Prioritize Survival Actions in the First 24 Hours?
The “Rule of Threes” is a classic survival mnemonic that helps prioritize actions in an emergency. It states a human can generally survive for 3 minutes without air, 3 hours without shelter in extreme conditions, 3 days without water, and 3 weeks without food. This rule provides a vital framework for decision-making when a hike goes wrong. When you’re lost or injured, panic can lead to focusing on the wrong thing (like hunger). The Rule of Threes brings you back to what will kill you first.
For a hiker in technical terrain, however, this rule needs a critical modification. A fall might not be immediately fatal, but the environment can be. If you are injured and immobilized on an exposed rock slab or scree slope, a new, more urgent clock starts: heat loss through conduction. Lying on cold rock can drain your body heat with terrifying speed, leading to hypothermia even in moderate air temperatures. Therefore, a crucial addendum for mountain environments is the “30-minute rule”: wilderness medicine protocols establish that you have about 30 minutes to insulate your body from the cold ground before hypothermia becomes a life-threatening risk.
This means your first action after an immobilizing incident, after checking for immediate life-threatening bleeding, is not to build a shelter or find water. It is to get your emergency foam pad, your backpack, or even a coiled rope underneath you. This simple act of insulation is the most important survival action you can take in that first half-hour. But even before applying the Rule of Threes, you must first survive the first three seconds after an incident. This requires an automatic mental checklist:
- Second 1: Am I hurt? – Quick body scan for injuries, bleeding, or pain without moving unnecessarily.
- Second 2: Am I secure? – Assess immediate position stability and risk of further falls or exposure.
- Second 3: Am I visible? – Determine if rescue teams could spot you or if signaling is needed.
If the answer to any of these is ‘no,’ that becomes your absolute priority. Only once you are stable, safe from further harm, and have assessed your injuries can you begin working through the larger priorities of the Rule of Threes.
The next step is not to buy a bigger first-aid kit, but to take these movement principles and mental models to a safe, local environment. Begin to practice them consciously, so they become second nature. True safety is built through deliberate practice, not purchased at a store.