Contrary to popular belief, relying on stiff, high-top boots for ankle support is a flawed strategy that can weaken your body’s natural defenses. True stability on treacherous terrain comes not from external bracing, but from actively retraining your neuromuscular system. This guide focuses on developing your proprioceptive feedback loop, mastering functional lacing techniques, and refining your visual scanning to build resilient ankles that can adapt to any surface without restricting movement.
The sudden, sickening roll of an ankle on a patch of loose scree is a moment every hiker dreads. For those with a history of sprains, this fear can dictate every footstep, turning a beautiful trek into a high-anxiety ordeal. The conventional wisdom, repeated in countless forums and gear shops, offers a simple solution: lace up a pair of stiff, high-top boots. This external scaffolding is presented as the definitive answer to preventing injury, a rigid fortress to protect a vulnerable joint. But from a clinical and biomechanical perspective, this reliance on passive support is not just incomplete—it can be counterproductive.
By encasing the ankle in a rigid cast, we inadvertently engage in a process of neuromuscular de-skilling. The intricate network of muscles, ligaments, and nerves responsible for dynamic stabilization doesn’t get the stimulus it needs to stay sharp. It becomes lazy, dependent on the boot to do its job. The real key to conquering uneven ground without injury lies not in restricting movement, but in enhancing your body’s innate ability to control it. This is the principle of active, or dynamic stabilization.
This article will deconstruct the myth of the all-powerful boot and provide an orthopedic specialist’s framework for building true, functional ankle resilience. We will shift the focus from external gear to your internal guidance system. We’ll explore how to train your proprioception, optimize the gear you already have through advanced lacing, and correct the critical visual mistakes that lead to falls. The goal is to transform your ankles from a liability into a confident, responsive asset on the trail.
This comprehensive guide provides a clinical yet practical roadmap to building unshakeable ankle stability. Below is the structure we will follow to retrain your body and mind for the trail.
Summary: A Hiker’s Guide to Building Functional Ankle Resilience
- Why High-Top Boots Don’t Guarantee Ankle Safety Without Strong Muscles?
- How to Train Your Proprioception for Safer Hiking on Loose Rocks?
- Lock Lacing vs Surgeon’s Knot: Which Holds the Heel Better?
- The Visual Mistake That leads to 80% of Ankle Sprains on Descents
- What to Do Immediately After Twisting an Ankle 5 Miles from the Trailhead?
- How to Use the ‘Smearing’ Technique on Smooth Rock Slabs?
- Why Lightweight Boots May Increase Ankle Fatigue on Multi-Day Treks?
- How to Navigate Technical Terrain Safely Without Technical Climbing Gear?
Why High-Top Boots Don’t Guarantee Ankle Safety Without Strong Muscles?
The high-top hiking boot is marketed as the ultimate defense against ankle injuries, a tall leather or synthetic guardian standing watch over your ligaments. While they do offer protection from direct impacts and can provide a physical barrier against extreme ankle rolling, their role in preventing common sprains is widely misunderstood. The feeling of security they provide is often a double-edged sword. Over-reliance on rigid external support can lead to a weakening of the ankle’s intrinsic musculature, a phenomenon known as neuromuscular de-skilling.
From a biomechanical standpoint, the body adapts to the support it’s given. When a stiff boot collar does the work of stabilizing the joint, the peroneal tendons and other supporting muscles are not required to fire as frequently or as forcefully. Over time, this lack of stimulus leads to weakness and a dulled proprioceptive sense. Furthermore, this rigidity can shift stress to other joints. In fact, research comparing boot shaft stiffness shows that stiffer boots limit ankle range of motion and cause greater knee joint loading, potentially trading one injury risk for another.
This creates a dangerous dependency. A hiker who has only ever used stiff boots may have underdeveloped stabilizing muscles, making them even more vulnerable when they switch to lighter footwear or are caught in an awkward position that overcomes the boot’s support. According to clinical observations, a significant portion of individuals who suffer an ankle sprain go on to develop Chronic Ankle Instability (CAI), particularly when they prioritize external support over building internal strength. The boot should be seen as a tool that works in concert with strong, well-trained muscles, not as a substitute for them. The true foundation of ankle safety is the dynamic stabilization provided by your own body.
How to Train Your Proprioception for Safer Hiking on Loose Rocks?
If strong muscles are the engine of ankle stability, then proprioception is the guidance system. Proprioception is your body’s “sixth sense”—the unconscious awareness of where your limbs are in space. It’s a constant feedback loop between sensors in your muscles and ligaments and your central nervous system. On a field of loose rocks or scree, a well-tuned proprioceptive system can detect a slight wobble and trigger a corrective muscle contraction in milliseconds, long before your conscious mind even registers the instability. Relying solely on boots dulls this sense; actively training it is the key to navigating treacherous terrain with confidence.
Training proprioception doesn’t require a gym. The best place to hone this skill is on the trail itself, by intentionally and safely challenging your balance. This involves moving beyond simply walking and incorporating specific drills that force your neuromuscular system to adapt and respond. The goal is to make these micro-corrections automatic and reflexive. A small, unstable rock becomes a training opportunity rather than a hazard.
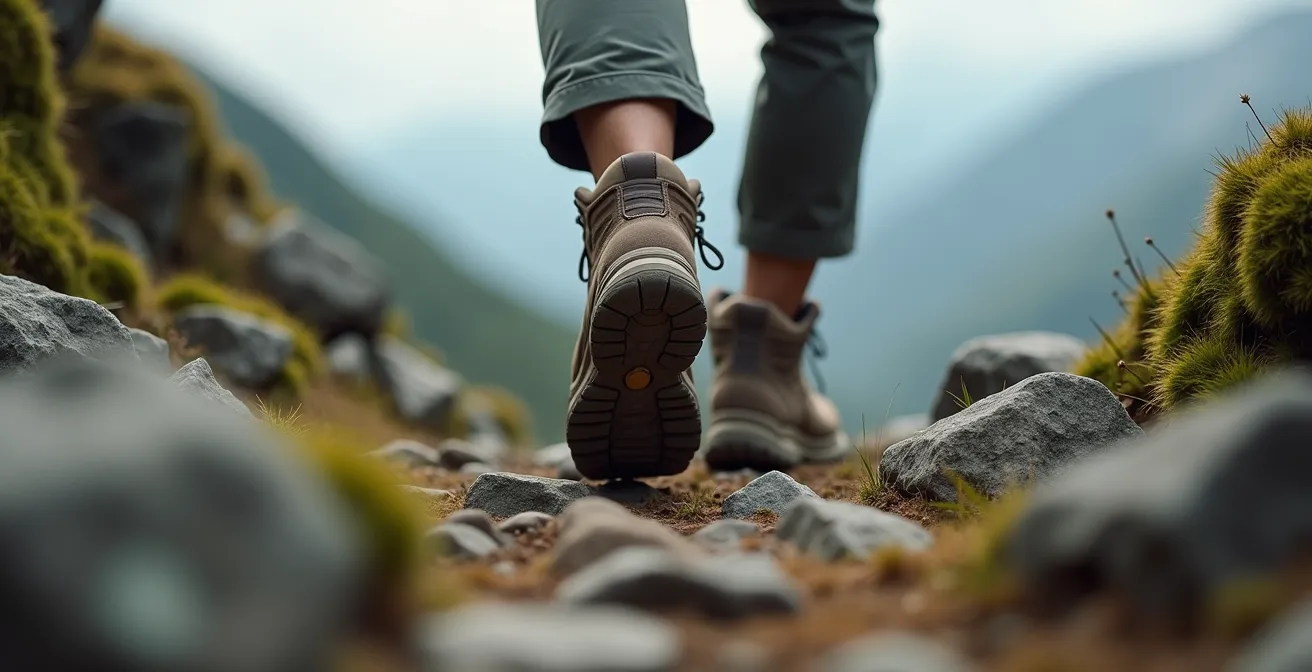
This image demonstrates the core of proprioceptive training: engaging the foot and ankle on an uneven surface to stimulate the neuromuscular response.
Notice the engagement required to maintain balance. This is the feeling you want to cultivate. By practicing controlled instability, you are essentially “calibrating” your ankle’s internal GPS. The following routine can be integrated into the first 15 minutes of any hike to prime your proprioceptive pathways for the challenges ahead.
Your On-Trail Proprioceptive Calibration Routine
- First 5 minutes: Start with heel-to-toe walks on flat sections of the trail to wake up your balance and fine motor control.
- Minutes 6-10: Find stable, flat-topped rocks and practice single-leg stands, aiming for 30 seconds on each leg. Focus on minimizing wobbles.
- Minutes 11-15: Introduce dynamic movement by performing “airplane” movements—hinging at the hips and rotating your arms and shoulders while balancing on one leg.
- Throughout the hike: At rest stops, perform a few single-leg Romanian Deadlifts (RDLs) by hinging at the hip while keeping your back straight. This builds strength and balance simultaneously.
- Advanced practice: For an added challenge, perform slow and controlled hip circles (rotating your lifted leg in a 180° arc) while maintaining balance on the standing leg.
Lock Lacing vs Surgeon’s Knot: Which Holds the Heel Better?
Even with strong muscles and sharp proprioception, the interface between your foot and your boot is critical. A foot that slides inside the boot, especially on steep descents, is a major cause of instability and blisters. The primary goal of any lacing strategy is not just tightness, but achieving a secure heel lock. This prevents your heel from lifting and your foot from slamming into the front of the boot. While standard criss-cross lacing is quick, it often fails to provide this targeted security. Two advanced techniques, Lock Lacing (also known as a “runner’s loop”) and the Surgeon’s Knot, offer far superior performance.
The Surgeon’s Knot is a simple modification where you wrap the laces around each other an extra time at a specific point. This creates friction that locks the tension below the knot, allowing you to have different tightness levels in the forefoot and ankle area. It’s fast and effective for general security.
Lock Lacing is a more specialized technique. It utilizes the extra, often-ignored eyelets at the very top of your boots. By creating a loop on each side and passing the lace through the opposite loop, you create a pulley system. When tightened, this system cinches down securely around the ankle, providing an unmatched heel lock. It is the gold standard for preventing heel slip on descents. Choosing the right technique depends on your specific needs, foot shape, and the terrain.
The following table provides a clear comparison of common lacing methods, evaluated on the factors most crucial for trail stability. This data is synthesized from expert recommendations and biomechanical principles to help you make an informed choice.
| Technique | Heel Lock Rating | Pressure Distribution | Risk of Nerve Compression | Adjustment Speed |
|---|---|---|---|---|
| Lock Lacing | Excellent (9/10) | Concentrated at ankle | Moderate if overtightened | Slow (2-3 min) |
| Surgeon’s Knot | Very Good (8/10) | Even across midfoot | Low | Fast (30 sec) |
| Window Lacing | Good (7/10) | Customizable zones | Very Low | Moderate (1-2 min) |
| Standard Criss-Cross | Fair (5/10) | Uniform | Low | Very Fast (20 sec) |
The Visual Mistake That leads to 80% of Ankle Sprains on Descents
Ankle stability is not just a function of your feet and ankles; it’s a direct result of how your brain processes visual information. The most common and dangerous visual mistake hikers make, especially on steep, technical descents, is target fixation on their feet. Staring directly at the spot where your foot is about to land narrows your field of view and forces your brain into a reactive, last-second decision-making mode. This eliminates your ability to plan ahead and creates a jerky, unstable gait. It’s estimated that this single error contributes to the vast majority of non-contact ankle injuries on downhills.
Elite trail runners and seasoned hikers practice a different approach: visual-motor synchronization. They use their eyes to scan ahead, gathering data about the trail 10 to 20 feet in front of them. Their brain pre-selects a sequence of 3-4 optimal foot placements, and their feet follow this “mental map” while their eyes are already scanning the next segment of trail. The actual foot placement occurs in their peripheral vision. This “look-step-look” rhythm creates a fluid, forward-moving, and proactive gait that is far more stable.
This skill requires conscious practice to override the instinctive urge to watch your feet. As experienced trail runners often report, developing this automatic visual processing is one of the biggest factors in improving stability and confidence on rooty, rock-strewn trails. To build this skill, you must consciously train your eyes to work in tiers:
- Long-Range Scan (20-30 feet ahead): This is for route-finding. You’re identifying the general path, large obstacles like fallen logs, and the overall flow of the trail.
- Mid-Range Scan (10-15 feet ahead): This is the crucial zone for foot placement planning. You are pre-selecting your next 3-4 steps, noting the size, angle, and stability of rocks or roots.
- Near-Range Awareness (0-5 feet): This is handled by your peripheral vision. You don’t stare here. You trust the map you created in the mid-range scan and allow your highly-trained proprioceptive system to handle the final placement.
- Practice Soft Focus: Instead of a hard, narrow gaze, relax your eyes. This maximizes your peripheral awareness, allowing you to take in more information about the terrain around you without turning your head.
What to Do Immediately After Twisting an Ankle 5 Miles from the Trailhead?
Even the best-prepared hiker can suffer an ankle sprain. When it happens deep in the backcountry, panic is a real danger. Knowing a clear, immediate action protocol is not just helpful—it is a critical safety skill. The moment you feel that sharp pain and your ankle gives way, stop. Do not try to “walk it off.” The first few minutes and hours after the injury will significantly impact your recovery time and your ability to self-evacuate safely. The standard R.I.C.E. protocol (Rest, Ice, Compression, Elevation) is the foundation, but it needs to be adapted for a wilderness context and expanded to include Stabilization (R.I.C.E.S.).
The first step is to sit down, remove your boot to assess the damage, and calm your breathing. Assess the severity: can you bear any weight on it at all? Is there obvious deformity? If there is deformity or you cannot bear any weight, you are dealing with a severe injury that likely requires assistance. For a mild to moderate sprain, where you can bear some weight, the goal is to manage swelling and stabilize the joint for the hike out. This is where the R.I.C.E.S. protocol comes into play.
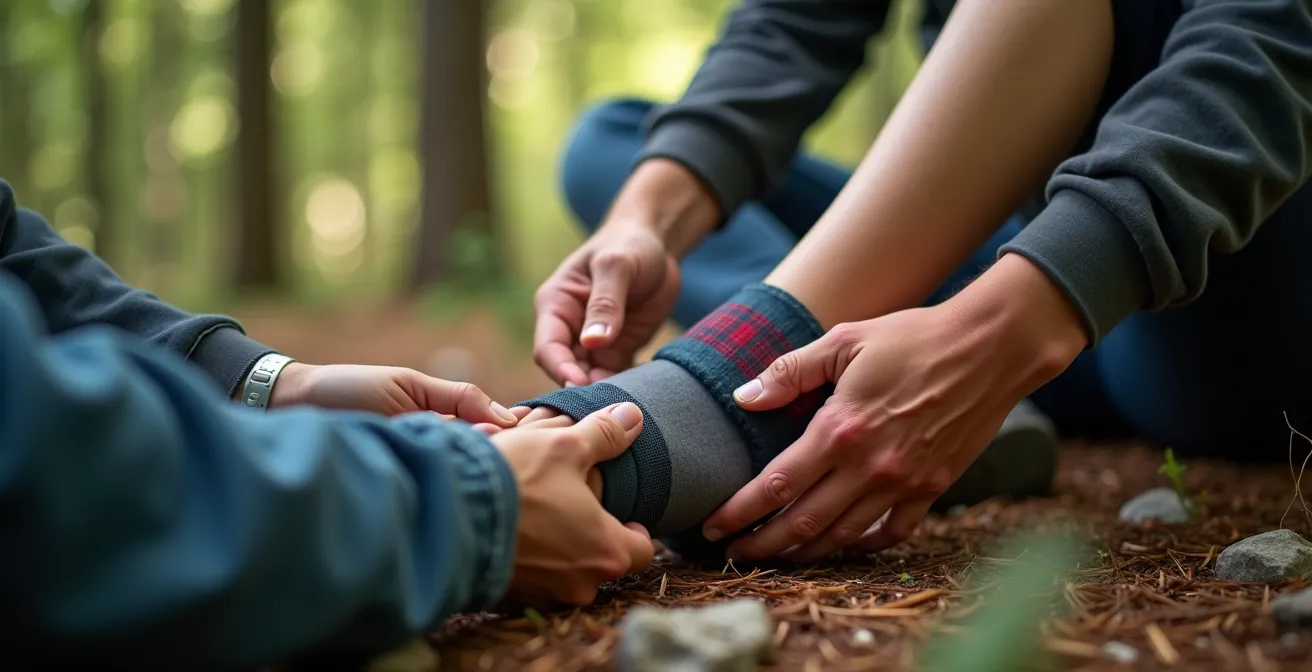
Improvising is key. Ice can be snow from a nearby patch or a bandana soaked in a cold mountain stream. Compression can be an ACE bandage from your first-aid kit. Elevation is as simple as propping your foot up on your pack. Stabilization is where you can get creative, using trekking poles, sticks, and tape to create a makeshift splint that limits further movement during the walk out, as shown below.
The following steps should be performed immediately:
- Rest: Stop all activity immediately. Take the weight off the ankle to prevent further injury.
- Ice: If available, apply ice or a cold compress for up to 20 minutes. A cold stream is an excellent substitute. This will reduce swelling and numb the pain.
- Compression: If you have an elastic or compression wrap, apply it to the ankle. Start at the toes and wrap upwards, covering the foot and ankle. It should be snug but not cut off circulation.
- Elevation: Elevate the injured ankle above the level of your heart to help gravity drain fluid and reduce swelling.
- Stabilization: Before attempting to hike out, stabilize the joint. Use tape, a brace, or a makeshift splint to prevent the ankle from rolling again.
Continue R-I-C-E-S for 72 hours following the injury. Take an anti-inflammatory, like ibuprofen, up to three times per day.
– American Hiking Society, Ankle Injury Treatment Guidelines
How to Use the ‘Smearing’ Technique on Smooth Rock Slabs?
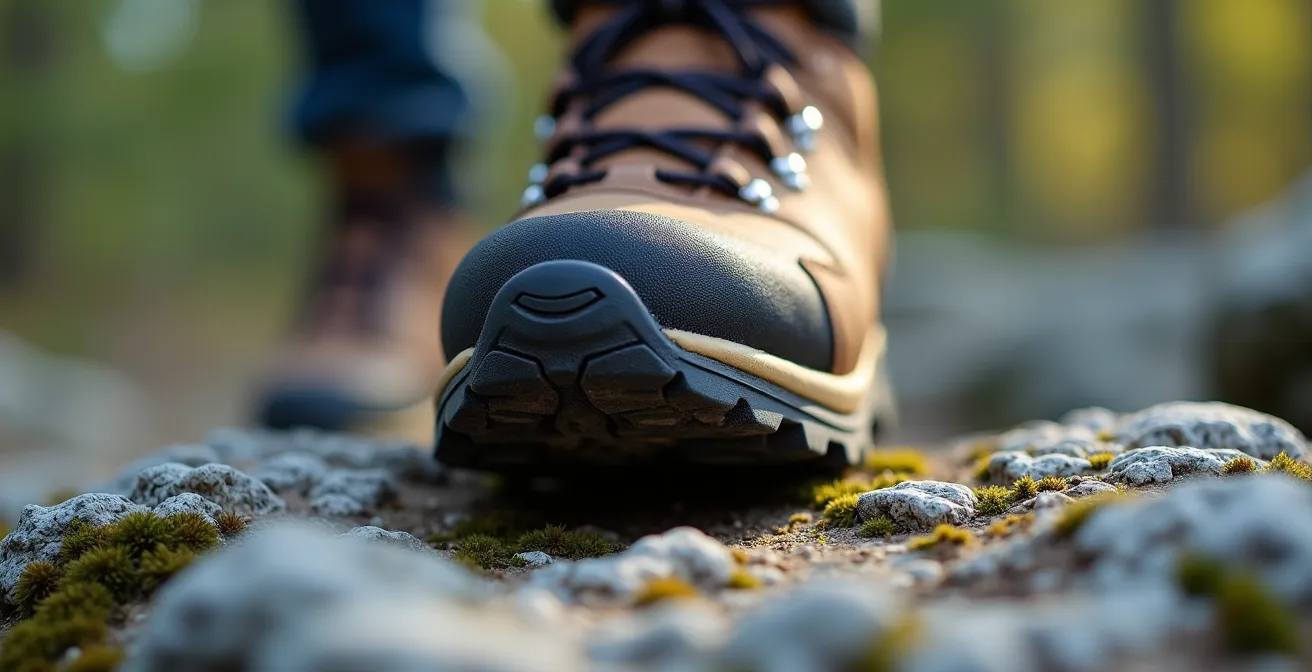
Navigating large, smooth, angled rock slabs (friction slabs) presents a unique challenge to ankle stability. Unlike on rocky trails where you seek out edges and footholds, smearing is a technique borrowed from rock climbing that relies purely on friction. It requires immense trust in your footwear and, more importantly, in the subtle control of your ankles and body position. This is where all your proprioceptive training comes to a head. Mastering smearing is a sign of true ankle confidence and control.
The core principle of smearing is to maximize the surface area contact of your boot’s sole with the rock. Instead of using the edge of your boot, you place your foot flat against the slab. The magic happens when you transfer your weight. You must commit your body weight slowly and deliberately over your planted foot, bending your knees and dropping your center of gravity to “press” the rubber into the rock’s microscopic irregularities. This generates the friction needed to hold you in place.
Ankle stability is paramount here. Your ankle must remain steady and strong, preventing any slight roll that would break the frictional bond. It acts as a solid platform, transferring power from your legs directly into the rock face. Building confidence in this technique should be a gradual process, starting on low-angle, textured rock and progressing as your skill and trust in your body increase.
- Start on low-angle slabs: Find a slab with a 10-15 degree angle and a grippy, sandpaper-like texture.
- Practice weight transfer: With your hands for balance, place your foot flat on the slab and slowly shift your weight onto it. Feel how the friction increases with pressure.
- Drop your center of gravity: The lower your hips are to the slab, the more stable you’ll be. Bend your knees and hips deeply, keeping your heel down as much as possible.
- Test friction incrementally: Before fully committing, test the hold by applying 25%, then 50%, then 75% of your body weight.
- Progress to steeper angles: Only move to steeper or smoother slabs after you feel completely secure on easier terrain. Always practice in dry conditions first.
Why Lightweight Boots May Increase Ankle Fatigue on Multi-Day Treks?
The conversation around ankle support often devolves into a simple “high-top vs. low-top” debate. However, a far more nuanced factor impacting your ankle health on long treks is the interplay between boot weight and midsole stiffness. While a lighter boot or trail runner feels liberating and requires less energy to lift with each step, this advantage can become a liability over long distances with a heavy pack. The issue is accumulated muscle fatigue.
A sturdier backpacking boot features a thicker, less flexible midsole. This structure does some of the work for the small muscles in your feet and ankles. It acts as a rigid lever, helping to absorb impact and maintain the foot’s arch under the load of a heavy pack. A lightweight, flexible trail runner, by contrast, forces these intrinsic foot muscles to work much harder with every single step to stabilize the foot and absorb shock. While this is excellent for strengthening on a short day hike, over the course of a 15-mile day with a 30-pound pack, this constant, low-level effort can lead to significant fatigue.
A fatigued muscle is an ineffective stabilizer. As the small muscles in your feet and lower legs tire, your proprioceptive feedback dulls, and your reaction time slows. Your gait becomes sloppier. This is when you’re most likely to misjudge a foot placement or fail to correct a slight wobble, leading to an ankle roll late in the day. Therefore, the “best” boot is not simply the lightest one, but the one that strikes the right balance between weight and support for the specific demands of your trip.
Choosing the right footwear requires a trade-off. As this a comparative analysis of boot types shows, what you gain in weight savings you may lose in long-term support and fatigue resistance, a crucial consideration for multi-day journeys.
| Boot Type | Weight Range | Midsole Thickness | Best For | Fatigue Onset |
|---|---|---|---|---|
| Trail Runners | 10-16 oz | 15-20mm | Day hikes, light loads | 4-6 hours |
| Day Hiking Boots | 20-28 oz | 20-25mm | Moderate terrain, medium loads | 6-8 hours |
| Backpacking Boots | 32-40 oz | 25-35mm | Heavy loads, rough terrain | 8-10+ hours |
Key Takeaways
- True ankle stability comes from trained neuromuscular control (proprioception), not from relying on stiff boots.
- Mastering advanced lacing techniques like the “Lock Lace” is crucial for securing your heel and making your boot work with you.
- The biggest cause of falls on descents is a visual error: staring at your feet. Train a “look-step-look” scanning rhythm instead.
How to Navigate Technical Terrain Safely Without Technical Climbing Gear?
You’ve strengthened your muscles, honed your proprioception, and optimized your gear. The final step is to integrate these skills into a holistic movement philosophy for navigating any technical terrain—be it a steep talus field, a path of slick roots, or an off-camber trail. This is not about speed; it’s about deliberate, efficient, and exceptionally safe movement. The “Hunter’s Gait” is a useful mental model for this approach: move through the wilderness with the quiet intention and situational awareness of a predator, making every step count.
This technique is a synthesis of all the principles we’ve discussed. It demands a lower center of gravity, constant core engagement, and the use of trekking poles not as crutches, but as dynamic probes and balance points. It’s about placing each foot with full commitment and minimizing impact. By practicing “quiet feet,” you are forced to control your movements and place your feet precisely, rather than crashing down and hoping for the best. This slow, deliberate pace conserves energy and gives your visual and proprioceptive systems ample time to process the terrain and react accordingly.
This method transforms hiking from a simple act of walking into a full-body engagement with the landscape. It requires you to be present and focused, turning a potentially hazardous section of trail into a rewarding physical puzzle. This is the ultimate expression of dynamic stabilization in action.
- Reduce your pace: Slow down to 50-60% of your normal hiking speed. This is about safety, not speed.
- Place each foot deliberately: Commit your full weight to each step only after you are certain of the placement.
- Maintain three-point contact: Whenever possible on steep or exposed sections, keep two feet and one hand, or one foot and two poles, in contact with the ground.
- Use poles as probes: Use your trekking poles to test the stability of rocks or the depth of mud before you step.
- Keep your core engaged: A tight core and low hips provide a stable platform from which your limbs can move.
- Practice ‘quiet feet’: Try to move without making noise. This forces you to control your footfalls and place your feet with precision.
The journey to resilient ankles begins with a mental shift. Stop outsourcing your stability to your boots and start investing in the most sophisticated piece of gear you own: your own body. By committing to this movement-first approach, you transform fear and vulnerability into confidence and control, allowing you to tackle any trail with the assurance that you are your own best protection.