The performance of a waterproof-breathable boot is not dictated by the membrane’s brand, but by the user’s management of the entire footwear system.
- Internal moisture (sweat) is often a bigger problem than external water, as even the best membranes have a limited sweat-evaporation capacity.
- Breathability is easily compromised by external contaminants (dirt, oil) and internal user errors (improper socks, untrimmed toenails, over-waxing).
Recommendation: Adopt a holistic, system-based approach. Actively manage moisture from within, maintain your boots with proper techniques, and understand when non-waterproof options are superior.
It’s a frustration every serious hiker knows: that familiar, clammy feeling inside a pair of expensive waterproof boots, even on a dry day. You invested in top-tier technology, perhaps debating the merits of Gore-Tex versus eVent, only to find your socks are damp with sweat. This experience leads many to question the very concept of “waterproof-breathable” technology. The common debate focuses on which membrane is superior, but this misses the fundamental point. From a textile science perspective, the brand name on the tag is far less important than how the entire footwear ecosystem is managed.
The truth is, the promise of a perfectly dry foot under high-exertion is a marketing ideal, not a physical reality. The failure point is rarely a single component but rather a breakdown in the system as a whole. This includes everything from the socks on your feet and the insoles beneath them to the dirt caked on the outside and the treatments used to clean and protect the leather. The membrane is just one part of a complex equation governing moisture and comfort.
This guide abandons the simplistic brand-versus-brand debate. Instead, we will conduct a scientific investigation into the common failure points of waterproof footwear. We’ll explore why your boots feel damp, how maintenance mistakes can suffocate the membrane, and why sometimes the most advanced solution is to ditch waterproofing altogether. By understanding your footwear as a complete system, you can move beyond the marketing hype and finally achieve consistent comfort on the trail.
This article breaks down the key factors that compromise your boots’ performance. By examining each element, you’ll gain a complete understanding of how to manage your entire footwear system for maximum breathability and comfort.
Summary: A Scientific Guide to Footwear Performance
- Why Your Waterproof Boots Feel Damp Inside Even Without Leaks?
- How to Unclog Membrane Pores to Restore Breathability After a Muddy Hike?
- Non-Waterproof Boots: Why They Are Safer for River Crossings in Summer?
- The Toenail Mistake That Punctures Waterproof Membranes from the Inside
- How to Test Your Membrane Integrity in a Bathtub Without Damaging the Boot?
- Why Aluminum-Faced Insoles Can Cause Sweaty Feet and How to Fix It?
- Why Over-Waxing Your Boots Causes Sweaty Feet on the Trail?
- Why Dish Soap Ruins Leather Boots and What to Use Instead?
Why Your Waterproof Boots Feel Damp Inside Even Without Leaks?
The primary reason your waterproof boots feel damp is often internal, not external. The culprit is sweat. During high-output activities, the human foot can produce a significant amount of moisture. While waterproof-breathable membranes are designed to allow this water vapor to escape, their capacity is finite. This capacity is measured scientifically as the Moisture Vapor Transmission Rate (MVTR), typically in grams of water per square meter per 24 hours (g/m²/day).
When your rate of perspiration exceeds the boot’s MVTR, moisture accumulates inside faster than it can escape, leading to damp socks and a clammy feeling. According to field test analysis, products with an MVTR rating between 10,000-15,000 g/m²/day are considered suitable for intense hiking, but even this can be overwhelmed during strenuous ascents or in warm weather. This issue is compounded by a phenomenon called “wet-out,” where the boot’s outer fabric becomes saturated with water. This film of external water blocks the membrane’s pores from the outside, effectively shutting down breathability and trapping all sweat inside, even if the membrane itself isn’t leaking.
To combat this, active moisture management is key. This begins with pre-activity preparation, such as applying antiperspirant to your feet and choosing moisture-wicking socks made from merino wool or synthetics, which pull sweat away from the skin. During long hikes, consider rotating between two pairs of socks to give one pair time to dry. Proactively airing out your feet during breaks can make a significant difference. After the hike, immediate post-activity care, like removing boots and using moisture-absorbing inserts, is crucial for preventing microbial growth and ensuring the boots are dry for their next use.
How to Unclog Membrane Pores to Restore Breathability After a Muddy Hike?
A membrane’s breathability is entirely dependent on its microscopic pores remaining open. After a muddy hike, these pores can become clogged with dirt, silt, and oils from the environment. Internally, sweat crystallizes into salt deposits that can also block the membrane. This pore contamination effectively suffocates the boot, turning a breathable piece of technology into a simple rubber shell. Restoring breathability requires a more thorough cleaning than a simple rinse.
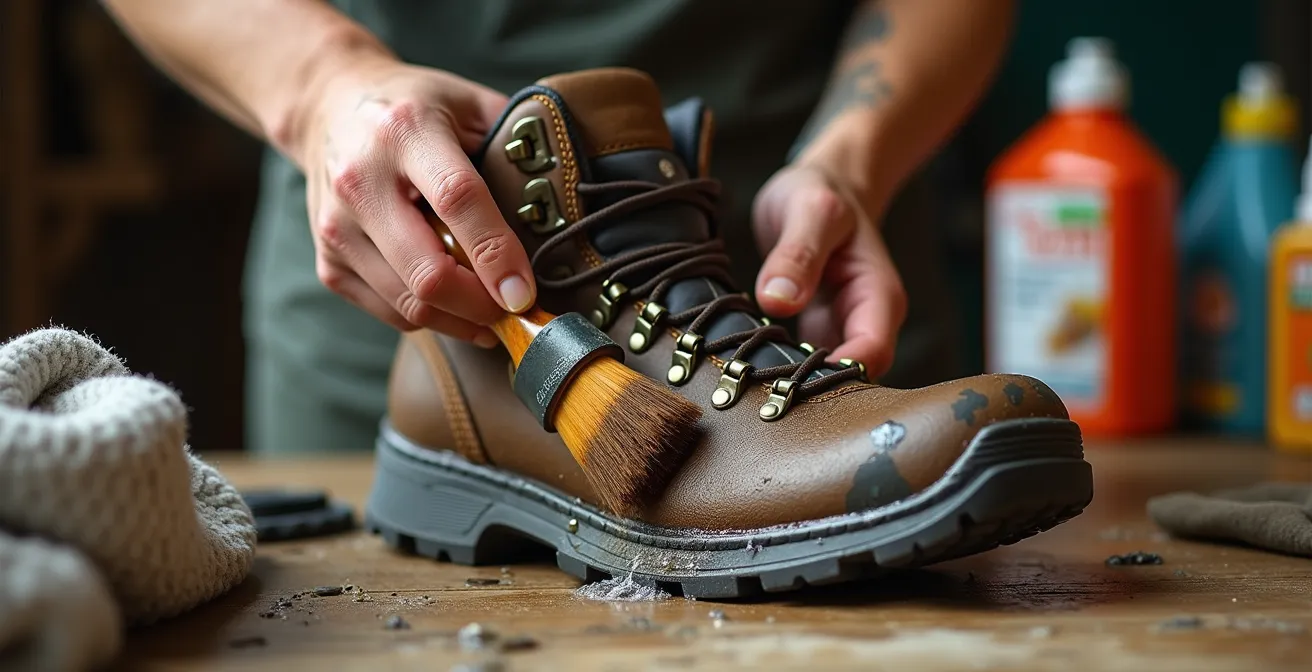
A deep clean is a systematic process aimed at clearing contaminants from both sides of the membrane. Follow this restoration protocol for best results:
- Initial Preparation: Begin by removing the laces and insoles. Use a soft brush to remove all loose and dried mud, paying special attention to seams, flex points, and the gusseted tongue where debris accumulates.
- External Cleaning: Instead of harsh soaps, use a specialized technical wash like Nikwax Footwear Cleaning Gel. This is formulated to gently lift dirt without stripping factory water-repellent coatings or leaving residues that harm the membrane. Apply it and scrub gently.
- Internal Flushing: To dissolve internal salt and oil deposits, fill the boots with lukewarm water mixed with a small amount of a technical footwear wash. Let them sit for about 30 minutes to allow the solution to break down the buildup.
- Thorough Rinsing: This step is critical. Rinse the inside and outside of the boots multiple times with clean, cool water until absolutely no suds or residue remains. Lingering soap is a primary cause of reduced breathability.
- Re-Waterproofing: Once clean, it’s time to restore the Durable Water Repellent (DWR) finish on the exterior. If you notice the outer fabric absorbs water (wets out), it’s a sign the DWR has worn off. Applying a treatment like Nikwax Nubuck & Suede Proof will ensure water beads up and rolls off, protecting the membrane’s ability to breathe.
Non-Waterproof Boots: Why They Are Safer for River Crossings in Summer?
The obsession with waterproofing can sometimes be counterproductive, especially in summer conditions involving inevitable water entry, like deep river crossings. While a waterproof boot provides excellent protection against puddles and light rain, it becomes a liability once water overtops the collar. The same membrane that keeps water out also keeps it in, creating a “bucket effect.” This trapped water adds significant weight, compromises stability, and creates a perfect breeding ground for bacteria, leading to blisters and other foot issues. As many hikers report from field experience, “If it is wet it is worth it, if it not your feet generally sweat too much with the membrane.”
Conversely, non-waterproof boots, made from mesh and other porous materials, become saturated immediately but also begin to drain the moment you are back on land. Their design prioritizes rapid drying and airflow over initial water resistance. In a warm-weather scenario, a non-waterproof boot can go from submerged to merely damp in a matter of minutes and be completely dry within a few hours of hiking, whereas a swamped waterproof boot can take 24-48 hours to dry fully. As a comparative analysis shows, a waterproof shoe simply won’t breathe nearly as well as a non-waterproof design, a factor that is magnified when the boot is wet.
| Factor | Waterproof Boots | Non-Waterproof Boots |
|---|---|---|
| Initial Water Entry | Protected until water overtops collar | Immediate saturation |
| Post-Crossing Weight | Heavy if water enters (trapped inside) | Temporarily heavy, drains quickly |
| Drying Time | 24-48 hours if water enters | 4-8 hours with good ventilation |
| Breathability When Wet | If you’re sealing moisture out, that also means you’re sealing it in. This means a waterproof shoe won’t breathe nearly as well as a non-waterproof design, no matter how much it advertises breathability. | Maintains airflow through fabric |
| Bacterial Growth Risk | High in trapped water environment | Lower due to faster drying |
The Toenail Mistake That Punctures Waterproof Membranes from the Inside
One of the most overlooked causes of membrane failure is not external abrasion, but internal damage inflicted by the wearer’s own foot. A waterproof-breathable membrane is an incredibly thin, delicate layer of expanded polytetrafluoroethylene (ePTFE). While protected by inner liners and outer fabrics, it is highly susceptible to repetitive friction and puncture from within. The most common culprit is an improperly trimmed toenail.
A toenail that is too long, or one that is cut with sharp, square edges, acts like a tiny blade inside the boot. With every step, especially on descents when the foot slides forward, this sharp edge repeatedly presses and rubs against the boot’s inner lining. Over thousands of steps, this persistent abrasion can wear through the liner and puncture the fragile membrane. This creates a microscopic hole that is invisible to the naked eye but large enough to allow water molecules to seep in, compromising the entire waterproofing system. Field reports from long-distance hikers often note that even the most robust waterproof membranes hold up for one or two years at best, and internal abrasion is a leading factor in this limited lifespan.
Preventing this self-inflicted damage requires diligent foot care and a proper boot fit. It’s not just about the boots; it’s about preparing your body for the demands of the trail. Integrating a pre-trek protocol into your routine is the most effective defense against this hidden form of wear and tear.
Your Boot System Performance Audit Plan
- Internal Environment Assessment: Before your hike, inspect your insoles for signs of compression, which reduces cushioning and airflow. Verify your socks are made of moisture-wicking materials (merino/synthetics), not absorbent cotton.
- Membrane Integrity Check: If you suspect a leak, perform the bathtub test (as detailed in the next section) to definitively diagnose whether you have a true puncture or a breathability issue.
- External Surface Analysis: Mist the outside of your boots with water. If the water soaks in (“wets out”) instead of beading, your DWR coating has failed and needs reapplication to maintain breathability.
- Pore Contamination Review: Closely examine high-flex areas, seams, and the tongue for ingrained dirt or a shiny residue, which can indicate pore-clogging from improper cleaning agents.
- Action Plan Formulation: Based on your findings, create a specific maintenance plan. This could include scheduling a deep clean, reapplying DWR, replacing worn insoles, or simply ensuring proper toenail care before your next outing.
How to Test Your Membrane Integrity in a Bathtub Without Damaging the Boot?
When your feet get damp, the immediate question is: is my boot leaking, or is it just not breathing? Misdiagnosing the problem can lead to frustration and unnecessary expense. Fortunately, there is a simple, definitive test you can perform at home to determine if the waterproof membrane has been physically compromised. The logic is straightforward: if a hole is large enough for water to get in, it’s also large enough for water to get out.
This test involves filling the boot with water and observing if it leaks outwards. It’s a reliable method, but it must be done correctly to avoid damaging the boot’s other components or misinterpreting the results. Force-drying a boot after this test can cause leather to shrink and crack, so patience is key. The goal is diagnosis, not destruction. Here is the safe and effective protocol for testing your membrane’s integrity.
- Prepare the Boot: First, remove the insole. It serves no purpose in this test and will only become waterlogged, significantly increasing drying time. Also, remove the laces to allow for easier handling and observation of the tongue area.
- Fill with Water: Place the boot in a dry bathtub or sink. Carefully fill the boot with cool or lukewarm water up to the ankle collar. Do not use hot water, as it can potentially affect the adhesives used in the boot’s construction.
- Wait and Observe: The crucial step is patience. Let the boot stand for at least 15-20 minutes. Carefully inspect the entire exterior of the boot for any signs of water seeping through. Look for small, dark wet spots forming on the leather or fabric, or tiny drips appearing at the seams. A true leak will usually manifest within this timeframe.
- Interpret the Results: If you see water leaking out, you have confirmed a puncture in the membrane. If after 20 minutes there is absolutely no sign of leakage, it’s highly probable that your membrane is intact. Your damp-feet issue is almost certainly a result of trapped sweat due to a breathability problem (e.g., pore contamination or wet-out), not a leak.
- Safe Drying: You will now have a very wet boot. Do NOT place it near a radiator, fireplace, or use a hairdryer. Force-drying will ruin the materials. Stuff the boots loosely with newspaper (changing it every few hours) and place them in a well-ventilated room. Allow a full 24-48 hours for them to dry completely.
Why Aluminum-Faced Insoles Can Cause Sweaty Feet and How to Fix It?
In the quest for warm feet during winter activities, many hikers turn to thermal insoles, some of which feature a reflective aluminum layer. The marketing logic is simple: the aluminum reflects body heat back to the foot. However, this solution introduces a significant, often overlooked, problem for breathability. Aluminum is not just a poor insulator; it is a highly effective thermal conductor. In fact, aluminum conducts heat about 25 times faster than the foam or cork materials used in standard insoles.
This high thermal conductivity creates two issues. First, when you are inactive, the aluminum rapidly pulls heat away from your foot, making it feel colder. Second, and more importantly for this discussion, the solid, non-porous aluminum foil acts as a second, perfect vapor barrier at the bottom of your boot. It completely blocks any moisture from being wicked down into the lower layers of the insole, trapping all sweat directly against your sock. This effectively suffocates the boot from the bottom up, rendering the breathable membrane in the boot’s upper almost useless and creating a swampy microclimate.
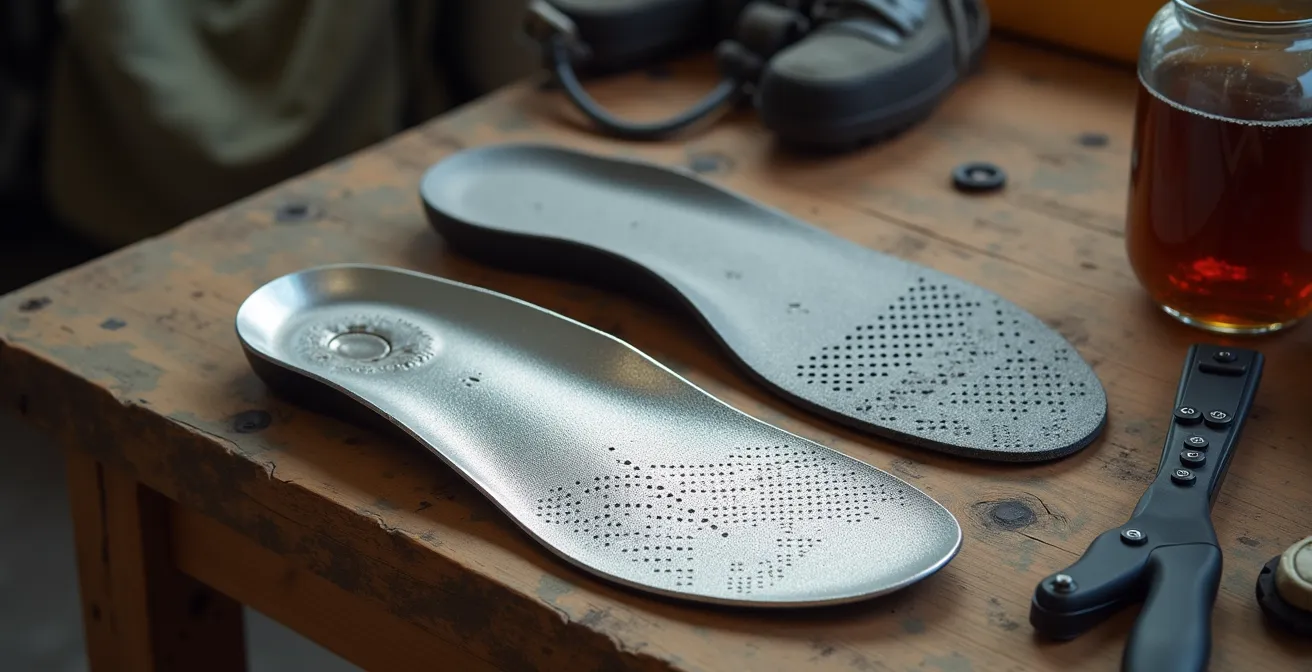
The solution is not to discard the insoles, but to modify them to restore airflow. By systematically perforating the aluminum layer, you can maintain some of its reflective properties while creating channels for moisture to escape. Using a small drill bit or an awl, you can create a grid of holes across the entire insole. This simple modification breaks the vapor barrier, allowing sweat to be wicked downwards and giving the boot’s main membrane a chance to do its job. For a better solution, consider insoles made from wool or other breathable, insulating materials that manage moisture without a metallic barrier.
Why Over-Waxing Your Boots Causes Sweaty Feet on the Trail?
For leather hiking boots, applying a waterproofing treatment is a crucial part of maintenance. It prevents the leather from drying out and cracking, and it creates a DWR finish that stops the outer material from “wetting out,” which is essential for breathability. As boot care specialists from HANWAG explain, this treatment is vital because “in wet conditions, it prevents a film of water building up on the outside of the boots. Among other things, that film of water can have a negative effect on breathability.”
So, why do we need waterproofing treatment? In wet conditions, it prevents a film of water building up on the outside of the boots. Among other things, that film of water can have a negative effect on breathability.
– HANWAG Boot Care Specialists, HANWAG Professional Boot Care Guide
However, more is not better. A common mistake is the over-application of heavy waxes, especially hot-wax treatments. While these provide excellent and durable water resistance, they achieve it by deeply impregnating the leather’s pores with a thick, non-porous wax. This process effectively seals the leather, which can severely reduce or even eliminate its natural breathability. When you over-wax a boot that also contains a waterproof-breathable membrane, you are essentially laminating the membrane between two non-breathable layers: the wax on the outside and the sweat-saturated sock on the inside. The membrane is completely suffocated.
The key is to choose the right treatment for your activity level and apply it sparingly. Light DWR sprays offer good water resistance with minimal impact on breathability, making them ideal for high-output use. Heavier wax applications should be reserved for more demanding, wet conditions where waterproofing is a higher priority than maximum breathability, and they should be applied as a thin layer, not caked on.
| Treatment Method | Water Resistance | Breathability Impact | Application Frequency |
|---|---|---|---|
| Light DWR Spray | Good (6-8 weeks) | Minimal reduction (5-10%) | Every 4-6 weeks |
| Cold Wax Application | Very Good (2-3 months) | Moderate reduction (20-30%) | Every 2-3 months |
| Hot Wax Treatment | Excellent (4-6 months) | Severe reduction (60-80%) | Once per season maximum |
| Silicone-based Spray | Good (4-6 weeks) | Low reduction (10-15%) | Every 3-4 weeks |
Key Takeaways
- It’s a System, Not a Single Part: Foot comfort is determined by the interplay of socks, insoles, boot materials, user maintenance, and activity level—not just the membrane brand.
- Sweat Is the Main Enemy: In most non-raining conditions, internal moisture (sweat) is a greater challenge than external water. Your perspiration rate can easily exceed a boot’s maximum breathability (MVTR).
- Maintenance Is Performance: Breathability is not a permanent feature. It must be maintained through proper cleaning to remove pore-clogging contaminants and by reapplying DWR to prevent “wet-out.”
Why Dish Soap Ruins Leather Boots and What to Use Instead?
When faced with a pair of muddy boots, it can be tempting to reach for the most convenient cleaner available: dish soap. This is a critical error that can cause irreversible damage to leather boots and compromise the function of any integrated membrane. The problem lies in the chemical composition of dish soap. It is a surfactant and a powerful degreaser, designed to strip grease and oil from dinner plates.
When applied to leather, these same properties strip away the essential natural oils that keep the material supple, strong, and water-resistant. This process leaves the leather dry and brittle, making it prone to cracking, especially in high-flex areas. These cracks can eventually propagate through to the waterproof membrane, creating leaks. Furthermore, dish soaps often contain fragrances, dyes, and other additives that can leave a residue. This residue can clog the microscopic pores of both the leather and the ePTFE membrane, severely impairing the boot’s breathability long after it has been rinsed.
Instead of harsh household detergents, you must use a product specifically formulated for technical footwear. The ideal choice is a pH-neutral, non-detergent technical cleaner, such as the Nikwax Footwear Cleaning Gel mentioned previously. These cleaners are engineered to lift away dirt and grime without stripping the leather’s natural oils or leaving behind any pore-clogging residue. They safely prepare the boot’s surface for the reapplication of DWR treatments, ensuring that both the leather’s health and the membrane’s breathability are preserved. This is not an upsell; it’s a fundamental requirement for maintaining the performance and longevity of your investment.
By moving beyond the brand name and embracing a holistic, scientific approach to your footwear, you take control of your comfort. Understanding each component of the system—from your own feet to the treatments you apply—is the only way to solve the breathability paradox and ensure your boots perform as intended. Start applying these principles today to transform your experience on the trail.