
Relying on the simple “Rule of Threes” is a common mistake; true survival depends on understanding the strategic ‘why’ behind each priority.
- Shelter isn’t just about getting out of the rain; it’s about a precise calculation of caloric cost versus thermal benefit.
- Water purification isn’t a one-size-fits-all solution; the choice between filtering and boiling is a critical decision based on unseen threats.
Recommendation: Shift your focus from memorizing rules to mastering a decision-making framework based on energetic accounting and risk calibration for any environment.
Every hiker and hunter has heard of the “Rule of Threes”: three minutes without air, three hours without shelter, three days without water, three weeks without food. It’s a neat, memorable mantra. But as a certified survival instructor, I can tell you that simply memorizing this list is one of the most dangerous things you can do. It gives you a false sense of security and a checklist mentality in a world that demands dynamic, intelligent decision-making. The wilderness does not care about your list; it cares about physics, biology, and psychology.
The common approach is to treat survival like a grocery list—find shelter, find water, build a fire. But what if the energy you spend building a “perfect” shelter is the very thing that accelerates hypothermia through sweat and exhaustion? What if the water you boil is free of bacteria but laced with industrial chemicals? The real key to surviving the first 24 hours isn’t about following rules blindly. It’s about understanding the deeper principles that govern them: energetic accounting, situational trade-offs, and psychological fortitude. It’s about asking “why” before you ask “what.”
This guide moves beyond the platitudes. We will not just list priorities; we will dissect them. We will analyze the critical trade-offs you must weigh for shelter, signaling, and water. We’ll explore the mental errors that are far deadlier than any predator and deconstruct how to equip yourself—both with gear and with knowledge—to think, adapt, and ultimately prevail. This is not about memorization; it’s about mastery.
To navigate the complexities of a survival situation, we will break down the essential decisions and skills you need to master. This structure will guide you from immediate life-saving actions to the strategic preparation that makes them possible.
Summary: A Strategic Guide to the Rule of Threes
- Why Debris Huts Are More Thermal Efficient Than Tarp Shelters in Winter?
- How to Use a Signal Mirror to Contact Aircraft 10 Miles Away?
- Filter or Boil: Which Method Is Safer for Stagnant Pond Water?
- The Mental Error That Kills More Survivors Than Cold or Hunger
- What to Pack in an Altoids Tin Survival Kit for Day Hikes?
- Why MOLLE Systems Are Superior for Organizing Emergency Supplies?
- Why Following the Cairn Line Isn’t Always the Safest Path in Fog?
- What to Do Immediately After Twisting an Ankle 5 Miles from the Trailhead?
Why Debris Huts Are More Thermal Efficient Than Tarp Shelters in Winter?
In a winter survival scenario, shelter is your number one priority. A common debate is tarp versus debris hut. A tarp is fast and low-effort, but it’s primarily a shield against wind and precipitation. It does very little to prevent convective heat loss—the air your body warms is immediately stolen by the cold. A debris hut, on the other hand, operates on the principle of insulation. It’s a lesson in energetic accounting. The significant calorie and time investment in its construction pays dividends in thermal efficiency, creating a micro-environment that actively retains your body heat.
The secret is trapped air. The walls, ideally several feet thick, are made of leaves, pine needles, and other forest duff. These materials create millions of tiny air pockets. Air is a poor conductor of heat, so these pockets act as a barrier, preventing your precious body heat from escaping. The goal isn’t to heat the entire forest; it’s to heat the tiny, body-sized space inside the hut. Properly constructed, research shows debris huts effectively maintain a person’s core temperature in freezing conditions, using only their own body heat as a furnace.

The effectiveness of this principle was demonstrated in a field test where a survival instructor spent a night in a debris hut with outside temperatures in the low 20s Fahrenheit. As the case study from WGVenom details, with no sleeping bag or fire, he was able to remain in the shelter from 9 PM until 3 AM before the cold became unmanageable, proving that even a hastily built structure can be the difference between life and death. The trade-off is clear: if you have the time and energy, the superior insulation of a debris hut is a life-saving investment against severe cold.
How to Use a Signal Mirror to Contact Aircraft 10 Miles Away?
Once your immediate shelter needs are met, your priority shifts to rescue. A signal mirror is one of the most effective daylight signaling tools available, capable of producing a flash of light visible from miles away. However, it’s a tool that requires skill, not just possession. Waving it randomly is a waste of energy and opportunity. Effective use requires a precise technique to aim the sun’s reflection directly at your target.
The most reliable method is using the mirror’s built-in aiming sight or, if it lacks one, the “V-sight” or “peace sign” method. By holding two fingers up in a ‘V’ and placing the target (like an aircraft) within that V, you can flash the mirror through that opening. The key is to “paint” the target and the area around it. Don’t just hold the flash steady; sweep it slowly back and forth across the aircraft’s path. This increases the chances of the pilot seeing the flash, even for a split second. A single flash can be dismissed as a glint off water or ice; a rhythmic, repeated flash is an unmistakable sign of intelligence.
| Signal Device | Daylight Range | Weather Impact | Skill Required |
|---|---|---|---|
| Signal Mirror | 10+ miles | Needs clear sun | Moderate |
| Flares | 1-3 miles | Works in most conditions | Low |
| Smoke Signal | 5-8 miles | Wind dependent | High |
| Whistle | 0.5 miles | All weather | None |
As the comparison table shows, the mirror’s range is unmatched on a clear day, but it’s useless at night or in overcast weather. This highlights a crucial survival concept: redundancy and situational trade-offs. While the mirror is your best bet for distant aircraft, a whistle is superior in dense fog or at night. The most prepared survivor carries multiple signaling options to cover all conditions. Mastering the mirror, however, gives you the power to reach out across vast distances with a simple, lightweight tool.
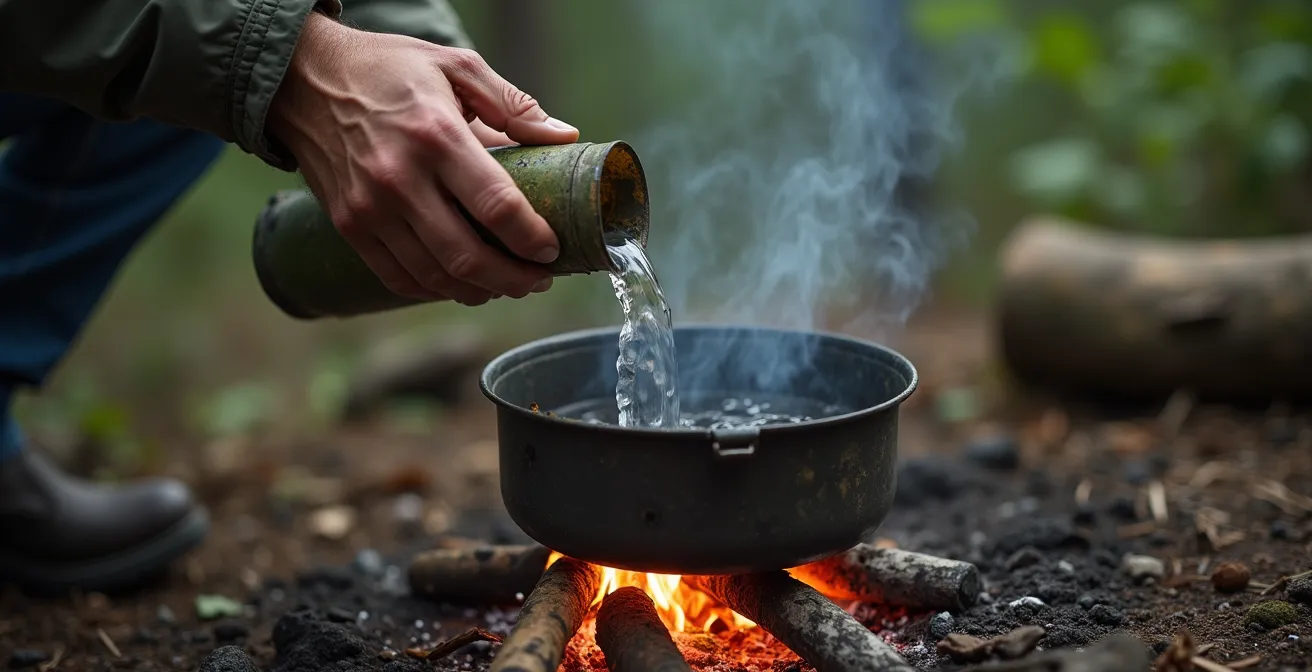
Filter or Boil: Which Method Is Safer for Stagnant Pond Water?
After shelter, water becomes the next critical priority. But procuring water is only half the battle; making it safe to drink is what truly matters. The two most common methods are filtering and boiling. The question of which is “safer” for stagnant pond water isn’t a simple choice—it’s a lesson in understanding the enemy. Waterborne threats fall into two main categories: biological pathogens (bacteria, protozoa, viruses) and chemical contaminants (pesticides, heavy metals).
Boiling is the most definitive method for destroying biological threats. Bringing water to a rolling boil for just one minute is enough to kill virtually all pathogens. In fact, scientific studies confirm that boiling water eliminates over 99% of biological pathogens even at temperatures as low as 158°F (70°C). This makes boiling an extremely reliable tool in your survival arsenal. However, boiling has a significant limitation: it does absolutely nothing to remove chemical pollutants. In fact, by boiling water, you are slightly concentrating any dissolved pesticides, herbicides, or heavy metals that might be present, especially in water from a stagnant pond near agricultural or industrial areas.
Modern portable filters, on the other hand, excel at removing bacteria and protozoa like Giardia and Cryptosporidium. They physically strain these larger pathogens out of the water. However, most backpacking filters are not small enough to remove viruses. This is where the situational trade-off becomes critical. The safest approach, especially with highly suspect water, is a two-step process: filter first, then boil. Filtering removes sediment, turbidity, and larger pathogens, improving the taste and clarity. Boiling then provides the final kill step, ensuring any viruses that passed through the filter are neutralized. This combined method addresses the full spectrum of biological threats and is the gold standard for wilderness water purification.
The Mental Error That Kills More Survivors Than Cold or Hunger
We’ve addressed shelter and water, but the most dangerous threat in a survival situation is often the one inside your own head. More survivors are defeated by their own minds than by the elements. The single most fatal mental error is the loss of purpose and the descent into what survival psychologists call “apathetic resignation.” It’s not a conscious decision to give up; it’s a slow slide into inaction fueled by fear, hopelessness, and a feeling of being overwhelmed.
This mental state is a silent killer. It’s the person who sits by the trail waiting for a rescue that isn’t coming, instead of making a signal fire. It’s the individual who stops collecting firewood because it feels pointless, only to succumb to hypothermia hours later. Psychological fortitude is not a passive quality; it is an active, ongoing process of maintaining purpose. The antidote to this mental trap is simple, but not easy: always have a task. Your mind needs a mission. Whether it’s improving your shelter, gathering more firewood, setting a snare, or mapping the area, staying busy keeps your mind focused on solutions, not problems.
Psychological Challenges in 74-Day Wilderness Isolation
Clay Hayes’ winning 74-day survival experience on the TV show “Alone” is a masterclass in mental resilience. He explicitly used principles of Stoic philosophy to combat the profound isolation and maintain focus. His success was not just due to his impressive hunting and shelter-building skills; it was hinged on his ability to manage his internal state. He proved that psychological preparation and having a mental framework to deal with adversity are just as crucial, if not more so, than any piece of gear or technical survival knowledge.
Every small, completed task builds psychological momentum. It creates a virtuous cycle of agency and hope, pushing back the shadows of despair. In a survival situation, your body is a resource, but your will to live is the engine. You must protect it and fuel it with purpose at all costs. Never allow yourself to be idle. The moment you run out of things to do is the moment you are in the most danger.
What to Pack in an Altoids Tin Survival Kit for Day Hikes?
While large-scale preparedness is vital, every hiker should carry a micro-survival kit. The classic Altoids tin kit is a perfect exercise in systems thinking and ruthless prioritization. The goal isn’t to carry everything, but to carry the most versatile, high-impact items in the smallest possible package for an unexpected night out. This is your first line of defense if you are separated from your main pack.
A well-curated kit should focus on the core survival priorities: fire, signaling, and essential tasks. Each item must be multi-purpose or the absolute best in its class for its size. Forgoing a bulky multi-tool for a single razor blade, for example, is a trade-off that saves immense space while still providing a crucial cutting edge. The contents are not just a random collection; they are an integrated system designed to address the most probable and immediate threats.
A solid baseline for a compact survival tin includes:
- Ferro rod with striker: Reliable fire starting in all weather conditions.
- Small Fresnel lens: A silent, weightless backup for fire starting and potential signaling.
- Single razor blade: For fine cutting tasks, scraping, and even as a signaling surface.
- 20 feet of kevlar thread: Incredibly strong for its weight, useful for repairs, snares, or lashing.
- Water purification tablets: Wrapped in foil, they provide a guaranteed method to make water safe.
- Mini compass: A button-style compass ensures you can always find a cardinal direction.
- Safety pins: Useful for first aid, gear repair, or even improvised fishing hooks.
A survival instructor challenged students to survive 24 hours using only their Altoids tin kit and a knife. Most students discovered their carefully curated lists failed in practice – items were too small to manipulate with cold hands, redundant items took precious space, and multi-use tools proved more valuable than single-purpose gadgets. The exercise revealed that practice with minimal gear is more valuable than perfecting a kit list.
– Field Testing Micro Survival Kits, The Survival University
This field test reveals the ultimate truth about any survival kit: the gear is useless without the skill and practice to use it effectively. Your Altoids tin is not a magic talisman; it’s a toolbox. You must practice with it in controlled, uncomfortable conditions to find its limitations and, more importantly, your own.
Why MOLLE Systems Are Superior for Organizing Emergency Supplies?
If a micro-kit is about ruthless minimalism, a full survival pack is about intelligent organization. The way you pack your gear can be as critical as the gear itself. In an emergency, you don’t have time to rummage through a cavernous bag. This is where a MOLLE (Modular Lightweight Load-carrying Equipment) system demonstrates its superiority. It’s not about the “tactical” look; it’s about applying systems thinking to your gear, aligning its accessibility with the Rule of Threes.
A traditional backpack has fixed compartments. You adapt to the bag. A MOLLE system allows the bag to adapt to you and your mission. By attaching specific pouches to the exterior webbing, you can organize your equipment by priority and speed of access. Your immediate life-saving gear—first aid, signaling, fire-starting—can be placed in external pouches for instant access without ever opening your main pack. Your shelter system can be in another easily-detached pouch. This modularity allows you to scale your gear up or down and ensures your response to a crisis is systematic, not chaotic.
Strategic MOLLE Configuration for Rule of Threes
The tactical advantage of this system is quantifiable. Search and rescue teams report that in simulated scenarios, survivors with modular systems that were strategically organized could access critical life-saving gear 40% faster than those with gear buried in traditional packs. The key is to organize pouches mirroring the survival timeline: immediate needs like tourniquets and signal mirrors on the outside, shelter and fire tools in the next tier, and long-term sustainment items like food in the main compartment. This turns your pack from a simple container into a strategic response tool.
The ability to detach a single pouch, such as a fire kit or first aid kit, and keep it with you while you leave the main pack to gather resources is an enormous advantage. It allows for a more flexible and efficient response. While some may argue against the military appearance, from a purely functional standpoint, the MOLLE system’s ability to put the right tool in your hand at the right time is unparalleled.
Why Following the Cairn Line Isn’t Always the Safest Path in Fog?
Navigation is a fundamental survival skill, but it’s also where the most dangerous assumptions are made. A line of cairns (man-made stacks of rocks) seems like a gift from the trail gods, a clear path to safety. In good weather, it often is. But in fog, rain, or snow, blindly following a cairn line without verification is a gamble that has led many hikers into disaster. You must engage in active risk calibration, constantly questioning your assumptions.
Cairns can be misleading for many reasons. Unofficial or “local” trails can branch off. Other hikers may have built their own for fun. A single missing or knocked-over cairn in low visibility can send you veering off a cliff or deep into trailless wilderness. The shocking reality is that search and rescue statistics reveal that 67% of wilderness rescues involve navigation errors. Many of these errors stem from an over-reliance on a single indicator, like a faint trail or a line of cairns, without cross-referencing with more reliable tools.
The professional approach is to treat a cairn as a single data point, not as an infallible guide. It must be verified by at least two other sources. This “Trinity Navigation” method is your safeguard against false paths.
Your Action Plan: The Trinity Navigation Verification Method
- Note the cairn’s position and the apparent direction of the trail.
- Check your compass bearing. Does it align with the expected direction of the trail on your map?
- Verify with your map’s contour lines. Does the terrain you see and feel underfoot match what the map says should be there? (e.g., Are you going uphill when the map shows a downhill slope?)
- Look for secondary signs of a legitimate trail, like a worn foot path or packed earth around the base of the cairn.
- If any of these three elements—cairn, compass, and contour—contradict each other, you stop. Do not proceed until you have resolved the discrepancy.
This disciplined process turns a passive act of following into an active process of navigation. It replaces hope with data and ensures you are in command of your direction, not a victim of misleading signs. In the fog, your compass and map are the only truths you can rely on.
Key Takeaways
- Mindset over Gear: Psychological fortitude and a task-oriented mindset are more critical to survival than any single piece of equipment.
- Energy as a Currency: Every action has a caloric cost. Always weigh the energy expenditure against the potential survival benefit.
- Question Everything: Never blindly trust a single indicator, whether it’s a trail marker, a water source, or a piece of common wisdom. Verify with multiple sources.
What to Do Immediately After Twisting an Ankle 5 Miles from the Trailhead?
An injury in the backcountry instantly changes your priorities. A twisted ankle, five miles from the trailhead, is not a minor inconvenience; it’s a life-threatening situation that demands a calm, methodical response. Panic is your enemy. The first thing to do is STOP. Do not try to “walk it off.” Sit down, control your breathing, and begin a systematic assessment of your situation. Your next decisions will be a critical test of situational trade-offs and calculation.
First, you must assess the injury itself. Is it a sprain or a fracture? You can get a rough idea by gently palpating the bony parts of your ankle. Sharp, localized pain directly on the bone suggests a possible fracture, which is a game-changer. Next, test its weight-bearing ability. If you cannot put any weight on it at all, you must treat it as a fracture. In this case, your priority is no longer self-evacuation; it is to find a safe place, create shelter, and signal for help. Continuing to walk on a fractured ankle can turn a stable injury into a compound fracture, a far more grievous situation.
If you can bear some weight, the question becomes: stay or go? This is not a guess; it’s a calculation. A common mistake is to keep the boot on if you plan to walk, as it provides compression and support. Removing it will likely cause swelling that prevents you from putting it back on. Your evacuation calculation should be: (Hours of daylight remaining) – (2-hour safety buffer) / (Your new, reduced pace, likely 50% of normal). If the result shows you can make it to the trailhead before dark, self-evacuation may be an option. If not, your best bet is to stay put, improve your position, and prepare to spend the night.
Improvised Ankle Support Using Trekking Poles
If you decide to self-evacuate, you must offload weight from the injured ankle. A hiker in this exact situation successfully evacuated by creating an improvised support system. Using trekking poles as crutches to bear the weight of his upper body and wrapping his ankle in a figure-8 pattern with a bandana for compression, he was able to slowly but steadily make his way out. It was a grueling 7-hour process, but it was a calculated decision based on his ability to create a system that made the evacuation possible. This demonstrates the power of improvisation and turning available gear into life-saving tools.
Frequently Asked Questions about The Rule of Threes
Does boiling remove chemical contaminants?
No, boiling kills biological pathogens but does not remove pesticides, heavy metals, or chemical pollutants from agricultural runoff. In fact, it can slightly concentrate them.
What is the safest combined approach for water purification?
Filter first to remove sediment and larger pathogens, then boil for complete biological sterilization. This two-step method maximizes safety when dealing with questionable water sources.