Securing your footing on wet, unpredictable terrain is less about the brand of your boot and more about understanding the physics of traction.
- The grip is determined by a formula: the right rubber compound for the temperature, a tread geometry matched to the surface, and proper user technique.
- Different Vibram compounds (like Megagrip vs. Arctic Grip) are chemically engineered for specific conditions, from slick rock to wet ice.
Recommendation: Instead of asking “which sole is best?”, learn to analyze the specific terrain you’ll face and choose an outsole with the corresponding compound and tread design for maximum safety.
That heart-stopping moment when a boot slides on a slick, rain-dampened rock is a universal fear for any hiker. The immediate response is often to blame the gear, leading to an endless search for the “perfect” boot. Common wisdom suggests simply buying boots with a yellow Vibram logo or seeking out specific compounds like Megagrip. While these are excellent starting points, they only scratch the surface of a much deeper subject. True confidence on treacherous ground doesn’t come from a logo; it comes from understanding the fundamental science of what makes a sole stick—or slip.
This analysis moves beyond brand names to deconstruct the core principles of traction. We will treat the outsole not as a single piece of rubber, but as a complex technological system. The real key to slip prevention lies in a triad of factors: the chemical properties of the rubber compound, the physical geometry of the tread pattern, and the dynamic application of force through your own footwork. By dissecting these elements, you can learn to read an outsole’s capabilities just as you read a trail map, empowering you to make informed decisions for any environment.
This guide will equip you with a researcher’s perspective on grip technology. We’ll explore how different compounds perform under various conditions, how tread design must be matched to the terrain, and how simple techniques can dramatically amplify your sole’s effectiveness. The goal is to transform your understanding from simply choosing a product to mastering a system, ensuring every step you take is a secure one.
This article provides a detailed breakdown of the critical factors influencing outsole performance. From compound comparisons to maintenance and technique, the following sections offer a complete framework for analyzing and maximizing your grip on any terrain.
Table of Contents: A Researcher’s Guide to Outsole Traction
- Megagrip vs Arctic Grip: Which Compound Handles Wet Autumn Leaves Best?
- How Mud Build-Up Reduces Your Traction by 50% and How to Clear It?
- The Tread Sign That Means Your Outsole Is no Longer Safe for Climbing
- Deep Lugs vs Shallow Tread: Which Is Safer on Slick Sandstone?
- Is It Worth Resoling a Vibram Sole on a Mid-Range Hiking Boot?
- How to Use the ‘Smearing’ Technique on Smooth Rock Slabs?
- Stiff vs Flexible Soles: Which Is Better for Scrambling Over Boulders?
- How to Navigate Technical Terrain Safely Without Technical Climbing Gear?
Megagrip vs Arctic Grip: Which Compound Handles Wet Autumn Leaves Best?
The term “Vibram” is not a single material but a vast library of rubber compounds, each engineered for a specific performance window. Choosing the right one is a matter of understanding the chemistry behind the grip. Two of the most advanced compounds, Megagrip and Arctic Grip, illustrate this principle perfectly. Megagrip is the benchmark for all-around performance on wet and dry surfaces. Its softer durometer (hardness) allows it to conform to micro-irregularities in rock, maximizing surface contact and friction. This makes it ideal for mixed terrain, including the unpredictable slipperiness of wet autumn leaves over rock and root.
Arctic Grip, on the other hand, is a highly specialized technology designed for one primary purpose: gripping wet ice. Normal rubber compounds become rigid and lose their conforming ability as temperatures drop below 7°C (45°F). Arctic Grip incorporates a unique filler material into the rubber matrix, creating a gritty, abrasive texture that can bite into slick, icy surfaces. Its broad lugs are specifically designed for sub-zero conditions. According to some claims, this technology is three times grippier on wet ice than other Vibram soles. The trade-off is that its specialized texture may wear faster on hard, dry pavement, although some have been tested up to 250 miles on hard surfaces without significant performance loss.
For wet autumn leaves, which create a slick organic film over varied surfaces, Megagrip’s versatile, “sticky” nature provides a more reliable and balanced performance. Arctic Grip should be reserved for environments where wet ice is the primary and consistent hazard. The choice is not about which is “better,” but which is chemically optimized for the expected temperature and surface.
How Mud Build-Up Reduces Your Traction by 50% and How to Clear It?
An outsole with a world-class tread design is rendered useless the moment it becomes clogged with mud. This is not simply a matter of aesthetics; it’s a critical failure of the mechanical grip system. When mud packs into the channels between lugs, it transforms a complex, high-friction surface into a smooth, low-friction plane. The lugs can no longer penetrate soft ground or channel water, effectively creating a barrier between the rubber and the terrain. This phenomenon, known as “lug-caking,” can reduce the effective traction of your footwear by a significant margin, dramatically increasing the risk of a slip, especially on inclines or side-slopes.
Vibram engineers combat this with specific design principles. Self-cleaning channels and open lug patterns are designed to encourage mud to release as the sole flexes. However, in heavy, clay-like mud, active clearing becomes necessary. Ignoring mud build-up is equivalent to hiking on bald tires in a rainstorm. Maintaining clear tread is a non-negotiable aspect of trail safety. Below is a demonstration of how a clogged sole loses its functionality.
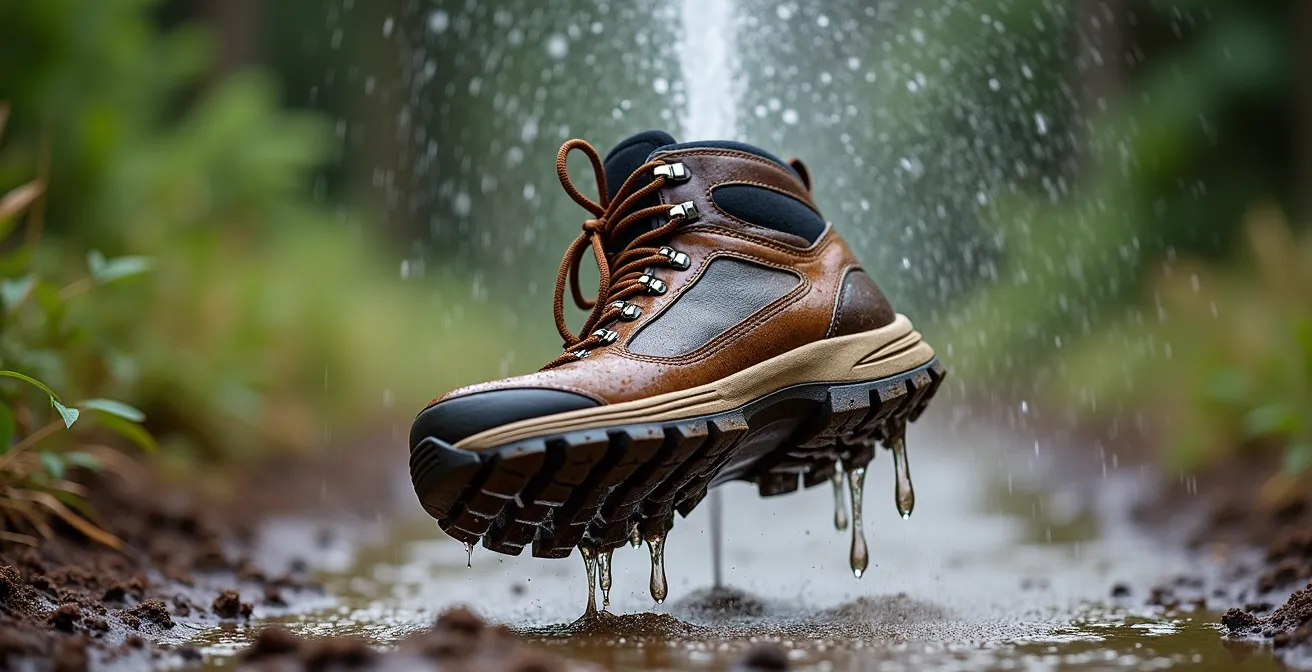
As the image illustrates, clearing the channels restores the tread’s ability to bite into the terrain. On the trail, the most effective method is to forcefully bang the boots together to dislodge the bulk of the mud. A stiff brush or a slender, sturdy stick can then be used to meticulously clear the remaining debris from between the lugs. After every trip, a thorough scrub with a stiff brush and mild soap is essential to remove the fine grit that can abrade and wear down the rubber over time, preserving the sole’s integrity and performance.
The Tread Sign That Means Your Outsole Is no Longer Safe for Climbing
All outsoles wear out, but not all wear is equal. Recognizing the transition from normal wear-and-tear to a critical safety failure is a crucial skill for any serious hiker or climber. Relying on a worn-out sole on technical terrain is a significant gamble. The most obvious sign of wear is the reduction of lug depth, particularly at high-pressure points like the outside of the heel and the ball of the foot. As these lugs wear down, the sole’s ability to penetrate soft ground and grip on uneven surfaces diminishes drastically.
However, there are more subtle and dangerous signs of failure. One of the most critical is the appearance of shiny, glazed patches on the rubber. This indicates that the rubber has been damaged by UV exposure and has lost its micro-conforming ability. The surface becomes hard and polished, losing the “stickiness” required for friction on smooth rock. Another key failure point is the loss of rubber density and flexibility. A safe sole should feel pliable, and its lugs should move independently when bent.
Your Outsole Safety Inspection Checklist
- Wear Pattern Analysis: Check for wear starting at the outside corner edges of the heel and forefoot. As wear progresses across the sole, grip on wet surfaces disappears first.
- Rubber Density Test: Wet your fingertip and rub your nail against the base of the sole. Denser, high-quality rubber will offer resistance and grip even when wet; compromised rubber will feel slick and slippery.
- Visual Surface Inspection: Look for shiny, glazed patches on the tread blocks. This indicates UV damage and a hardened surface that has lost its critical friction properties.
- Flexibility Test: Bend the forefoot of the boot. The lugs should still show some independent movement. If the sole feels stiff and the lugs are fused from wear, it can no longer adapt to the terrain.
- Edge Integrity: Inspect the edges of the sole. If they are rounded off and lack a sharp profile, the boot’s ability to hold on small rock edges is severely compromised.
A sole exhibiting these signs, especially glazed surfaces or a loss of flexibility, is no longer safe for climbing or navigating technical, high-consequence terrain. At this point, the outsole’s performance is unpredictable and resoling or replacement is required.
Deep Lugs vs Shallow Tread: Which Is Safer on Slick Sandstone?
A common misconception in outsole technology is that deeper lugs always equal better grip. This is a dangerous oversimplification. The optimal tread geometry is entirely dependent on the surface. Deep, aggressive lugs are superior in soft, loose terrain like mud, gravel, or snow, where they act like claws to penetrate the surface and provide mechanical grip. However, on hard, smooth surfaces like slick sandstone or granite slabs, these same deep lugs can become a liability.
On smooth rock, traction is primarily achieved through friction, not penetration. This requires maximizing the surface area of rubber in contact with the rock to leverage molecular adhesion (Van der Waals forces). Shallow tread patterns, or even dedicated “climbing zones” with completely smooth rubber under the big toe, excel in this environment. Deep lugs reduce the contact area and can wobble or fold under pressure on angled surfaces, leading to a sudden loss of grip. The choice between lug depth is therefore a critical trade-off between mechanical grip and frictional grip.
The following table, based on insights from sources like a recent comparative analysis, breaks down the performance characteristics:
| Surface Type | Deep Lugs | Shallow Tread |
|---|---|---|
| Wet Rock | Less effective – can slip on smooth wet rock | More rubber contact = better grip, with smooth climbing zones under big toe |
| Mud/Soft Ground | Superior traction with self-cleaning channels | Limited penetration and clearing ability |
| Hard Sandstone | Can wobble or fold on angled surfaces | Maximum surface contact for smearing friction |
For walkers and mountaineers, it’s about using a rubber compound and tread giving optimal balance between grip on different surfaces and durability – there’s no point in a sole that only lasts 200 miles even if it grips like a terrier.
– Trek and Mountain Technical Review, The Big Question: Which rubber sole is the stickiest?
Therefore, for a hike dominated by slick sandstone, a boot with a shallower, high-contact tread pattern is the safer choice. An ideal all-terrain outsole balances these needs with varied lug shapes and depths across the sole.
Is It Worth Resoling a Vibram Sole on a Mid-Range Hiking Boot?
The decision to resole a hiking boot is an economic and structural one. With high-end boots, resoling is almost always a cost-effective way to extend the life of a significant investment. For mid-range boots, typically those in the $130-$200 range, the calculation is more nuanced. A key factor is the expected lifespan of the original sole. According to field tests, quality Vibram outsoles on boots like the Merrell Moab 3 typically last over 3 years of moderate use, or at least 12 months of heavy, consistent use.
When the outsole is worn, but the boot’s uppers and, crucially, the midsole are still in good condition, resoling is an excellent option. For example, a case study of Altberg boots with Vibram Masai soles showed that after 10 months of daily wear, the uppers remained waterproof and structurally sound even though the sole’s heel and forefoot were significantly worn. This makes them ideal candidates for resoling. The primary benefit is restoring the boot to peak traction performance while retaining the comfortable, broken-in fit of the uppers.
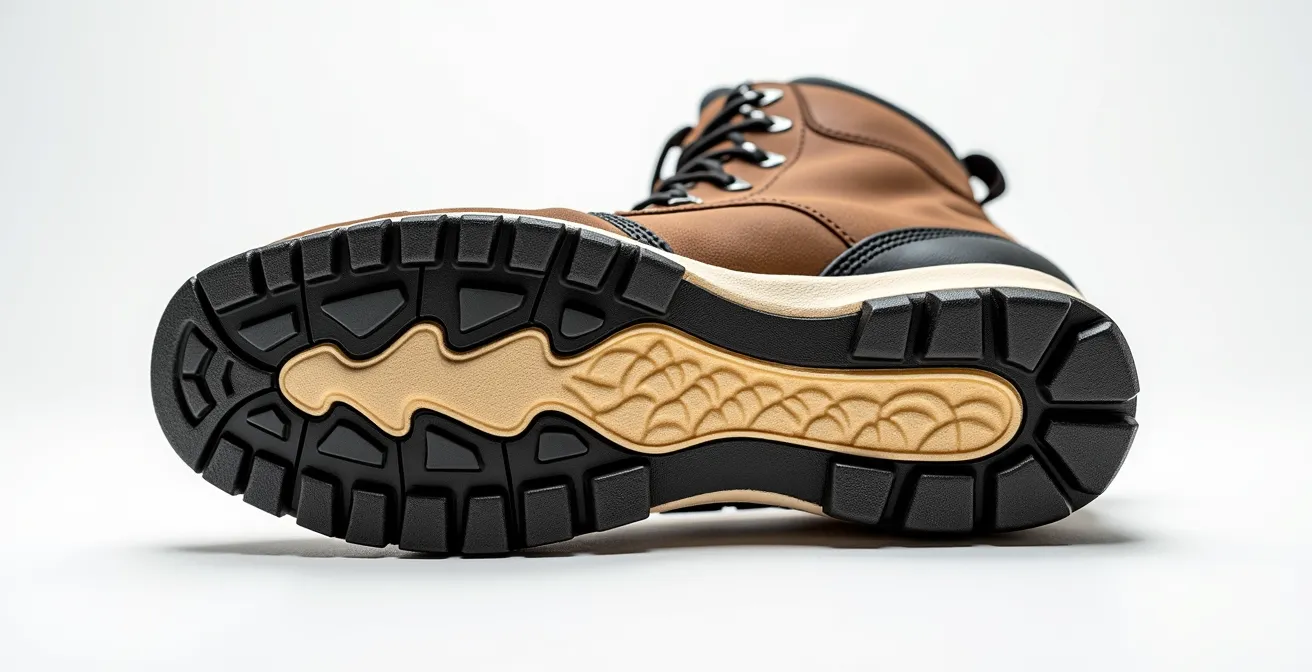
However, the critical inspection point is the midsole’s integrity, as shown in the cross-section above. The midsole provides cushioning and support. If it is visibly compressed, packed-out, or has lost its rebound, resoling the boot is a poor investment. You would be putting a high-performance new outsole on a failed support structure, leading to discomfort and poor biomechanics. If the uppers are torn, the waterproofing has failed, or the midsole is dead, it is more economical to invest in a new pair of boots.
How to Use the ‘Smearing’ Technique on Smooth Rock Slabs?
On low-angle, smooth rock slabs where there are no distinct edges or features to stand on, the primary source of grip is pure friction. The ‘smearing’ technique is the art of maximizing this friction. It involves positioning your foot to place as much rubber as possible in direct contact with the rock surface. This is a practical application of physics: the force of friction is proportional to the coefficient of friction and the normal force (the pressure you apply). By increasing the contact surface area, you engage more of the rubber at a molecular level, enhancing the Van der Waals forces that contribute to adhesion.
This technique is where sole design and user skill intersect. A flexible sole can bend to match the contours of the rock, while a sole with a dedicated “climbing zone”—a smooth patch of rubber under the toes—is specifically designed for smearing. The key is to trust the rubber. A tentative or off-balance posture reduces the perpendicular pressure, decreasing friction and increasing the chance of a slip. You must commit your weight directly downward through the sole of the foot.
Executing a proper smear involves a precise sequence of movements:
- Maximize Contact: Position your foot flat against the rock, orienting it to maximize the rubber contact patch. Avoid standing on just your toes or the edge of your boot.
- Apply Perpendicular Pressure: Drive your weight straight down into the sole. Think of your leg as a post pressing directly into the rock to increase molecular adhesion.
- Use Sole Stiffness: In a semi-stiff boot, use the boot’s structure to distribute pressure evenly across the entire forefoot, creating a larger, more effective friction patch.
- Test Placement: Before committing your full body weight, give the placement a few light taps or a small preparatory press to feel the security of the grip.
- Maintain Consistent Pressure: As you move upwards, maintain smooth, consistent pressure on the foothold to preserve the static friction. Jerky movements can break the adhesion and cause a slip.
Mastering the smear transforms daunting rock slabs from obstacles into manageable pathways. It is a fundamental skill that demonstrates a true understanding of how to make your gear work for you.
Stiff vs Flexible Soles: Which Is Better for Scrambling Over Boulders?
The debate between stiff and flexible soles is central to performance in technical, off-trail terrain like boulder fields. The optimal choice depends on the specific type of scrambling involved. A stiff sole acts as a rigid platform or lever. This design excels at “edging,” where you stand on very small rock crystals or ledges. The stiffness prevents the sole from deforming under pressure, concentrating your body weight onto a tiny point and providing a secure hold. This transfer of energy reduces muscular strain in your feet and calves on long, technical ascents.
Conversely, a flexible sole is designed to conform to the terrain. When scrambling over large, rounded boulders, a flexible sole’s ability to “wrap” around the rock’s features provides a significant advantage. It allows more rubber to make contact with the surface, increasing frictional grip in a manner similar to smearing. However, this same flexibility means the sole will deform on small edges, reducing edging performance. Professional testing by mountain guides has shown that while slightly more flexible Vibram soles offer superior grip in wet conditions, stiffer designs like some Contagrip models can perform better on dry, rough terrain where edging is paramount.
This table summarizes the core trade-offs:
| Feature | Stiff Soles | Flexible Soles |
|---|---|---|
| Edging Performance | Stiffer design enhances traction on small holds | Conform to surface, reducing traction on small edges |
| Comfort | Less comfortable, reduced ground feel | Increased comfort due to greater flexibility |
| Boulder Wrapping | Limited ability to wrap around features | Excel at wrapping foot around rounded boulders |
| Energy Transfer | Acts as lever, reducing muscular strain on edges | More direct but increased fatigue on technical terrain |
For scrambling that involves more smearing and gripping large, rounded features, a flexible sole is superior. For terrain demanding precise footwork on small, sharp edges, a stiff, supportive sole is the better and safer tool for the job.
Key Takeaways
- Compound is Context: The effectiveness of a rubber compound (e.g., Megagrip vs. Arctic Grip) is determined by temperature and surface type, not a universal “best” label.
- Geometry Governs Grip: Tread design is a trade-off. Deep lugs excel in soft terrain (mud), while shallow, high-contact tread is superior for frictional grip on smooth rock.
- Technique Amplifies Technology: Your footwear is a tool. Mastering techniques like smearing and maintaining your gear (e.g., clearing mud) is as important as the technology itself.
How to Navigate Technical Terrain Safely Without Technical Climbing Gear?
Safely navigating steep, exposed, or unstable terrain—often called “scrambling”—is where all the principles of traction technology and user skill converge. It is a discipline that exists between hiking and technical rock climbing. Success and safety in this realm depend on a systematic approach that integrates gear, body awareness, and technique into a single, cohesive framework. This can be conceptualized as the “Traction Triangle,” a balance of three critical components: your gear (the outsole), your body (center of gravity management), and your technique (foot placement and movement).
Your outsole is the foundation. As we’ve seen, it must be appropriate for the terrain—a boot with Vibram Megagrip and advanced features like Traction Lug technology, which can increase traction by up to 25%, provides a significant safety margin. However, the best gear is useless without proper technique. Always test a hold with your boot before committing your full weight. Use your boot as a probe to check for loose rock or unstable surfaces. When downclimbing steep sections, face into the slope and use your heels as a brake, maintaining three points of contact whenever possible.
Finally, your body awareness is paramount. Keep your center of gravity low and close to the rock. Move deliberately, planning your next two to three moves in advance. Progressively introducing yourself to more challenging terrain is key to building confidence and skill safely. Start by transitioning from smooth trails to rocky paths, then to scree fields, and finally to low-angle scrambling. This progressive exposure allows you to learn how your gear responds and to internalize the movements required for safe travel in high-consequence environments.
To truly master technical terrain, you must shift from being a passive consumer of gear to an active analyst of your environment. Start evaluating your current boots not by their brand, but by their specific compound and tread geometry, and assess how well they align with the terrain you hike most often. Apply these principles on your next outing to move with greater confidence and security.