The reliability of a telescopic rod in the backcountry depends less on its price tag and more on mastering techniques to prevent common failures.
- Proactive maintenance and understanding material limits are more critical than just choosing the lightest option.
- Proper packing and fast, modular rigging transform the rod from a fragile item into a highly efficient food-gathering tool.
Recommendation: Treat your telescopic rod as an integrated system—not just a pole—by learning its specific failure points to unlock its true potential as a productive and life-saving piece of ultralight gear.
For the serious ultralight backpacker, every ounce is a decision and every piece of gear must justify its place. Telescopic fishing rods often get a bad rap in this world, dismissed as flimsy “gag rods” or fragile toys prone to snapping at the worst possible moment. The common wisdom is to either leave them at home or accept their inevitable demise. This perspective, however, misses the point entirely. The problem isn’t the tool; it’s the lack of specialized knowledge required to use it effectively under harsh trail conditions.
A telescopic rod is not a shorter version of your standard graphite rod; it’s a unique piece of equipment with its own physics and failure points. True mastery lies not in simply buying the most expensive carbon fiber model, but in understanding the mechanics of joint-locking, the dynamics of casting with ultralight lures, and the strategy of integrating it seamlessly with your pack. It’s about shifting from a consumer mindset to one of a field technician who can prevent issues before they happen. This is the core of the “Productive Weight” philosophy: a tool that reliably puts fresh trout on your campfire is infinitely more valuable than a few ounces saved on a piece of gear that fails.
This guide moves beyond generic reviews and dives into the field-proven techniques that turn a fragile liability into your most productive survival tool. We will dissect the common points of failure and provide actionable strategies for maintenance, material selection, rapid deployment, and safe transport. By understanding how to work with the rod’s inherent design, you can transform it into a reliable source of sustenance, a critical safety device, and an indispensable part of your ultralight system.
This article provides a comprehensive roadmap, structured to build your expertise from fundamental maintenance to advanced tactical use in the backcountry. The following sections break down exactly what you need to know to master this essential piece of gear.
Summary: Why a Telescopic Rod is the Ultimate Survival Tool for the Ultralight Backpacker
- How to Collapse a Telescopic Rod Without Jamming or Breaking the Tip?
- Carbon Fiber vs Fiberglass: Which Telescopic Rod Survives Trail Abuse?
- How to Rig Your Telescopic Rod for Fishing in Under 60 Seconds?
- The Casting Error That Snaps Telescopic Rods When Using Heavy Lures
- Where to Strap Your Rod on a Backpack to Prevent Bush Snags?
- The Error of Packing Too Many Tactical Gadgets for a Simple Trek
- What to Pack in an Altoids Tin Survival Kit for Day Hikes?
- How to Identify Safe Crossing Points in Turbulent Water?
How to Collapse a Telescopic Rod Without Jamming or Breaking the Tip?
The most common and frustrating failure in a telescopic rod isn’t a dramatic snap while fighting a fish; it’s the silent, grinding jam of a section that refuses to collapse. This is almost always caused by microscopic trail dust, dirt, or temperature-induced expansion creating friction between the sections. The user’s instinctive reaction is to twist and force it, which puts immense torsional stress on the thin carbon walls, leading to cracks or a shattered tip. The solution is not force, but prevention.
Before your trip, the single most effective action is to create a lubricating barrier. Applying a thin coat of paraffin wax or specialized ferrule wax to each male section of the rod is a game-changer. This simple step prevents fine grit from working its way into the joints and provides a buffer against the material expansion and contraction that happens as you move from a cold morning to a sun-baked afternoon. It ensures the sections slide smoothly rather than binding under pressure.
Post-hike maintenance is just as critical. After any use, especially in saltwater environments which can cause corrosion within two weeks, the rod must be fully disassembled and cleaned. A simple rinse with fresh water and a wipe-down with a microfiber cloth to remove salt and grime is sufficient. Crucially, the sections must be dried completely before storage. Storing a rod with even a small amount of moisture inside can lead to long-term material degradation and sticking. These preventative measures take minutes but add years to the life of your rod, ensuring it functions when you need it most.
Ultimately, treating your rod with the same care as a precision instrument is the key. A gentle, straight-line push-and-pull is all that should ever be needed. If it sticks, don’t twist. Instead, clean it and re-evaluate, because force is the enemy of an ultralight system.
Carbon Fiber vs Fiberglass: Which Telescopic Rod Survives Trail Abuse?
Choosing a rod material is a critical decision that goes far beyond the simple “lighter is better” mantra. For the backpacker, it’s a calculated trade-off between weight, sensitivity, and, most importantly, durability against the specific abuses of the trail. The two primary materials, carbon fiber and fiberglass, offer vastly different performance profiles that must be matched to your terrain and personal habits.
This macro photograph reveals the intricate cross-hatch pattern of the carbon fiber weave, the source of its incredible stiffness and strength-to-weight ratio. It’s this structure that makes the material so sensitive to bites.
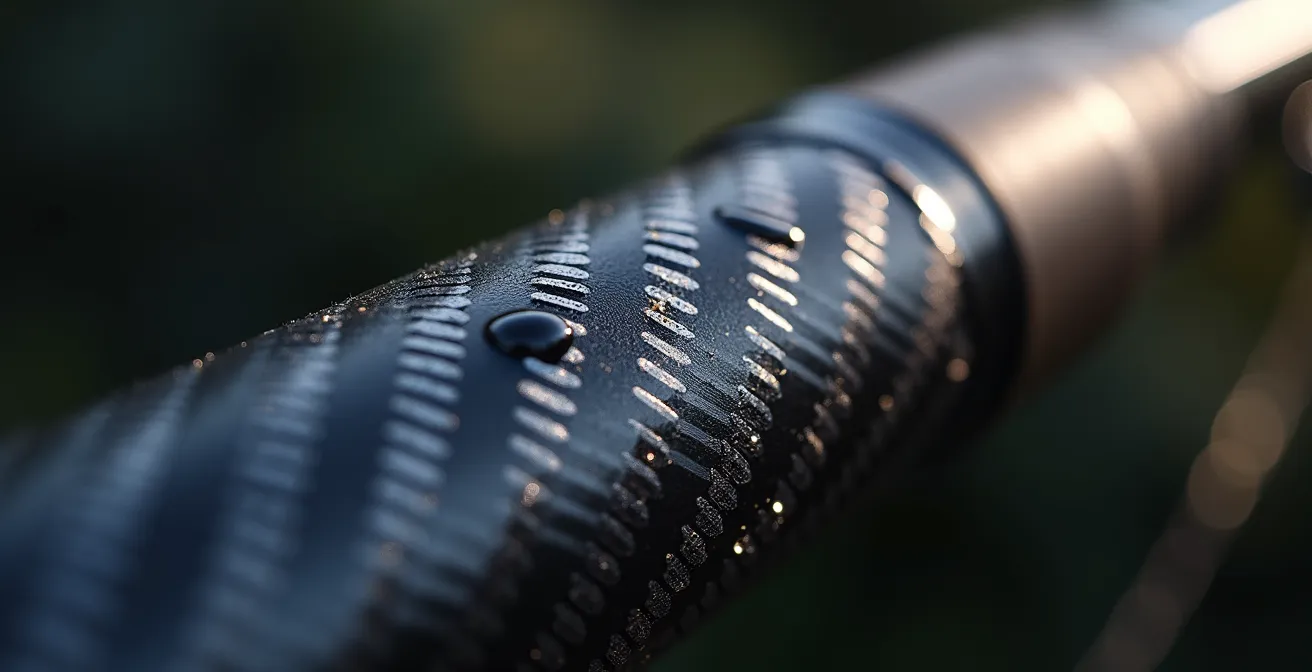
Carbon fiber is the high-performance champion. Field testing confirms that modern carbon telescopic rods are 30% stiffer with 50% less weight compared to their fiberglass counterparts. This translates to superior casting distance and incredible sensitivity, allowing you to feel the most subtle bites from wary alpine lake trout. However, this performance comes with a vulnerability: carbon fiber is brittle and susceptible to sharp, direct impacts. Dropping it on a rock or smacking it against a tree can cause micro-fractures that lead to catastrophic failure under load.
Fiberglass, on the other hand, is the workhorse. It’s heavier and less sensitive, but its ability to absorb impact and resist crushing forces is far superior. For anglers navigating dense bush or rocky talus slopes, or for those who admit they can be a bit clumsy with their gear, fiberglass provides invaluable peace of mind. The following table breaks down the key performance differences in a backcountry context.
This comparative data, derived from extensive analysis of materials used in rods for backpackers, helps clarify the decision-making process.
| Material | Weight | Impact Resistance | Bending Stress | Best Use Case |
|---|---|---|---|---|
| Carbon Fiber (24T) | Under 150g (5.3oz) | Vulnerable to sharp impacts | Superior flex under load | Target fish over 2lbs, sensitive bite detection |
| Fiberglass | 200-250g (7-9oz) | Excellent against drops | More prone to permanent bending | Rocky terrain, clumsy handlers, fish under 2lbs |
| Hybrid (Carbon/Glass tip) | 117-175g (4-6oz) | Balanced protection | Good flexibility with durability | All-around backcountry use |
A growing number of manufacturers are offering hybrid models, which use a robust fiberglass tip section on a lightweight carbon fiber blank. This innovative approach offers a “best of both worlds” solution, providing the sensitivity of carbon with added durability at the most vulnerable point, making it an excellent all-around choice for most backcountry scenarios.
How to Rig Your Telescopic Rod for Fishing in Under 60 Seconds?
On the trail, fishing opportunities are often fleeting—a 15-minute break by a promising creek, a deep pool spotted while filtering water, or the last light of day at an alpine lake. In these moments, speed is everything. Fumbling with tangled lines, knots, and lure changes is a waste of precious time and a major deterrent to even trying. The key to tactical deployment is a modular, pre-prepared system that allows you to go from a stowed rod to a baited line in the water in less than a minute.
The most efficient method is the pre-tied leader system. Before your trip, prepare two or three foam spools with different setups. For example:
- Setup 1 (Lures): A 3-foot section of leader with a loop at one end and a small snap swivel at the other for quickly changing spoons or spinners.
- Setup 2 (Bait): A similar leader with a hook and a couple of split-shot sinkers already attached for bait fishing.
- Setup 3 (Tenkara): For a reel-less approach, a pre-cut length of Tenkara line tied directly to a fly. The Beartooth Tenkara rod designed for backpacking weighs just 2.3 ounces and is 14 inches collapsed, making it the ultimate in rapid deployment.
When you reach a fishing spot, the process is lightning fast. Extend the rod, connect your main line to your chosen leader spool using a simple loop-to-loop connection, attach your lure or bait, and you’re fishing. This eliminates streamside knot tying in cold or windy conditions and keeps your main line pristine. This modular approach is the essence of backcountry efficiency, turning a complex task into a few simple, repeatable steps.
This system not only saves time but also makes you more likely to fish. When the barrier to entry is lowered to just a minute, you’ll find yourself capitalizing on many more of those small, opportunistic moments that often yield the best results.
The Casting Error That Snaps Telescopic Rods When Using Heavy Lures
The most dramatic and misunderstood failure of a telescopic rod is the “whiplash fracture”—a clean snap, usually in the upper third of the rod, that occurs during a cast. This is rarely a manufacturing defect. It’s a physics problem caused by overloading an ultralight system. Most backpackers fail to appreciate that their featherlight rod is a highly specialized tool, not an all-purpose workhorse. The majority of ultralight telescopic rods are designed for lure weights between 1/64 to 1/4 ounce with 2-6 pound line. Tying on a heavy, 1/2-ounce spoon or lure creates forces the rod was never engineered to handle.
The critical error is a powerful, snappy overhead cast. When you whip the rod forward, the heavy lure lags behind, creating a deep, stressful bend in the rod blank. As the lure “catches up” and accelerates forward, the rod tip must rebound at an incredible velocity. This violent, unsupported “whip” effect sends a shockwave through the thin carbon walls, causing them to buckle and fracture. It’s the equivalent of trying to throw a bowling ball with a fencing foil—the tool is simply mismatched for the load.
To prevent this, you must adapt your casting style. Instead of a hard, snappy motion, use a smoother, more deliberate side-arm or lob cast. Let the rod load gently and use a sweeping motion to send the lure out. This allows the rod to transfer energy progressively without the violent rebound that causes fractures. Better yet, respect the rod’s specifications and stick to ultralight lures.
Case Study: KastKing Blackhawk II Durability Innovation
Recognizing this common failure point, KastKing engineered a solution in their Blackhawk II model. They used a 24-ton Toray carbon blank for lightness but incorporated a solid fiberglass tip section. This hybrid design adds negligible weight but provides a durable, flexible tip that can absorb the shock of an aggressive cast. Furthermore, they used a four-layer carbon construction with fibers woven at multiple angles (135, 45, 90, and 180 degrees) to create superior resistance to the vertical compression and distortion that causes whiplash fractures. This is a prime example of how manufacturers are directly addressing the physics of rod failure in the field.
Ultimately, a telescopic rod demands finesse over force. By matching your lure weight to the rod’s rating and adopting a smoother casting technique, you can eliminate the single greatest cause of catastrophic rod failure.
Where to Strap Your Rod on a Backpack to Prevent Bush Snags?
How you carry your rod is just as important as how you use it. A poorly stowed rod is a liability, prone to snagging on overhanging branches, getting scraped against rocks, or throwing off your balance. The default method of simply strapping it to the side of a pack is often the worst choice, as it projects outside your body’s profile and becomes a magnet for trail hazards. The expert approach involves integrating the rod into your pack system to create a streamlined, snag-free profile.
The optimal placement, especially for off-trail bushwhacking, is the “Centerline Carry.” This involves securing the rod vertically along the spine of your backpack, tucked behind the front pocket or secured with daisy chains and compression straps. As shown in the image, this keeps the rod entirely within the width of your body, drastically reducing the chances of it catching on foliage. It moves with you, not against you.

For rods that are exceptionally light, like the 24T carbon EOW XPEDITE PRO, which weighs only 117 grams and collapses to under 17 inches, balance is also a key consideration. Even this small weight can create a noticeable pull if placed far off-center. The centerline carry helps maintain your center of gravity. If side-mounting is your only option, always place a counter-balancing item, like a full water bottle, in the opposite side pocket.
Finally, protecting the rod guides is paramount. Even inside a case, a hard impact can damage a guide. For ultimate protection during external mounting, a DIY exoskeleton made from a sturdy cardboard document mailer or a thin PVC pipe is an ultralight and highly effective solution. It adds an impenetrable layer of protection against drops and compression, ensuring your rod arrives at the lake in perfect condition.
By thinking of rod transport as a tactical decision rather than an afterthought, you eliminate a major source of gear damage and ensure your equipment is ready to perform when you reach your destination.
The Error of Packing Too Many Tactical Gadgets for a Simple Trek
In the world of ultralight backpacking, there’s a pervasive temptation to pack for a hypothetical apocalypse rather than the actual trip you’re taking. This leads to packs laden with “tactical” gadgets—oversized knives, complex fire starters, and emergency tools that are rarely, if ever, used. This is a fundamental misunderstanding of the concept of “Productive Weight.” Productive weight isn’t just about being light; it’s about every ounce serving a reliable and frequent purpose. A telescopic fishing rod is the ultimate embodiment of this philosophy.
A 7-ounce rod and reel combo that provides 1,000 calories of fresh trout for dinner is infinitely more productive than a 7-ounce tactical hatchet that you only carry “just in case.” The food it provides replaces weight you would have otherwise carried in your food bag, making the rod effectively “weightless” from a caloric standpoint. It transitions from being a piece of recreational gear to a core component of your food supply system.
Field Study: The Productive Weight Philosophy in the Sierra Nevada
Members of the Backpacking Light forum put this philosophy to the test over multiple seasons. One member reported using the same cheap, drug-store telescopic pole for years, repaired with nothing more than duct tape. This “inferior” rod was used to catch trout every single night at camp, including prized Golden Trout in remote areas. The consensus was clear: a simple, functional tool that puts food in your belly is far superior to an unused, pristine piece of tactical gear. The study also revealed a counter-intuitive insight: using a slightly heavier reel (5-6oz) with a larger spool dramatically improved casting distance, which was a worthwhile 2oz penalty for accessing more of an alpine lake’s prime fishing spots.
This highlights a crucial point: optimizing for absolute lowest weight can sometimes be counterproductive. The extra two ounces for a better reel became “productive weight” because they enabled a higher success rate, yielding more food and a better overall experience. It’s about smart trade-offs, not blind weight-cutting.
Before your next trip, lay out your gear and ask of each item: “Will this tool help me, feed me, or keep me safe on *this* specific journey?” If the answer is a vague “maybe someday,” consider replacing it with a tool that delivers tangible results, like a reliable telescopic rod.
What to Pack in an Altoids Tin Survival Kit for Day Hikes?
The principle of ultralight efficiency reaches its ultimate expression in the micro-kit. For day hikes or quick scouting trips away from basecamp, carrying a full rod and reel is overkill. However, the opportunity to catch a meal can still present itself. The solution is the “Micro-Angler,” a complete hand-lining fishing kit housed within a single Altoids tin. This is the epitome of minimalism, providing a genuine survival fishing capability for virtually zero weight or bulk.
The key to the Altoids kit is space efficiency and ruthless curation. You’re not packing for every possibility; you’re packing for the most likely scenario. This means a small selection of proven gear, not a miniature tackle shop. For a typical mountain stream or pond, the contents should be focused and multi-purpose. Wrapping your line around the outside of the tin is a classic space-saving hack, leaving the interior free for terminal tackle.
A well-configured kit gives you the ability to catch small-to-medium-sized panfish and trout, which are often the most abundant protein sources in a survival situation. It’s a system that prioritizes function over form, using a simple bottle cap or small dowel as a “hobo reel” for retrieving the line. This isn’t about sport; it’s about sustenance.
Action Plan: The Micro-Angler Altoids Tin Configuration
- Line Management: Wrap 20m of 10lb braided line around the tin’s exterior to maximize internal space.
- Hook Selection: Include 3 barbless hooks in versatile sizes (#8, #10, #12) to match local insect and fish size.
- Weight System: Pack 4-5 small split shot sinkers of varying weights for depth control in pools and currents.
- Proven Lure: Carry one high-confidence micro-lure, like a 1/32oz Trout Magnet, that consistently produces results.
- Emergency Rig: Store a 6ft length of 4lb fluorocarbon for a stealthy leader and a small wooden dowel to act as a hand-line reel.
Building this kit forces you to think critically about what works, solidifying your knowledge and ensuring you have a life-saving tool that can be slipped into any pocket, ready at a moment’s notice.
Key Takeaways
- A telescopic rod’s value is defined by user skill and preventative maintenance, not just its material or weight.
- Understanding the physics of casting and material limits (carbon vs. fiberglass) is crucial to preventing the most common types of breakage.
- Integrating the rod into your pack system (e.g., Centerline Carry) and using modular rigging are key tactical skills for backcountry efficiency and gear longevity.
How to Identify Safe Crossing Points in Turbulent Water?
In the backcountry, your fishing rod can—and should—be more than just a tool for catching food. With the right mindset, it becomes a critical safety device, particularly when faced with a hazardous water crossing. The skills you develop as an angler to “read the water” for fish are the exact same skills needed to identify the safest path across a turbulent creek or river. This transference of knowledge elevates the rod from a luxury item to an essential piece of survival gear.
An angler learns to spot seams between fast and slow currents, eddies behind rocks where fish rest, and shallow gravel bars. These are precisely the features that indicate areas of lesser force and safer footing. Before even stepping into the water, you can use your angler’s eye to map a route that avoids the main force of the current. This is a level of environmental awareness that non-anglers often lack.
The rod itself becomes an active tool in this process. Before committing to a crossing, you can use the collapsed (but not fully extended) rod as a probe to test water depth and substrate stability from the safety of the bank. Is the bottom firm gravel or soft, sinking mud? A quick probe with the rod tells you instantly. During the crossing, the rod acts as a third point of contact, a stabilizing pole that dramatically increases your balance and security in a swift current.
Field Study: Jenny Anderson’s Triple-Duty Rod in the Boundary Waters
Jenny Anderson, known as the “Girl of 10,000 Lakes,” expertly demonstrates this multi-use principle during her expeditions. She uses her telescopic rod for its three core safety functions: as a depth gauge, a stability pole, and a tool for reading water features. She emphasizes that the skills for finding fish and finding safe crossings are identical. Her bright yellow rod, which has survived being bent in every direction while landing large lake trout, proves that these tools are tough enough to handle the stresses of river safety applications, debunking the myth of their fragility when used correctly.
By viewing your telescopic rod through this lens, you unlock its full potential. It’s no longer just about fishing; it’s about moving through the natural world with greater awareness, confidence, and safety. Now, apply this “productive weight” and “system integrity” mindset to every single item in your pack.