Using dish soap on leather boots is a catastrophic mistake because its high alkaline pH chemically attacks and denatures the leather’s very structure.
- Alkaline cleaners strip the essential “fatliquors” (natural oils) that keep leather supple, causing it to become brittle and crack.
- Proper care involves using pH-balanced cleaners, understanding the difference between conditioners, and avoiding common mistakes like overheating or over-conditioning.
Recommendation: Treat your leather care like a science. Always use products specifically formulated for leather and test your boot’s needs before applying any conditioner to avoid irreversible damage.
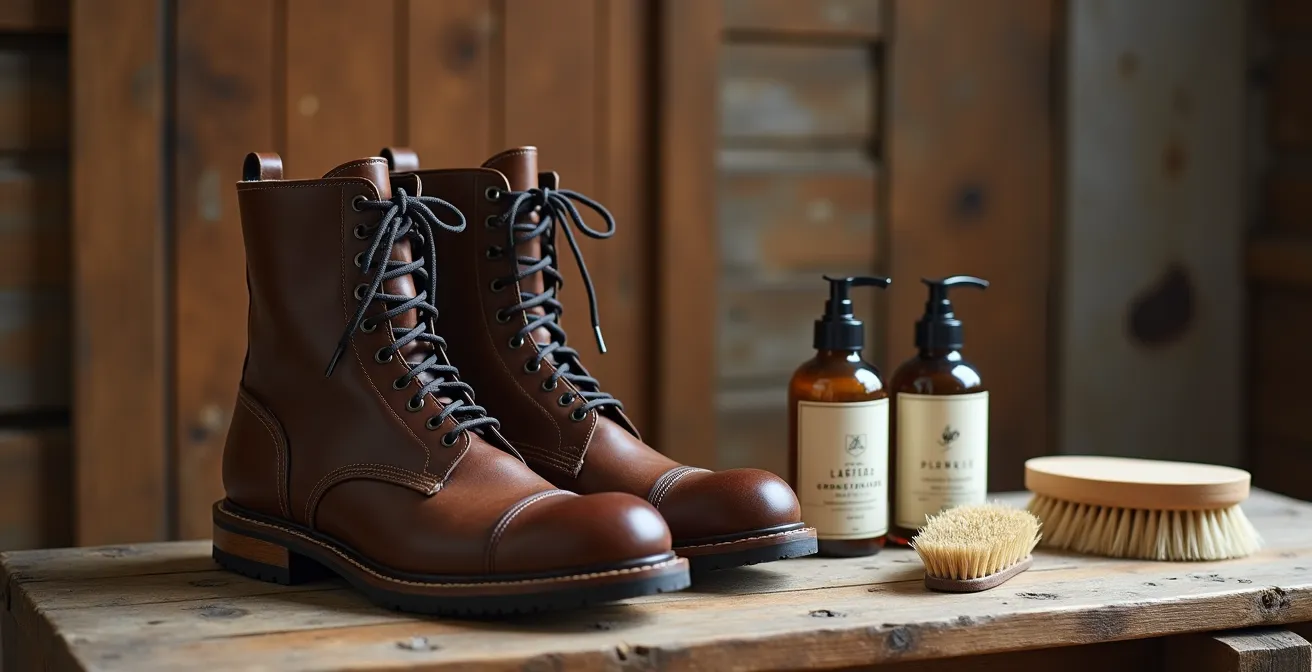
That familiar bottle of dish soap under the sink seems like the perfect, convenient solution for a pair of mud-caked boots. It cuts through grease on pans, so it should cut through dirt on leather, right? This single, common assumption is responsible for the premature death of countless high-quality boots. The problem is that we treat leather like an inert, waterproof kitchen countertop when it is, in fact, a complex and delicate biological material preserved through a careful chemical balancing act.
Most boot owners follow generic advice: “scrub them clean,” “slap on some conditioner,” and “let them dry.” But these instructions lack the most critical information—the ‘why’ behind the process. The world of leather care is filled with well-intentioned habits that cause irreparable harm. From applying heat to speed up drying to conditioning on a fixed schedule regardless of the leather’s actual state, these missteps progressively weaken the material at a microscopic level. It’s not about the brand of cleaner you use; it’s about respecting the chemistry.
The true key to longevity isn’t just cleaning, but preserving the leather’s fundamental chemical equilibrium. This article will shift your perspective from simple maintenance to informed preservation. We will abandon household “hacks” and delve into the science of what leather needs to thrive. We will explore why pH is the most critical factor, how to handle specific contaminants, and why even “care” products can be destructive if misused.
By understanding the material science, you’ll learn not just what to use, but why you’re using it, ensuring your investment in quality footwear lasts for decades, not just a few seasons. This guide breaks down the essential principles of leather chemistry to transform your maintenance routine into a preservation strategy.
Summary: Why Dish Soap Ruins Leather Boots and What to Use Instead?
- Why High pH Cleaners Strip Natural Oils and Crack Leather?
- How to Remove Pine Resin from Leather Without Damaging the Finish?
- Oil vs Cream Conditioner: Which Is Better for Nubuck Leather?
- The Frequency Mistake That Makes Leather Too Soft and Weak
- How to Clean Boots Before Summer Storage to Prevent Dry Rot?
- The Maintenance Error That Makes Leather Brittle and Prone to Tearing
- How to Unclog Membrane Pores to Restore Breathability After a Muddy Hike?
- Cream or Wax: Which Waterproofing Method Protects Leather Boots Longer in Rain?
Why High pH Cleaners Strip Natural Oils and Crack Leather?
To understand why dish soap is leather’s nemesis, we must first understand leather’s native environment. Leather is acidic. During the tanning process, the collagen fibers of the animal hide are stabilized in an acidic state, achieving a delicate chemical balance. For maximum stability and longevity, an article from the International Leather Club confirms that leather maintains its ideal pH range between 4.5 and 5.0. This acidic state is crucial for holding the entire structure together—what is known as the fiber-tannin-fatliquor matrix. The fatliquors are the essential oils and fats that keep the fibers lubricated, flexible, and strong.
Dish soap, by contrast, is a powerful alkaline detergent, typically with a pH between 9 and 10. When you apply this high-pH cleaner to acidic leather, you trigger a destructive chemical reaction. Studies on the impact of alkaline cleaners show this process in detail. The alkaline environment creates strong negative charges within the leather’s collagen, causing it to repel the negatively charged fatliquors. These essential oils are literally pushed out of the fiber structure and washed away. This process is called structural denaturation. With each cleaning, more oils are stripped, and the fibers lose their lubrication, becoming dry, stiff, and brittle. They begin to rub against each other, eventually leading to microscopic tears that grow into visible cracks and a complete loss of tensile strength.
The visual damage is a direct result of this chemical assault. The leather becomes unable to flex without breaking, leading to the cracking you see at stress points like the ankle and toe box.
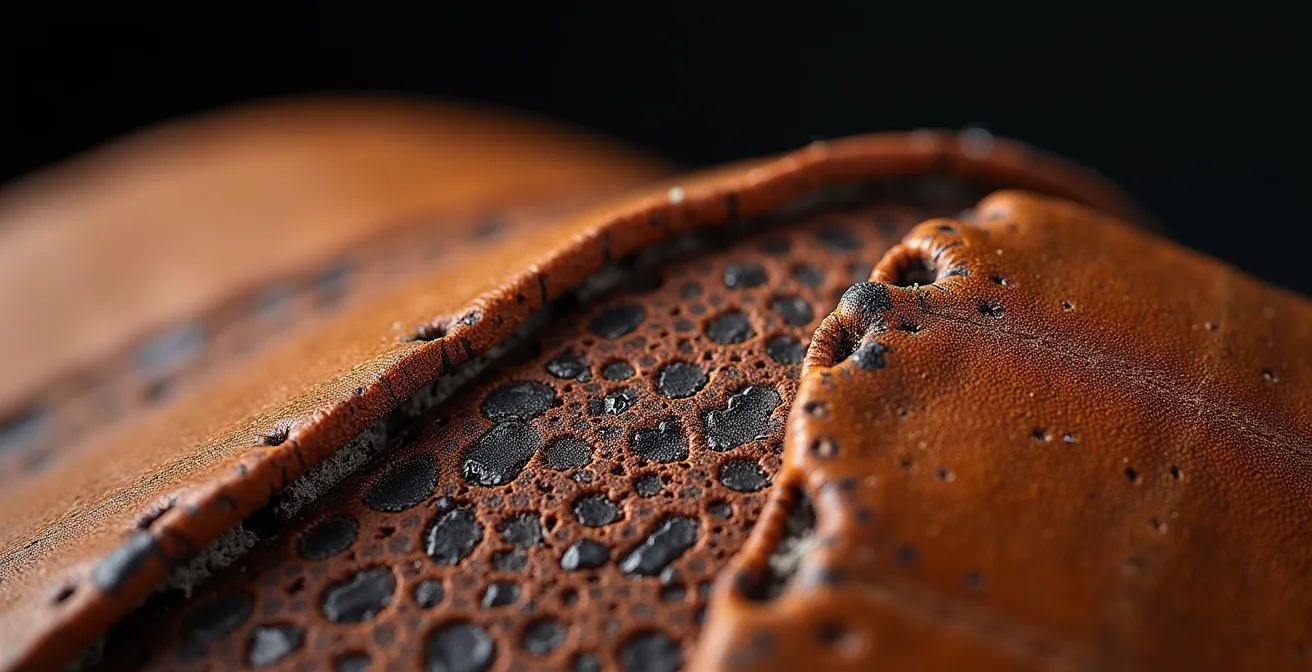
As this microscopic view illustrates, healthy leather fibers are supple and interwoven, lubricated by natural oils. When exposed to high pH cleaners, those oils are stripped, causing the fibers to dry out, shrink, and fracture. The solution is to always use a dedicated, pH-neutral or slightly acidic leather cleaner. These products are formulated to cleanse the surface without disrupting the core chemical equilibrium that is essential for the leather’s long-term health.
How to Remove Pine Resin from Leather Without Damaging the Finish?
Walking through a forest can leave your boots with a sticky, stubborn problem: pine resin. Attempting to scrub it off with an aggressive cleaner or solvent is a fast track to stripping the leather’s finish and color. Resin removal requires a targeted approach that respects the leather’s integrity. Unlike general dirt, resin is a hydrocarbon that won’t simply dissolve in water or a standard pH-neutral cleaner. The goal is to make the resin brittle or to gently dissolve it with a substance that is safe for the leather itself.
The most effective and least risky method is mechanical removal through cold. Place the boot in a plastic bag and put it in the freezer for a few hours. The cold temperature will cause the resin to become extremely brittle, allowing you to gently flex the leather and shatter the resin, which can then be picked or brushed off. This method has zero chemical impact on the leather.
For any stubborn residue left behind, a small amount of a gentle oil can be used. A light mineral oil or even a dab of smooth peanut butter (the oils dissolve the resin) can be applied with a soft cloth. Let it sit for a few minutes to soften the remaining resin, then gently wipe it away. It’s crucial to clean the spot afterward with a pH-neutral leather cleaner to remove any oily residue. Applying direct heat is the worst possible approach, as it can cause the resin to melt and penetrate deeper into the leather’s pores while simultaneously damaging the leather itself.
The following table from BootSpy offers a clear comparison of common methods, reinforcing why heat should be avoided at all costs.
| Method | Effectiveness | Risk to Leather | Best For |
|---|---|---|---|
| Freeze & Shatter | High | None | Fresh resin |
| Mineral Oil | Medium | Low | Stubborn residue |
| Heat Application | Low | High | Not recommended |
Oil vs Cream Conditioner: Which Is Better for Nubuck Leather?
Not all leather is the same, and using the wrong type of conditioner can be just as destructive as using the wrong cleaner. This is especially true for nubuck, a type of top-grain leather that has been sanded or buffed to create a soft, velvety surface of short protein fibers, often called the “nap.” Preserving this unique texture is the primary goal of nubuck care, and this is where the choice between an oil and a cream conditioner becomes critical.
Heavy oil-based conditioners, such as mink oil or neatsfoot oil, are excellent for smooth, full-grain leather, as they penetrate deeply to nourish the fibers. However, on nubuck, they are a disaster. As the Red Wing Heritage Care Guide authoritatively states, using a heavy oil on this type of material has a devastating effect.
Heavy oils will irreversibly saturate and flatten the nap, matting the fibers, permanently darkening the color, and destroying the characteristic velvety texture.
– Red Wing Heritage Care Guide, Red Wing Shoes Official Care Instructions
This isn’t just an aesthetic issue; it’s a structural one. The oil mats the fine fibers together, and dedicated studies show that heavy oils can cause up to a 95% texture loss in nubuck, effectively ruining the material. This damage is irreversible. Once the nap is matted and darkened, it cannot be restored.
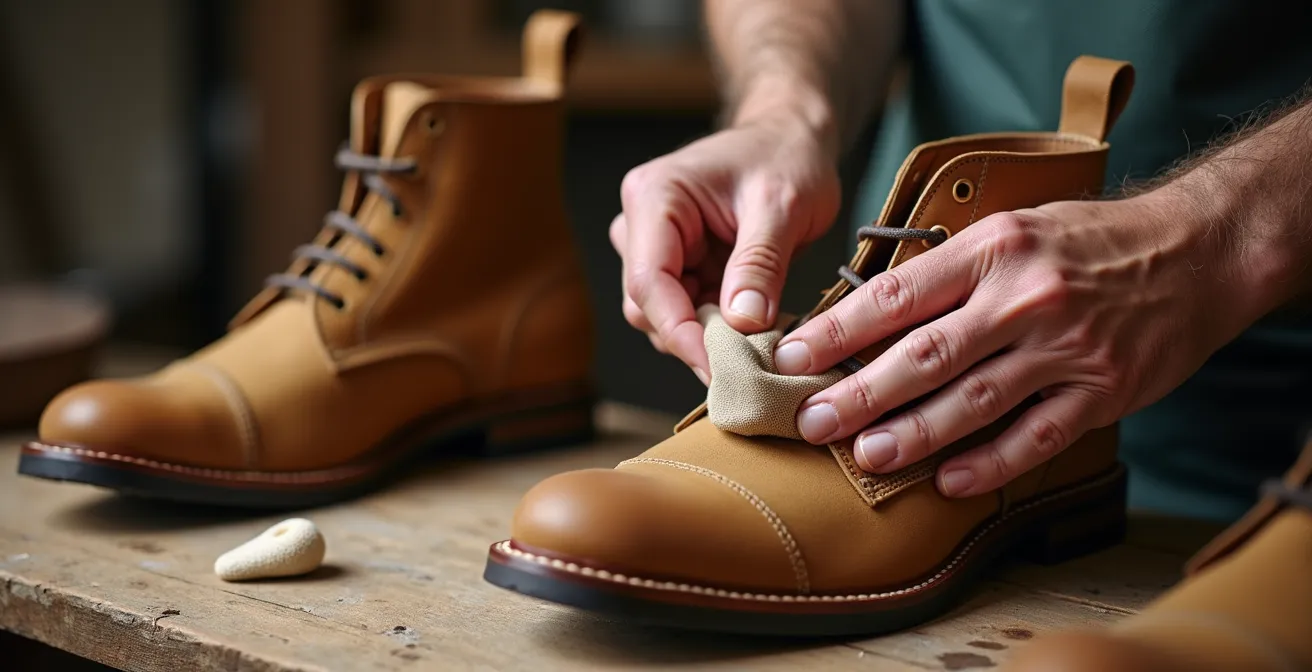
The correct choice for nubuck is a specialized cream or spray conditioner. These products are formulated with lighter conditioning agents that treat the leather without oversaturating it. They are designed to be applied sparingly and worked into the surface, nourishing the hide while leaving the delicate nap intact. A light-colored cream helps avoid the significant darkening associated with oils, preserving the nubuck’s original appearance and velvety feel. Always use a soft brush after conditioning to gently lift the nap and restore its texture.
The Frequency Mistake That Makes Leather Too Soft and Weak
While under-conditioning leads to dry, cracked leather, there is an equally damaging and far more counter-intuitive mistake: over-conditioning. Many boot owners believe that “more is better” and apply conditioner on a rigid monthly schedule. This approach ignores the leather’s actual needs and can lead to a condition of fiber supersaturation, where the leather becomes overly soft, stretchy, and structurally weak.
Leather needs a certain balance of oils to remain flexible but firm. When too much conditioner is applied too often, the oils completely saturate the collagen fibers. This over-lubrication reduces the natural friction between fibers that gives leather its tensile strength and shape-holding ability. The leather essentially becomes “mushy” and prone to stretching and tearing at stress points.
Field Test on Over-Conditioning’s Impact
A field test on work boots, referenced by Thorogood, provides stark evidence of this phenomenon. The study found that conditioning boots every 3 to 6 months maintained optimal leather strength. In stark contrast, boots that were conditioned monthly experienced fiber supersaturation and a 40% reduction in tensile strength. Within just one year of use, these over-conditioned boots showed significant premature stretching and tearing at key stress points like the eyelets and heel counter.
So, how do you know when to condition? You let the boots tell you. Instead of a calendar, use a simple physical test. This method allows you to assess the leather’s current oil content and condition it only when necessary, preventing the weakening effects of supersaturation.
Your Action Plan: The Pinch and Flex Test
- Locate a Stress Point: Choose a high-flex area on the boot, such as the ankle or the vamp (where the boot creases at the toes).
- Pinch the Leather: Firmly pinch a small section of the leather between your thumb and forefinger.
- Analyze the Result: If you see fine, light-colored lines appear in the crease, or if the leather feels dry and papery, its oil reserves are low and it needs conditioning.
- Confirm Sufficiency: If the leather pinches and flexes while maintaining a supple feel and uniform color, it has sufficient oils and does not need conditioner.
- Establish a Rhythm: Perform this test monthly if you live in a very dry climate or use your boots daily, and quarterly in more humid environments or with less frequent use. Adjust based on your findings.
How to Clean Boots Before Summer Storage to Prevent Dry Rot?
Putting your leather boots away for the off-season without proper preparation is an invitation for disaster. The biggest threat during long-term storage is not cracking from dryness, but the insidious onset of dry rot. Contrary to its name, dry rot is not caused by dryness; it is the result of fungal growth that consumes the leather’s fibers, leaving it brittle and structurally ruined. This fungus requires two things to thrive: a food source and moisture.
When you store boots that are even slightly dirty or damp, you are creating a perfect incubator. The “food source” for the fungus is any organic matter left on the boots. This includes not just visible mud and dirt, but also invisible sweat salts, skin cells, and other residues that have accumulated inside and outside the boot. The “moisture” can be residual dampness from a final wear, or it can be ambient humidity drawn into the boot during storage in a damp basement or closet. Once these two conditions are met, mildew and other fungi can begin to grow, feeding on the leather’s collagen and fatliquors.
Therefore, cleaning your boots before storage is the single most important step in preventing dry rot. The goal is to eliminate the fungal food source. This requires a thorough cleaning inside and out with a pH-balanced leather cleaner. Pay special attention to the seams and welt, where dirt loves to hide. After cleaning, the boots must be dried completely, a process that can take 24-48 hours at room temperature. Stuffing them with newspaper or using cedar boot trees can help draw out any internal moisture.
Once perfectly clean and bone-dry, apply a very light coat of conditioner to keep the fibers supple during storage. Store them in a dry, well-ventilated area, away from direct sunlight and humidity. Using a breathable cloth bag is far superior to sealing them in a plastic box, which can trap moisture and encourage mildew growth. This meticulous cleaning process ensures you are storing leather, not a fungal buffet.
The Maintenance Error That Makes Leather Brittle and Prone to Tearing
After a long, wet hike, the temptation to place your soaked leather boots by a radiator, fireplace, or heat vent for a quick-dry is immense. This is arguably the most common and destructive maintenance error a boot owner can make. Applying direct, high heat to wet leather doesn’t just dry it; it cooks it, fundamentally and irreversibly altering its structure and making it brittle.
The science behind this damage is straightforward. As boot care expert William Adler explains, the process is one of forced, rapid evaporation.
Placing wet boots near direct heat forces water to evaporate too quickly, pulling essential oils out with it and causing outer surface fibers to shrink, denature, and become irreversibly brittle.
– William Adler, BootSpy Boot Care Guide
The water molecules, in their rapid escape as vapor, physically pull the leather’s essential fatliquors out with them. Research shows that placing wet boots near direct heat sources causes up to 72% moisture loss from the leather’s core, taking vital oils along for the ride. This leaves the collagen fibers without lubrication. At the same time, the heat causes the outer surface of the leather to shrink rapidly while the inside remains swollen with moisture. This differential shrinkage creates immense tension, causing the fibers to break and the surface to crack. This damage, known as heat-denaturation, cannot be fixed with conditioner. The leather has been permanently weakened.
The correct method for drying wet boots is slow and patient, allowing water to evaporate gently without pulling out the oils. A comparison of drying methods clearly shows the devastating impact of heat on oil retention and fiber integrity.
| Method | Time | Oil Retention | Fiber Integrity |
|---|---|---|---|
| Room Temperature + Newspaper | 24-48 hrs | 95% | Preserved |
| Fan + Boot Trees | 12-24 hrs | 90% | Preserved |
| Direct Heat/Radiator | 4-6 hrs | 30% | Damaged |
The best practice is to remove any insoles, stuff the boots with newspaper (changing it every few hours), and let them air dry at room temperature, away from any direct heat source. It takes longer, but it’s the only way to preserve the leather’s structural integrity.
How to Unclog Membrane Pores to Restore Breathability After a Muddy Hike?
Modern hiking boots often feature a waterproof-breathable membrane, like Gore-Tex, sandwiched within the leather. These marvels of material science are designed to keep water out while letting sweat vapor escape. This is possible because the membrane’s pores are about 20,000 times smaller than a water droplet but 700 times larger than a water vapor molecule. However, this functionality can be completely negated when the boot is covered in mud. The problem isn’t just cosmetic; it’s a matter of pore occlusion.
When mud dries on the leather’s surface, fine particles of dirt and silt are forced into the outer pores of the leather and can even clog the microscopic pores of the underlying membrane. This effectively suffocates the boot, trapping sweat and creating a damp, uncomfortable internal environment. It’s often mistaken for a leak in the membrane, when in reality, the boot has simply lost its ability to breathe.
Restoring Gore-Tex Breathability
Testing on this very issue, as detailed by REI, demonstrates the severity of the problem. Field tests showed that waterproof-breathable membranes can lose up to 85% of their breathability when their pores are clogged with dirt. However, the same tests revealed that a specialized two-stage cleaning process could restore 90% of the original breathability, proving the issue is reversible with the correct technique.
Restoring breathability requires more than just a surface wipe-down. It’s a two-stage process designed to clean both the outer leather and reset the technical membrane.
- Stage 1 – External Decontamination: The first step is to remove all visible, dried mud from the outer leather. Use a stiff boot brush to vigorously scrub away all caked-on dirt. Then, use a soft brush with a pH-neutral cleaner to gently wash the entire outer surface. This removes the bulk of the particles that cause pore occlusion.
- Stage 2 – Membrane Reset: After the external cleaning, it’s crucial to use a specialized tech wash. These are gentle, non-detergent cleaners designed specifically for technical waterproof fabrics. They help to flush out any fine particles that may have worked their way into the membrane’s pores without leaving behind any residues that could impede breathability themselves. Rinse the boots thoroughly with clean water and allow them to air dry completely.
Key Takeaways
- The single most important factor in leather care is maintaining its natural acidic pH (4.5-5.0); alkaline cleaners like dish soap cause irreversible chemical damage.
- Conditioning should be done based on the leather’s physical signs of dryness (the “pinch test”), not a fixed schedule, to prevent over-softening and weakening.
- Slow, room-temperature air drying is non-negotiable; direct heat “cooks” the leather, stripping essential oils and making it permanently brittle.
Cream or Wax: Which Waterproofing Method Protects Leather Boots Longer in Rain?
While conditioning nourishes leather, waterproofing protects it from external moisture. These are two different functions, often confused, and require different products. The main contenders for robust waterproofing are creams and waxes. While both offer protection, their chemical nature dictates their performance and longevity, especially in sustained wet conditions like heavy rain or trekking through wet snow.
Waterproofing creams are emulsions of oils and waxes in a water base. They offer a good balance of conditioning and water resistance. They penetrate slightly into the leather’s top layer, nourishing the fibers while leaving a thin protective film on the surface. Their primary benefit is that they have minimal impact on the leather’s breathability, making them ideal for boots with waterproof membranes or for use in less extreme, intermittently rainy conditions. However, this thinner protective layer breaks down more quickly, typically requiring reapplication every 1-2 months with regular use.
Waxes, on the other hand, provide superior and longer-lasting protection. Products based on beeswax or other natural waxes are solid lipids. As the Kodiak Boots technical team explains, waxes function by staying on the surface to create a thick, robust physical barrier against water. This coating is more durable and less permeable than that of a cream, making it the best choice for harsh, sustained wet environments. A good wax application can last 3-4 months. The trade-off is a noticeable reduction in breathability, which is why heavy waxing is not recommended for boots with breathable membranes like Gore-Tex, as it can trap sweat vapor.
The following table provides a clear performance comparison, helping you choose the right method for your specific needs.
| Method | Water Protection | Duration | Breathability | Best Use |
|---|---|---|---|---|
| Wax | Superior | 3-4 months | Reduced | Wet snow/bog |
| Cream | Good | 1-2 months | Maintained | Intermittent rain |
| Spray | Fair | 2-4 weeks | Full | Light moisture |
By moving beyond generic advice and embracing the underlying chemistry of your gear, you transition from a simple owner to a knowledgeable caretaker. A proactive, science-based approach doesn’t just clean your boots; it preserves your investment and ensures they are ready for the next adventure. Start applying these principles today to give your leather boots the expert care they deserve.